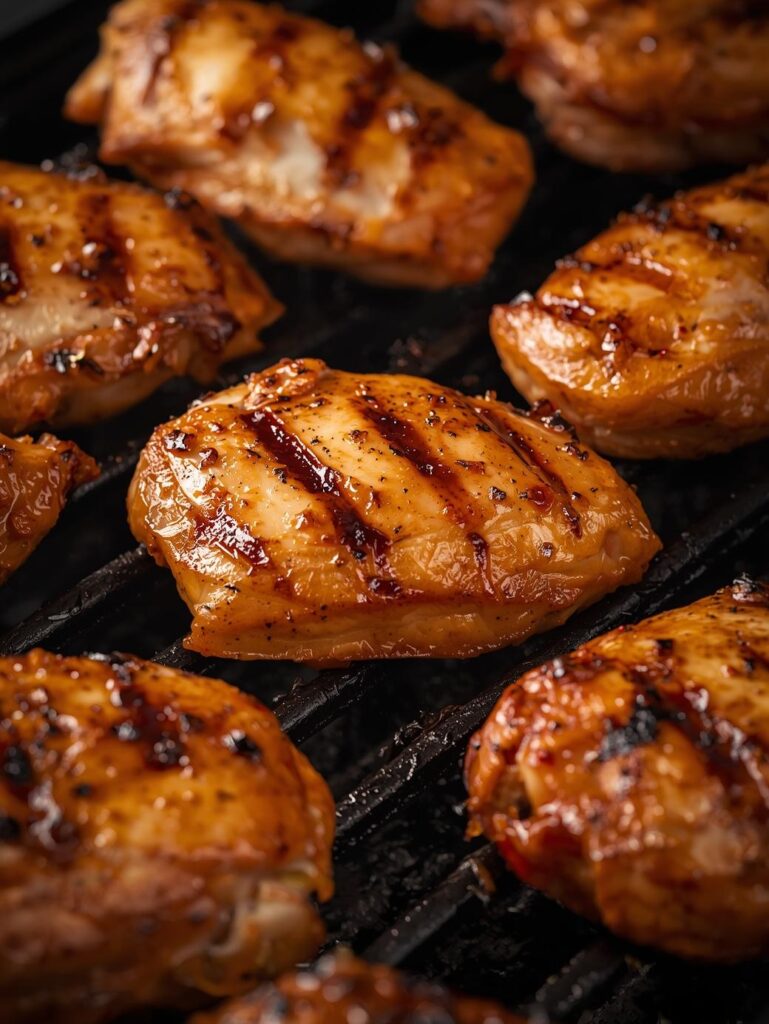

Grilling Chicken: Tips for Crispy Skin and Tender Meat
There are few more satisfying meals on a warm day than perfectly grilled chicken. A simple, classic dish, it holds the promise of tender, juicy meat and a beautifully crispy, golden-brown skin. Yet, for many home cooks, grilling chicken can be a source of frustration, often resulting in meat that is either dry and chalky or skin that is soggy and unappealing.
Achieving that ideal balance of a juicy interior and a crisp exterior is a skill that requires understanding a few key principles. This comprehensive guide will demystify the process and provide you with the essential tips and techniques you need to master this beloved summer tradition.
With this guide, you will learn the secrets to flawless Grilling Chicken that will impress everyone at your next barbecue.
Understanding the Challenges of Grilling Chicken
To truly master Grilling Chicken, it’s important to understand why it can be so difficult. Unlike beef or pork, chicken has a very low fat content and its meat is lean, making it highly susceptible to drying out. The fat that is present is mostly in the skin, which can become rubbery or burnt if not handled correctly. The challenge lies in cooking the meat to a safe internal temperature (165°F / 74°C) without overcooking it, while also rendering the fat in the skin to make it crispy and delicious.
The Prep: The Foundation of Flavor and Moisture
The work that happens before the chicken even touches the grill is what sets a good grilled chicken apart from a great one.
Choosing the Right Cut for Grilling Chicken
The cut of chicken you choose will impact your cooking time and strategy.
- Bone-in, Skin-on Pieces (Thighs, Legs, Breasts): These are the best for grilling. The bone insulates the meat, helping it to cook more evenly and stay juicy, while the skin protects the meat and provides a fantastic, crispy texture when done correctly.
- Boneless, Skinless Breasts: These are the most difficult to grill because they are so lean. They can dry out in a matter of minutes. If you are using this cut, marinating or brining is essential.
- Wings: Wings are excellent for grilling because their high skin-to-meat ratio makes them ideal for getting a crispy exterior.
- Whole Chicken: A whole chicken requires a much longer cook time and careful management of temperature to ensure every part is cooked to perfection. A popular method is spatchcocking (butterflying) the chicken to help it cook more evenly.
The Importance of a Dry Surface
This is a non-negotiable step for crispy skin.
- Why it matters: Moisture on the surface of the chicken will create steam when it hits the grill, which will prevent the skin from browning and becoming crispy.
- How to do it: Before you add any seasoning, pat the chicken pieces completely dry with paper towels. You can even place them on a wire rack in the refrigerator for an hour or two to let the air circulate and dry out the skin even more.
Brines, Marinades, and Rubs
These preparatory steps are vital for adding flavor and ensuring a juicy result. For a more detailed guide on the differences, check out our guide on rubs vs marinades vs brines.
- Dry Brining: This is the easiest and most effective method for juicy chicken. Simply sprinkle a generous amount of salt on all sides of the chicken and let it sit uncovered in the refrigerator for at least 4 hours, or up to 24 hours. The salt will draw out moisture, then reabsorb it, seasoning the meat from the inside out.
- Marinades: A marinade, typically made with an acid (like vinegar or lemon juice), oil, and seasonings, adds flavor and can help tenderize the meat. For juicy results, it’s best to marinate for a shorter period (1-4 hours) to prevent the acid from turning the meat mushy.
- Rubs: A dry rub is a mixture of herbs and spices that is applied directly to the surface of the chicken. It creates a flavorful crust during cooking.
The Cook: Mastering the Two-Zone Grill
The secret to flawlessly cooked chicken—with tender meat and crispy skin—is to use a two-zone grilling method. This allows you to cook the chicken gently to its proper temperature before finishing with a quick sear for a crispy exterior. This is the hallmark of professional Grilling Chicken.
Setting Up Your Grill
- Charcoal Grill: Pile the charcoal on one side of the grill to create a “hot zone” (direct heat). Leave the other side empty to create a “cool zone” (indirect heat).
- Gas Grill: Light only one side of your grill to medium-high heat. The unlit side will be your cool zone.
The Grilling Process
- Start with the Cool Zone (Indirect Heat): Place your seasoned, bone-in chicken pieces skin-side up on the cool zone of the grill. Close the lid to allow the heat to circulate. This gentle, low-and-slow cooking method ensures the meat cooks evenly to a safe temperature without drying out. This step is crucial for perfectly cooked Grilling Chicken.
- Monitor Temperature: Cook the chicken over indirect heat until it is about 10-15°F below its final target temperature. This will take anywhere from 20-40 minutes depending on the cut and size.
- Finish with the Hot Zone (Direct Heat): Once the chicken is close to its target temperature, move it to the hot side of the grill. Cook for 2-3 minutes per side, or until the skin is golden-brown and crispy. The high heat will quickly render any remaining fat and create a delicious crust.
Grilling Chicken: Doneness and Resting
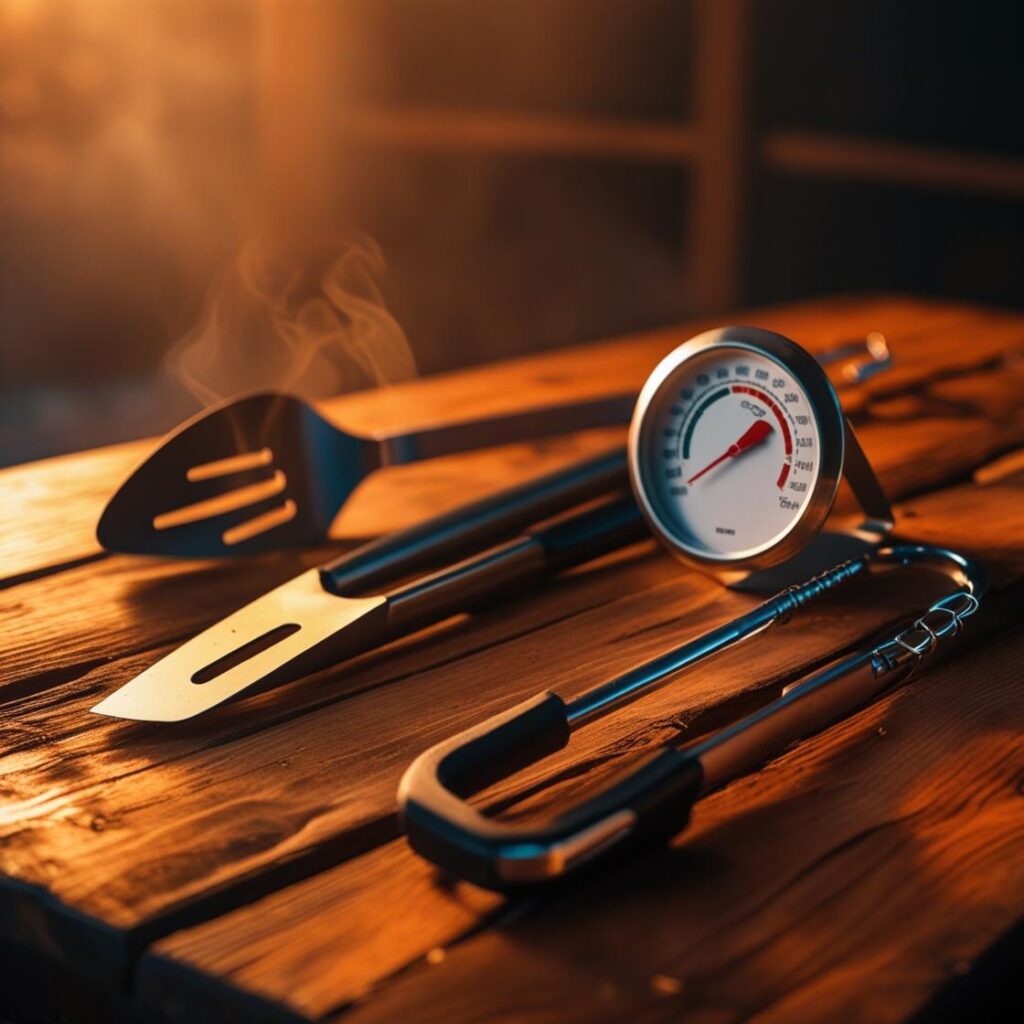
Knowing when your chicken is perfectly cooked is the most important part of any Grilling Chicken guide. You must use a reliable instant-read meat thermometer for accuracy. For our top recommendations, see our guide on the essential BBQ tools you need.
The Internal Temperature Guide
- The safe internal temperature for chicken is 165°F (74°C).
- Check the thickest part of the meat, avoiding any bones. For a full breakdown of temperatures, see our meat temperature chart for safe internal temps. You can also reference the official USDA food safety chart.
The Importance of Resting
After the chicken is cooked and has a crispy skin, resting it is the final, essential step.
- Why it matters: As meat cooks, the muscle fibers contract, pushing all the internal juices toward the center. If you cut into the chicken immediately, all those juices will run out onto your cutting board, leaving you with dry meat. Resting allows the muscle fibers to relax and reabsorb those juices, ensuring a uniformly moist and tender result.
- How to Rest: Transfer the grilled chicken to a plate and tent it loosely with foil. Let it rest for 5-10 minutes before serving.
Common Mistakes and Pro Tips for Grilling Chicken
Even with a detailed guide, minor mistakes can happen. Here’s how to avoid them and elevate your Grilling Chicken skills.
- Burning the Skin: This happens when you start with direct heat. The skin will burn long before the meat is cooked. Always start with indirect heat.
- Drying Out the Meat: The number one mistake. This is caused by overcooking. Use a meat thermometer! Do not rely on color or the “juices running clear” method.
- Not Enough Seasoning: Chicken is a blank canvas. Don’t be afraid to season it generously. A good rub or brine will make a huge difference.
- Pro Tip: Use Your Thermometer: We cannot stress this enough. It is the single most important tool for consistently great results.
- Pro Tip: Sauce at the End: If you’re using a barbecue sauce, baste it on the chicken only during the last 5-10 minutes of cooking. The high sugar content in most sauces can cause them to burn quickly.
- Pro Tip: Butterfly a Whole Chicken (Spatchcocking): This method involves cutting out the backbone so the chicken lays flat. It dramatically reduces cooking time and helps the chicken cook more evenly, making it an ideal method for Grilling Chicken.
- Pro Tip: Go Beyond Chicken: The two-zone grilling method is also perfect for larger cuts of meat, so if you are interested in expanding your grilling skills, you can check out our guide on the best pork cuts for BBQ. For more expert grilling tips on chicken, a guide from a trusted source like AmazingRibs.com can be very helpful.
Conclusion
Mastering Grilling Chicken is an entirely achievable goal that can elevate your outdoor cooking. By embracing the two-zone grilling method, taking the time to properly prep your chicken, and using a reliable meat thermometer, you can consistently achieve a meal that is both perfectly crispy and incredibly juicy. The result is a simple yet delicious feast that will become a go-to for all your summer gatherings.
Now that you have the knowledge and confidence to tackle this classic, it’s time to fire up your grill.
Ready to try your hand at this amazing Grilling Chicken? The perfect meal is within your reach!

Pingback: How to Season Meat: Rubs, Marinades, and Brines Explained
Pingback: Charcoal vs Gas vs Pellet Grills: Which One Is Best for You? - 2025
Pingback: Grilling vs Smoking: Which Is Best for Flavor?
Pingback: Cuts of Beef: Your Complete Guide to the Butcher's Chart