
Expert’s Note: This guide is part of our comprehensive The Ultimate BBQ Equipment Buying Guide (2025) collection. For the ultimate resource on this topic, explore our complete master guide.
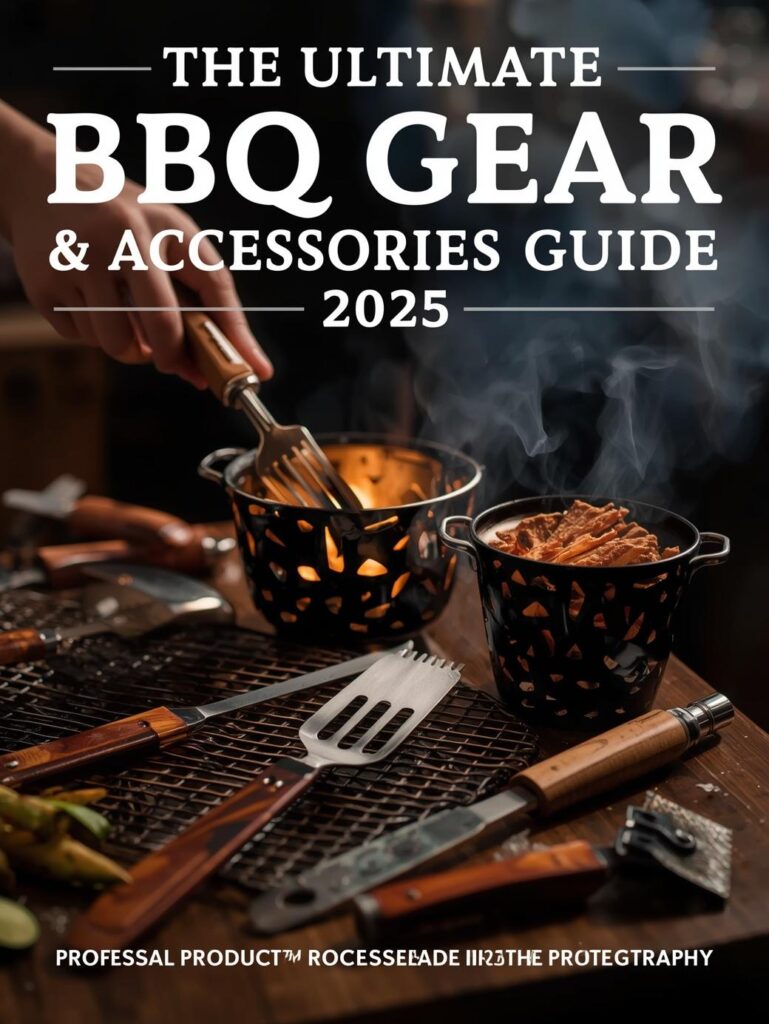
🛠️ THE ULTIMATE BBQ GEAR AND ACCESSORIES GUIDE
This post completes the “Trifecta of Mastery”: knowing your meat (Cuts Bible), knowing your techniques (Methods Encyclopedia), and now, knowing your tools.
🏗️ INTRODUCTION (The “Why” Behind the Tools)
“The $20 tool that matters more than a $2000 grill. Why the right gear isn’t about having more stuff—it’s about having the right stuff that makes you faster, more precise, and more confident at the grill.”
📋 TABLE OF CONTENTS (Interactive Jump Links)
SECTION 1: The BBQ Gear Philosophy
Walk down the grill aisle at any big-box store, and you’ll be bombarded by a dizzying array of tools, gadgets, and gizmos all promising to be the “secret” to perfect barbecue. The truth is, 80% of those products are designed to solve problems you don’t have, while the handful of tools that truly matter are often overlooked.
Mastering your gear isn’t about accumulating the most stuff; it’s about making strategic choices that remove friction, increase precision, and build confidence every time you light the fire.
The 80/20 Rule of BBQ Gear
The Pareto Principle applies perfectly to barbecue tools: you will use 20% of your gear for 80% of your cooking. Identifying that critical 20% is the first step toward a streamlined, efficient outdoor kitchen.
Your Core 20% Toolkit:
-
A Precision Thermometer: The single most important tool for moving from guesswork to guaranteed results.
-
Quality Long-Handled Tongs: Your primary extension for manipulating food safely over high heat.
-
A Great Chef’s Knife: For prepping ingredients and, most importantly, slicing finished meat properly.
-
A Sturdy Spatula: Essential for burgers, fish, and anything that requires lifting rather than pinching.
-
A Reliable Grill Brush: For maintaining a clean cooking surface (safely!).
Everything else—from specialized flipping claws to elaborate kebab racks—falls into the remaining 80%. They can be nice to have for specific tasks, but they are not foundational. Investing in high-quality versions of these five core tools will impact your cooking more than filling a cabinet with single-use gadgets.
Gear vs. Gimmick: How to Spot the Difference
Marketing departments are brilliant at making you feel like you need a specialized tool for every single task. Here’s how to spot the difference between a genuine innovation and a waste of money.
🚨 Red Flags of a Gimmick:
-
Solves a Nonexistent Problem: Does it promise to fix something that isn’t actually broken? (e.g., a “steak flip timer” when your eyes and thermometer work better).
-
Overly Complex: Does a simple task now require assembly, batteries, and an instruction manual?
-
One-Trick Pony: Will it languish in a drawer 364 days a year? Unitaskers are almost always gimmicks.
-
Suspiciously Cheap Construction: If it feels flimsy in the store, it will be broken in your hands by the third use.
✅ Hallmarks of Genuine Gear:
-
Solves a Real, Frustrating Problem: A fast, accurate thermometer solves the “is it done?” dilemma. Good heat-resistant gloves solve the “how do I handle hot meat?” problem.
-
Enhances a Fundamental Skill: A sharp, flexible boning knife doesn’t debone a chicken for you, but it makes the process safer, easier, and more precise.
-
Built to Last: It’s made from durable materials (full-tang knives, solid stainless steel, high-quality silicone) and feels substantial in your hand.
-
Trusted by Pros: If you see competition pitmasters or professional chefs using a version of it, it’s almost certainly legit.
The “Buy Once, Cry Once” Principle
In the world of BBQ gear, you almost always get what you pay for. The “Buy Once, Cry Once” philosophy is about making strategic investments in quality that will last for decades, rather than buying cheap replacements every few years.
Case Study: The $30 vs. $100 Thermometer
-
The $30 Thermometer: Takes 5-7 seconds to get a reading, has an accuracy of ±3-5°F, and the battery door might break in two years. That slow, slightly inaccurate reading could be the difference between a perfect medium-rare and overdone steak.
-
The $100 Thermometer: Reads in 2-3 seconds, is accurate to ±0.5°F, is waterproof, and is built to withstand years of professional use. It delivers perfection every single time and will likely outlast your grill.
This doesn’t mean you need to buy the most expensive version of everything. It means you should invest heavily in the tools that have the biggest impact on your results and your enjoyment—primarily your thermometer and knives. For other items, a mid-range option from a reputable brand is often the sweet spot.
The Bottom Line: Your goal is to build a curated toolkit, not a cluttered collection. Focus on the tools that make you better, faster, and more confident. A minimalist setup of high-quality, multi-purpose gear will serve you infinitely better than a garage full of cheap, specialized gimmicks.
Your first and most important investment? A great thermometer. Everything else can follow.
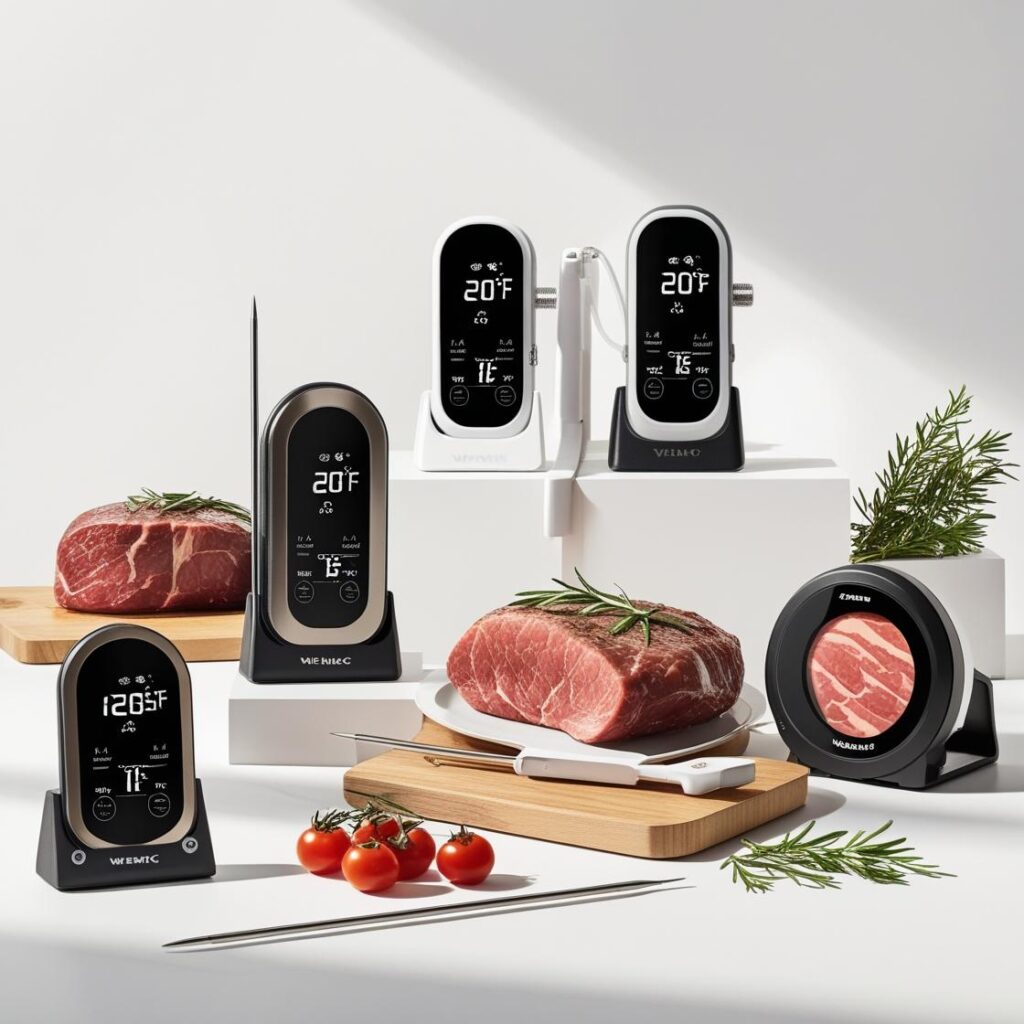
🌡️ SECTION 2: Thermometers & Probes Deep Dive
If you take only one piece of advice from this entire guide, let it be this: Buy a great thermometer. It is, without question, the most important tool in your BBQ arsenal. A premium grill can’t save you from overcooked meat, but a $30 thermometer can. This section breaks down the types, the top tested models, and how to ensure they’re always accurate.
2.1 Instant-Read Thermometers: Your Go-To Tool
These are the workhorses of temperature-taking—fast, portable, and incredibly accurate when you buy a good one. You’ll use this more than any other tool.
Our Top Tested Models:
Thermoworks Thermapen ONE ($99)
The Pro’s Choice: Unmatched speed (1-2 seconds) and lab-grade accuracy (±0.5°F). Waterproof, durable, and worth every penny for the serious cook.
ThermoPro TP19 ($29)
The Budget King: 90% of the performance for 30% of the price. 3-4 second readings and ±0.9°F accuracy make it the best value on the market.
Lavatools Javelin Pro ($49)
The Sweet Spot: Excellent speed (3-4 seconds) in a sleek, foldable design at a mid-range price. A fantastic all-arounder.
When to Use It:
-
Quick spot checks on steaks, chops, and burgers
-
Checking multiple parts of a large roast for evenness
-
Verifying the surface temperature of your grill grates
2.2 Leave-In Probe Systems: The “Set & Forget” Solution
These thermometers stay in the meat throughout the cook, connected by a wire to a base unit (or wirelessly) that displays the temperature. They are essential for long, slow cooks.
Key Features Compared:
| Feature | Basic Model | Bluetooth Model | WiFi Model |
|---|---|---|---|
| Range | 100 ft | 150 ft | Unlimited (uses internet) |
| Alarms | Base unit beeps | Phone notifications | Phone + Email alerts |
| Probes | Usually 1-2 | 1-4 | 2-6 |
| Best For | Staying nearby | Yard work, watching the game | Running errands, overnight cooks |
Our Top Picks:
-
Best Overall (WiFi): ThermoPro TempSpike – No wires, great app, long battery life.
-
Best Value (Bluetooth): MEATER+ – True wireless design, excellent predictive algorithms.
-
Best for Traditionalists: Thermoworks Smoke – Rock-solid reliability, superb range.
2.3 Thermometer Accuracy Test: Trust, But Verify
Even the best thermometers can drift over time. Here’s how to verify yours is telling the truth.
The Ice Bath Test (32°F / 0°C Calibration)
This is the most reliable method for testing low-temperature accuracy.
-
Fill a tall glass with crushed ice.
-
Add clean, cold water until the glass is full and stir well.
-
Wait 4-5 minutes for the temperature to stabilize.
-
Insert your thermometer probe into the slurry, ensuring it doesn’t touch the sides or bottom.
-
It should read 32°F (0°C). If it’s off by more than 1-2°F, check if it has a calibration feature or simply note the offset for future cooks.
The Boiling Water Test (212°F / 100°C Calibration)
Important: This test varies with altitude. Water boils at 212°F (100°C) only at sea level. For every 500 feet above sea level, subtract 1°F.
-
Bring a pot of water to a rolling boil.
-
Insert your thermometer probe into the water.
-
Compare the reading to the expected boiling point for your altitude.
-
Again, it should be within 1-2°F.
Pro Tip: Perform these tests every 6 months or if you drop your thermometer. Keep a small log of any offsets.
Interactive Tool: “Find Your Perfect Thermometer”
Find Your Perfect Thermometer Match
1. What’s your primary cooking style?
2. What’s your budget for a thermometer?
3. Most important feature to you?
Sample Result:
“The Weeknight Warrior” → ThermoPro TP19. You need fast, reliable reads to get dinner on the table without the premium price tag. This model gives you pro-level accuracy on a family budget.
The One Tool That Pays for Itself
A quality thermometer isn’t an expense; it’s an investment that pays dividends in every piece of meat you cook. It prevents you from ruining a $50 prime ribeye or a $80 brisket. It is the key that unlocks consistency and banishes the fear of under or overcooking. This is the one tool you should prioritize above all others.
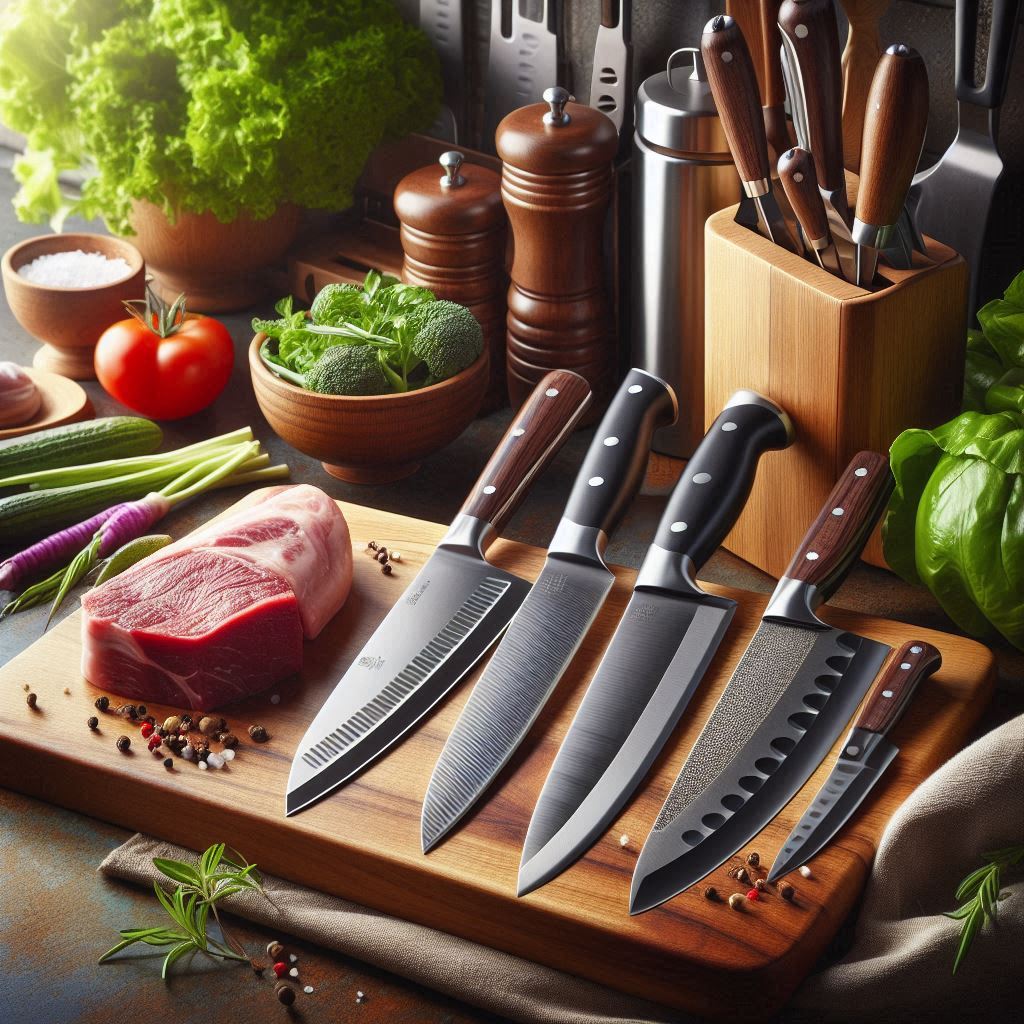
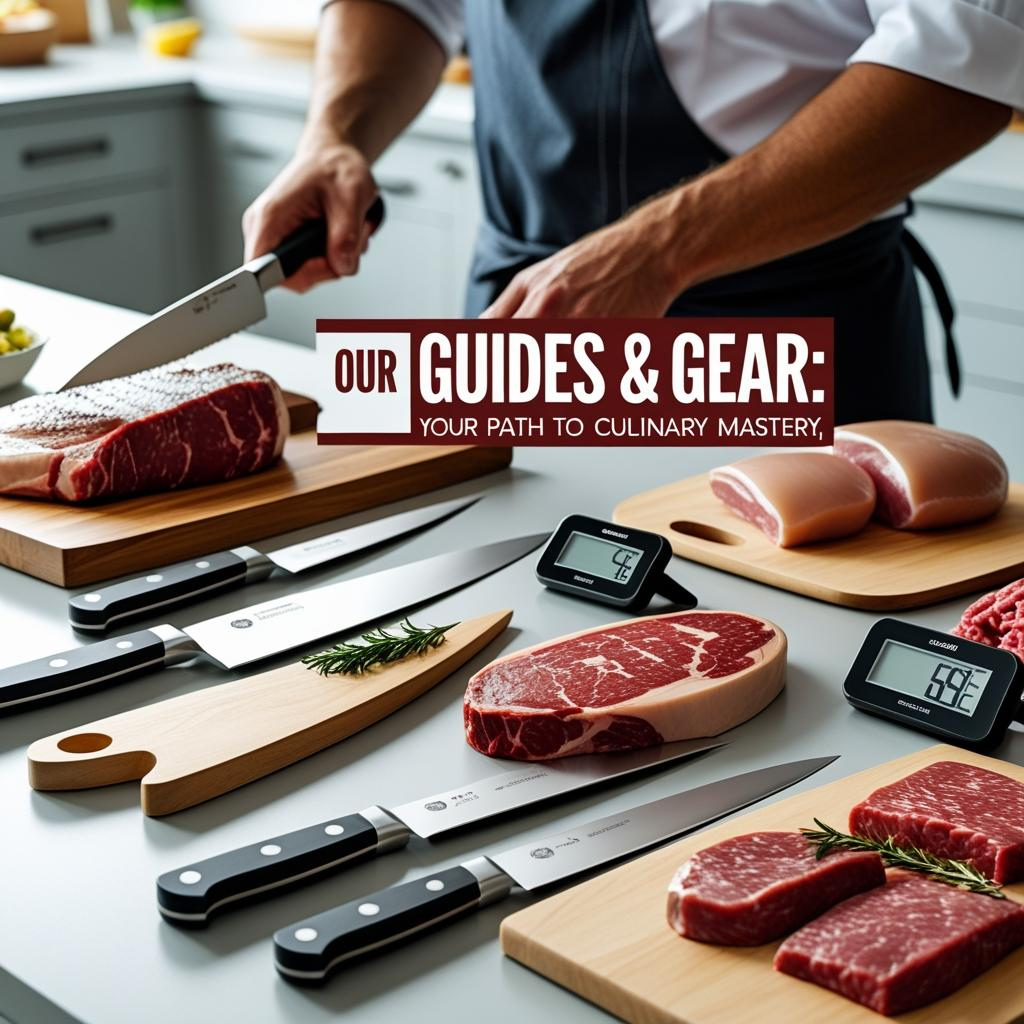
🔪 SECTION 3: Knives & Cutting Gear
A great grill session can be undone by a terrible cut. The difference between a perfectly sliced brisket that holds its juices and a shredded, torn mess often comes down to the knife in your hand. This isn’t about becoming a master chef—it’s about having the right blades to respect the work you just put in at the grill.
3.1 The Only 3 Knives You Need
Forget the 20-piece block. For barbecue, these three knives will handle 99% of your tasks with precision and ease.
1. The Chef’s Knife (8-inch)
Your all-purpose workhorse.
-
Primary Uses: Slicing large cuts of meat (brisket, pork shoulder), chopping vegetables, mincing herbs, disjointing chicken.
-
What to Look For:
-
Blade: High-carbon stainless steel for edge retention and rust resistance.
-
Handle: Comfortable, secure grip (often Santoprene or textured polymer).
-
Tang: Full tang (the metal extends through the handle) for balance and durability.
-
-
Pro Tip: The “rocking chop” motion with a chef’s knife is perfect for quickly prepping rub ingredients like onions and garlic.
2. The Slicing/Carving Knife (10-12 inch)
The brisket and roast specialist.
-
Primary Uses: Slicing brisket, carving whole birds, cutting ham and large roasts into thin, even slices.
-
What to Look For:
-
Blade: Long, narrow, and flexible. A Granton edge (small oval divots) helps prevent sticking.
-
Purpose: The long blade allows you to slice through large cuts in one smooth, drawing motion without sawing, which preserves the meat’s structure and juiciness.
-
-
Pro Tip: A sharp slicing knife should glide through a brisket with the weight of the knife alone—no downward pressure needed.
3. The Boning Knife (5-6 inch)
Your precision tool for butchery.
-
Primary Uses: Trimming excess fat and silver skin from brisket and ribs, deboning chicken thighs, butterflying pork chops, removing connective tissue.
-
What to Look For:
-
Flexibility: A slightly flexible blade is versatile for working around bones and curves.
-
Tip: A narrow, sharp point for detailed work.
-
-
Pro Tip: Use the “tip-down” technique, letting the sharp point lead the way through tough silver skin.
3.2 Cutting Board Showdown
Your knife is only as good as the surface it cuts on. The right board protects your blade’s edge and ensures food safety.
| Material | Pros | Cons | Best For | Care |
|---|---|---|---|---|
| End-Grain Wood | Gentlest on knife edges, self-healing surface, beautiful | Expensive, requires regular oiling, heavier | Daily use, showpiece slicing | Hand wash, mineral oil monthly |
| Edge-Grain Wood | Good knife protection, more affordable than end-grain, durable | Can show cut marks over time | All-purpose kitchen work | Hand wash, mineral oil monthly |
| High-Density Plastic (HDPE) | Dishwasher safe, lightweight, affordable, color-coded for safety | Can dull knives faster, shows deep knife scars | Raw meat prep, easy cleanup | Dishwasher safe |
| Composite (Epicurean) | Knife-friendly, dishwasher safe, lightweight, stain-resistant | Can warp over time with heat/water | Modern kitchens, busy cooks | Dishwasher safe, but hand wash recommended |
The Two-Board System for BBQ:
-
A Large Wood Board: For slicing and serving cooked meats. The beautiful presentation and knife-friendly surface are perfect for the final step.
-
A Color-Coded Plastic Board: Specifically for raw meat prep. Use a red board for red meat and a yellow board for poultry to prevent cross-contamination.
3.3 Knife Sharpening & Maintenance
A dull knife is a dangerous knife. It requires more force, slips more easily, and butchers your beautiful meat. Keeping your blades sharp is non-negotiable.
The Honing Steel: For Weekly Maintenance
-
What it does: Realigns the microscopic edge of your blade; it doesn’t actually sharpen by removing metal.
-
How to use: Hold the steel vertically. Place the knife’s heel at the top of the steel at a 15-20 degree angle. Draw the knife down and across the steel, maintaining the angle, so the entire blade edge contacts the steel. Repeat 5-10 times per side.
-
Frequency: Before or after each major use.
The Whetstone: For True Sharpening
-
What it does: Actually grinds away metal to create a new, sharp edge. This is necessary when honing no longer restores performance.
-
What to buy: A dual-grit (1000/6000) stone is perfect for home use. The 1000 grit for sharpening, the 6000 for polishing.
-
Frequency: Every 6-12 months, depending on use.
The “Paper Test” for Sharpness
A truly sharp knife will cleanly and effortlessly slice through a sheet of printer paper held in the air. If it tears or catches, it’s time to hone or sharpen.
The Golden Rule: A sharp, well-maintained trio of knives will make your post-cook preparation faster, safer, and will showcase your hard work perfectly. Don’t let a bad cut be the final note of your barbecue symphony.
These are the tools that live right next to your grill—the extensions of your hands that you’ll reach for dozens of times during every cook. Choosing the right ones makes the process fluid and enjoyable; choosing the wrong ones leads to constant frustration.
4.1 Tongs & Spatulas: Your Primary Instruments
Tongs: The Ultimate Grill Tool
You’ll use these more than any other tool. Don’t settle for flimsy, uncomfortable tongs.
What to Look For:
-
Length: 16 inches is the sweet spot. Long enough to keep your hands safe from the heat, short enough for precise control.
-
Material: Stainless steel for durability. Avoid chrome-plated, which can chip and rust.
-
Spring Mechanism: A lockable spring is crucial for storage and one-handed operation.
-
Grip: Scalloped or serrated tips provide a secure hold without crushing delicate food.
Pro Tip: Buy two pairs. Use one for raw meat and one for moving cooked food or vegetables to prevent cross-contamination.
Spatulas: The Burger Flipper’s Best Friend
A good spatula is about more than just flipping burgers. It’s for lifting, turning, and serving.
What to Look For:
-
Blade: A thin, beveled front edge that can easily slide under food without tearing it.
-
Head: Offset head to keep your hand clear of hot grates.
-
Material: Stainless steel or hardened nylon (for non-stick grates).
-
Handle: A comfortable, heat-resistant grip.
The “Flex Test”: A good spatula should have a little flex in the neck for easy maneuvering, but not so much that it bends under the weight of a heavy burger.
4.2 Grill Brush Safety: The Bristle-Free Revolution
Wire grill brushes are a known hazard, with bristles that can break off, stick to grates, and be ingested, leading to serious internal injuries. It’s time to move to safer, more effective alternatives.
Safer & More Effective Alternatives:
| Tool | How It Works | Best For | Pros | Cons |
|---|---|---|---|---|
| Pumice Stone/Brick | Abrasive volcanic rock scrubs away debris | All grill types | No bristles, effective on baked-on grease | Can wear down quickly, messy |
| Wood Scraper/Scrubber | Hardwood scrapers (like grill planks) | Cast iron grates | Natural, safe, can be trimmed for a fresh edge | Less effective on heavy buildup |
| Nylon Bristle Brushes | Durable plastic bristles | Gas grills, coated grates | Bristle-free safety, inexpensive | Can melt on very high heat |
| Onion Method | Halved onion scrubbed on hot grates | Quick cleaning, flavor | Adds flavor, zero cost, zero hardware | Not for deep cleaning |
Our Top Recommendation: The Grill Rescue-style pumice-based scrubber. It uses water to create a steam-cleaning action and is completely bristle-free.
Proper Grill Grate Cleaning Protocol:
-
Heat the Grill: Always clean when the grates are HOT.
-
Scrub: Use your chosen tool to scrub debris.
-
Oil (Optional): For cast iron grates, wipe with an oiled paper towel to season.
4.3 Grill Grates & Upgrades
The grates your grill came with aren’t necessarily the best for the job. Upgrading can dramatically improve your results.
Material Comparison:
Porcelain-Coated Cast Iron
Best for: Heat retention, perfect sear marks
Care: Avoid harsh scraping; can chip and rust.
Stainless Steel (Rod)
Best for: Durability, easy maintenance
Care: Easy to clean, won’t rust.
Cast Iron (Bare)
Best for: Ultimate sear, heat retention
Care: Requires regular seasoning to prevent rust.
Specialty Grate Upgrades:
-
Flat Top/Griddle Grates: Transform your grill into a flat-top for smash burgers, pancakes, and stir-fry.
-
GrillGrates®: Anodized aluminum panels that sit on top of your existing grates. They eliminate flare-ups and create a superior sear by trapping heat and creating a “convection oven” effect.
-
Rotisserie Kits: If your grill can accommodate one, a rotisserie is incredible for whole chickens, prime rib, and porchetta.
The Essential Toolkit Summary:
| Tool | Why It’s Essential | Pro Tip |
|---|---|---|
| 16″ Locking Tongs | Your primary food manipulator. | Buy two to avoid cross-contamination. |
| Offset Spatula | For lifting, turning, and serving. | Look for a thin, beveled edge. |
| Bristle-Free Scraper | Safe and effective grate cleaning. | Always clean when grates are hot. |
| Grill Gloves | Heat protection for hands and arms. | Choose silicone-dipped for grip. |
| Drip Pan | Manages grease, prevents flare-ups. | Essential for indirect cooking. |
Final Word: Don’t cheap out on the tools you use most. Investing in high-quality, comfortable, and safe tongs, spatulas, and cleaning tools will make every grilling session more enjoyable and professional. Your future self, enjoying perfectly flipped burgers and safe, clean grates, will thank you.
Smoking meat is an art form that blends patience with precision. While the fundamentals are simple—heat, smoke, and time—the right accessories can elevate your results from good to competition-worthy. This section covers the tools that give you control over the entire smoking process.
5.1 Smoke Generators: Mastering the Art of Smoke
Creating consistent, clean smoke is the foundation of great BBQ. Different tools offer different levels of control and convenience.
Smoke Tube ($15-25)
-
How it Works: A perforated metal tube filled with wood pellets that smolders for hours.
-
Best For: Adding extra smoke flavor on any grill (especially gas or charcoal), cold smoking cheese.
-
Pro Tip: Use a torch to light one end thoroughly, let it burn for 60 seconds, then blow out the flame for consistent smoldering.
Smoke Box ($10-20)
-
How it Works: A metal box with vents that holds wood chips, placed directly on heat source.
-
Best For: Gas grill users wanting authentic smoke flavor.
-
Pro Tip: Soak chips for 30 minutes first for longer, cooler smoke rather than instant combustion.
Maze Pellet Smoker ($20-35)
-
How it Works: A serpentine metal maze that slowly burns pellets in a controlled pattern.
-
Best For: Long, unattended smokes (up to 8 hours), perfect for charcoal kettles or dedicated smokers.
-
Pro Tip: Fill the maze completely and light one end for predictable, extended smoke time.
5.2 Drip Pans & Water Pans: The Unsung Heroes
These simple tools manage two critical elements: grease and humidity.
Drip Pans: Flare-Up Prevention
-
Purpose: Catches rendering fat, preventing dangerous flare-ups and keeping your smoker clean.
-
Setup: Place directly under the meat on the indirect side.
-
Pro Tip: Add 1 inch of sand to the pan. It absorbs grease better than an empty pan and helps stabilize temperatures.
Water Pans: Humidity Control
-
Purpose: Adds moisture to the cooking environment, preventing meat from drying out during long cooks.
-
Setup: Place near the heat source (not directly under meat where it will cool it down).
-
Pro Tip: For extra flavor, use apple juice, beer, or broth instead of water. For better bark formation, some pitmasters run without a water pan—experiment to find your preference.
5.3 Butcher Paper vs. Foil: The “Texas Crutch” Showdown
When meat hits “the stall” (around 150-165°F), wrapping it can power through the temperature plateau. But what you wrap with matters.
| Material | Best For | Result | Pro Tip |
|---|---|---|---|
| Pink Butcher Paper | Brisket, beef ribs | Protects moisture while allowing evaporation for better bark | Use the “boat method” for the last few hours |
| Aluminum Foil | Pork shoulder, ribs | Faster cooking, fall-off-the-bone tenderness | Add a little liquid (apple juice) before sealing tight |
| No Wrap | All meats (for purists) | Maximum bark formation, more smoke flavor | Plan for 30-50% longer cook times |
The “Boat Method” Hybrid Approach:
-
When the bark is set (usually 160-170°F), place the brisket in a sheet of butcher paper.
-
Wrap the sides up, but leave the top exposed.
-
This protects the bottom from drying while maintaining bark formation on top.
5.4 Advanced Smoking Accessories
Ash Removal Tool ($15-30)
-
A simple vacuum or scraper system for quickly cleaning ash from charcoal smokers.
-
Why it matters: Ash buildup restricts airflow, making temperature control difficult.
Charcoal Baskets ($20-40 pair)
-
Metal containers that corral charcoal into a concentrated area.
-
Why they matter: Create perfect two-zone cooking in a kettle grill and extend burn time.
Pellet Tube Extender ($10-15)
-
A simple metal stand that elevates your smoke tube for better airflow.
-
Why it matters: Prevents the tube from smothering in its own ash, ensuring complete burn.
The Smoking Success Checklist:
-
Smoke generator matched to your grill type
-
Drip pans sized for your smoker
-
Butcher paper for the Texas crutch
-
Heat-resistant gloves for handling hot meat
-
Spray bottle for spritzing (apple juice/vinegar mix)
Final Smoke Wisdom: The goal isn’t maximum smoke—it’s clean, consistent smoke. Thin blue smoke is your target; thick white smoke creates bitter flavors. These tools help you achieve that control, turning unpredictable smoking into a repeatable science.
Great barbecue doesn’t start at the grill—it starts in the kitchen with proper preparation and storage. The right gear here can dramatically improve your final results, from deeper flavor penetration to longer-lasting leftovers.
6.1 Food Storage & Marinating
Vacuum Sealers: The Game Changer
Vacuum sealing isn’t just for freezing; it’s the ultimate marinating technology.
Why It’s Essential:
-
Marinating: Cuts marinating time from 24 hours to 30 minutes by forcing flavor deep into the meat.
-
Meat Aging: Perfect for dry-aging steaks at home in a controlled environment.
-
Leftover Preservation:
-
Sliced Brisket: Stays fresh for 5-7 days, reheats perfectly in hot water.
-
Pulled Pork: Freeze in meal-sized portions for quick future meals.
-
Top Models:
-
Budget Choice: FoodSaver FM2000 – Reliable, affordable, great for beginners.
-
Pro Choice: Nesco VS-12 – More powerful suction, better bag options.
Pro Tip: When freezing smoked meat, add a tablespoon of beef broth to the bag before sealing. This prevents “freezer burn” and maintains moisture during reheating.
Marinating Containers & Injectors
Glass vs. Plastic Containers:
-
Glass: Doesn’t absorb odors, easy to clean, oven-safe for finishing.
-
Plastic: Lightweight, less breakage risk, but can stain over time.
Meat Injectors ($15-30):
-
Purpose: Delivers flavor and moisture deep inside large cuts.
-
Best For: Whole turkeys, pork shoulders, brisket.
-
Injection Recipes: Try apple juice + rub spices, or beef broth + Worcestershire sauce.
-
Pro Tip: Strain your injection liquid to prevent clogging the needle.
6.2 Meat Preparation Tools
Trussing Needles & Twine
-
Purpose: Creates uniform shape for even cooking on roasts and poultry.
-
Why It Matters: A compact, evenly-shaped roast cooks more predictably than a loose, irregular one.
-
Pro Tip: Use cotton butcher’s twine—it’s strong, food-safe, and won’t melt like synthetic strings.
Brining Bags & Containers
-
Purpose: Submerges poultry or pork in salt solution for ultimate juiciness.
-
Setup: Use a 2-gallon zip-top bag or dedicated brining container.
-
Basic Brine Ratio: 1/2 cup kosher salt + 1/2 cup sugar per gallon of water.
-
Pro Tip: Add aromatics like garlic, citrus, and herbs to your brine for extra flavor dimensions.
Resting Racks
-
Purpose: Elevates meat while resting so the bottom doesn’t get soggy.
-
Why It Matters: Allows air circulation around the entire cut, preserving that perfect crust you worked so hard to create.
-
Pro Tip: Place the rack over a cutting board to catch juices for au jus or gravy.
6.3 Advanced Prep Tools
Meat Claws ($10-20)
-
Purpose: Shreds pulled pork and beef quickly without burning your hands.
-
Bonus Use: Great for transferring large, hot cuts from smoker to resting pan.
-
Pro Tip: Use two claws in a “pull-apart” motion for the most efficient shredding.
Jerky Guns & Slicers
-
Purpose: Creates uniform strips for homemade jerky.
-
Best For: Making jerky from ground meat (consistent texture) or slicing whole muscle.
-
Pro Tip: Partially freeze meat before slicing for perfectly thin, even strips.
Bacon Hangers ($15-25)
-
Purpose: Hangs bacon vertically in your smoker for maximum smoke exposure.
-
Result: More evenly smoked bacon with professional appearance.
-
Capacity: Typically holds 10-15 slices per hanger.
Storage & Prep Gear Checklist
Essential Starter Kit:
-
Large glass marinating containers (various sizes)
-
Cotton butcher’s twine
-
Wire cooling racks for resting
-
2-gallon zip-top bags for brining
Advanced Upgrade Kit:
-
Vacuum sealer with roll bags
-
Meat injector with multiple needles
-
Meat claws for pulling and handling
-
Dedicated brining container with lid
Pro-Level Additions:
-
Jerky slicer for consistent thickness
-
Bacon hangers for commercial-style results
-
Digital scales for precise rub measurements
The Preparation Philosophy: Time invested in proper preparation pays exponential dividends at the eating stage. A well-trimmed, properly seasoned, and perfectly rested piece of meat will always outperform one that was thrown on the grill haphazardly. These tools don’t just make preparation easier—they make it more effective, ensuring your hard work at the grill translates directly to exceptional results on the plate.
For every genuinely useful BBQ tool, there are a dozen waiting to take your money while delivering disappointment. Learning to spot these gimmicks will save you money, storage space, and frustration. Here’s what to steer clear of, and why.
7.1 Overpriced Nonsense
These products use clever marketing to solve problems that either don’t exist or are better solved with simpler, cheaper tools.
“Digital Marinade Injectors” ($50-100)
-
The Promise: Precise, automated injection.
-
The Reality: Over-engineered, difficult to clean, and no more effective than a $15 manual injector. The motor often fails after limited use.
-
Better Alternative: A simple manual meat injector with a comfortable grip.
“Laser Thermometers” for Meat Doneness
-
The Promise: Instant surface temperature reading.
-
The Reality: Only reads surface temperature, which is useless for determining internal doneness. A $30 instant-read probe thermometer is infinitely more useful.
-
Actual Use Case: Great for checking grill surface temperature or smoker walls, but not for food.
“Flavorizer” Balls or Chips
-
The Promise: Magically add flavor to gas grills.
-
The Reality: Lava rocks or ceramic briquettes that sit under grates. They trap grease (creating flare-ups) and are a nightmare to clean.
-
Better Alternative: A simple smoke box with wood chips is cheaper, easier to clean, and actually works.
7.2 Single-Use Gadgets
These tools perform one hyper-specific task and then gather dust for 364 days a year. They clutter your drawers and drain your wallet.
“Corn Kerneler” or “Avocado Slicer”
-
The Problem: A unitasker that takes up space. A good chef’s knife can remove corn kernels or slice an avocado faster and with less cleanup.
-
The Rule: Be wary of any tool that can only do one thing.
“Hot Dog Toaster” or “Hamburger Grill Machine”
-
The Problem: Attempts to replicate grill marks and flavor but produces steamed, bland results. It’s a poor imitation of the real thing.
-
The Reality: If you have a grill, you already own a superior cooking device. Don’t buy a cheap knockoff for your countertop.
Specialty “Kebab” or “Fish” Turners
-
The Problem: Unnecessary. Your long-handled tongs can turn kebabs or fish fillets with more control and less risk of breaking.
-
The Rule: Your core tools (Tongs, Spatula) should be versatile enough to handle 90% of tasks.
7.3 Dangerous Designs
Some tools aren’t just useless—they’re hazardous. Avoid these for safety’s sake.
Wire Grill Brushes with Bristles
-
The Danger: Bristles can break off, stick to grates, and end up embedded in food. If ingested, they can cause serious internal injuries.
-
The Alternative: Bristle-free brushes (pumice, nylon, or coiled metal). They are safer and often more effective.
Flammable or Plastic-Handled Tools
-
The Danger: Cheap tools with plastic handles or coatings that can melt, burn, or break when exposed to high grill heat.
-
The Alternative: Tools with stainless steel construction and heat-resistant handles (silicone or wood).
Glass or Ceramic Cutting Boards
-
The Danger: Destroy knife edges instantly, making your expensive knives dull and dangerous. They are also slippery and can break.
-
The Alternative: Wood or plastic cutting boards are safer for your knives and your hands.
The Gimmick Red Flag Checklist
Before buying any new BBQ gadget, ask these questions:
-
Does it solve a problem I actually have? Or one I never knew I had?
-
Can I achieve the same result with a tool I already own? (e.g., tongs instead of a hot dog roller)
-
Is it easy to clean? Complicated parts or hard-to-reach areas are a deal-breaker.
-
Is it built to last? Or does it feel flimsy and cheap?
-
Would a professional use this? If the answer is no, it’s probably a gimmick.
The “One-Tool Test”
A great test for any potential purchase is the “One-Tool Test.” If you were stranded on a desert island with only one BBQ tool (besides your grill), could this new gadget replace something in your core toolkit? If not, it’s probably not essential.
Remember: The most valuable space in your BBQ area is the empty space that isn’t filled with junk. Curate your tools carefully, invest in quality where it matters, and don’t let marketing create problems for your wallet to solve. Your grill, your bank account, and your sanity will thank you.
Finding the perfect BBQ gear can feel overwhelming with thousands of products vying for your attention. This interactive tool cuts through the noise and gives you a personalized gear recommendation based on your specific needs, budget, and experience level.
Find Your Perfect BBQ Gear Setup
Build Your Perfect BBQ Toolkit
Answer 4 simple questions to get your personalized gear recommendation:
Sample Quiz Results
Result: “The Weekend Warrior”
Profile: Intermediate + Gas Grill + Serious Budget + Entertaining Focus
🥇 Priority 1: Temperature Control
-
ThermoPro TP19 Instant-Read Thermometer ($29)
-
Inkbird IBT-4XS Bluetooth BBQ Thermometer ($59)
🔧 Essential Tools
-
16″ OXO Good Grips Stainless Steel Tongs ($18)
-
Grill Rescue Pumice Scrubber ($25)
-
Cuisipro Stainless Steel Spatula ($22)
💡 Recommended Upgrades
-
GrillGrates Panel System ($89) – For better searing
-
Smoke Daddy Side Smoke Generator ($45) – For real smoke flavor
Total Investment: ~$288
Result: “The Smoking Enthusiast”
Profile: Advanced + Pellet Grill + Pro Budget + Precision Focus
🥇 Priority 1: Ultimate Temperature Control
-
Thermoworks Thermapen ONE ($99)
-
Thermoworks Smoke X4 ($249)
🔪 Cutting & Prep
-
Victorinox 8″ Chef’s Knife ($45)
-
Victorinox 12″ Slicing Knife ($60)
-
John Boos Maple Cutting Board ($129)
🛠️ Specialized Tools
-
Grill Armor Extreme Heat Gloves ($35)
-
Pink Butcher Paper Roll ($25)
-
Vacuum Sealer for leftovers ($89)
Total Investment: ~$731
Budget Allocation Guide
Smart Budget Allocation
Starter Budget ($50-100)
- 50% – Instant-read thermometer
- 30% – Basic tools (tongs, spatula)
- 20% – Cleaning supplies
Serious Budget ($100-250)
- 40% – Temperature control (instant + leave-in)
- 25% – Quality cutting tools
- 20% – Grill upgrades
- 15% – Specialized accessories
Gear Acquisition Timeline
Phase 1: Foundation (First Month)
-
Instant-read thermometer
-
Basic tongs and spatula
-
Bristle-free grill brush
-
Heat-resistant gloves
Phase 2: Capability (Months 2-3)
-
Leave-in probe thermometer
-
Quality chef’s knife
-
Drip pans and smoke tools
-
Cutting board upgrade
Phase 3: Mastery (Months 4-6)
-
Specialized thermometers
-
Knife set completion
-
Grill modification accessories
-
Advanced prep tools
Next Steps After Your Results
-
Click the product links to read detailed reviews in our database
-
Download our comparison charts for side-by-side feature analysis
-
Watch setup videos for proper tool usage and maintenance
-
Join our community to ask specific questions about your recommended gear
Remember: The best gear is the gear you’ll actually use. Start with the essentials that solve your biggest pain points, then build out your toolkit as your skills and needs evolve. Quality over quantity always wins in the world of BBQ tools.
Ready to download your personalized shopping list, or would you like to adjust your quiz answers for different recommendations?
📥 SECTION 9: FREE RESOURCES & DOWNLOADS
You’ve absorbed a massive amount of information. Now, let’s transform that knowledge into action with these practical, professional-grade resources. Everything you need to build, organize, and master your BBQ toolkit is right here.
🎁 Your Free BBQ Gear Toolkit
1. 📋 The Essential BBQ Gear Checklist
*(PDF – 2 Pages, Print-Friendly)*
A comprehensive checklist that breaks down gear by priority level, so you know exactly what to buy first and what can wait.
Includes:
-
Priority 1 “Must-Haves”: The non-negotiable tools for every griller
-
Priority 2 “Game Changers”: Tools that significantly upgrade your results
-
Priority 3 “Nice-to-Haves”: Specialized tools for specific applications
-
Budget ranges and recommended brands for each category
[Download PDF – Size: 285KB]
2. 🏷️ BBQ Gear Brand Reliability Report Card
*(PDF – 3 Pages, Mobile-Optimized)*
Our unbiased assessment of 25+ major BBQ gear brands based on customer satisfaction, warranty support, and long-term durability testing.
Covers:
-
Thermometer brands ranked by accuracy and durability
-
Knife brands evaluated by edge retention and comfort
-
Tool brands assessed by heat resistance and construction
-
Red Flag Alerts: Brands with consistent quality control issues
[Download PDF – Size: 420KB]
3. 🗓️ Annual BBQ Gear Maintenance Calendar
*(PDF – 1 Page, Laminated Version Recommended)*
Never forget critical maintenance tasks again. This visual calendar shows exactly what to do and when.
Features:
-
Monthly tasks: Quick checks and cleaning
-
Quarterly maintenance: Deep cleaning and calibration
-
Seasonal preparation: Winter storage and spring startup
-
Replacement timelines: When to expect wear and tear
[Download PDF – Size: 198KB]
4. 💰 Gear Value Calculator
(Excel Spreadsheet – Interactive)
Make smart purchasing decisions by comparing long-term value versus initial cost.
Interactive Features:
-
5-year cost of ownership calculations
-
Quality vs. price comparison charts
-
“Cost per use” analysis for expensive tools
-
Budget planning worksheet
[Download Excel File – Size: 156KB]
🚀 Advanced Implementation Tools
Join “The Sharpened Edge” VIP Program
Get ongoing gear education and support through our exclusive program:
Weekly Gear Workshops:
-
“Master Your Thermometer” deep dive
-
“Knife Sharpening Masterclass”
-
“Tool Maintenance & Repair Clinic”
-
“New Gear Review & Testing Sessions”
Member Benefits:
-
First access to our testing data
-
Live Q&A with gear experts
-
Exclusive discounts on recommended products
-
Private community forum
[Join VIP Program – Free Registration]
Gear Testing Video Library
See tools in action before you buy:
Featured Video Series:
-
“Thermometer Accuracy Showdown”
-
“Knife Sharpening: 5 Methods Compared”
-
“Does This Gadget Actually Work?”
-
“Tool Durability Torture Tests”
[Access Video Library – Free]
🎯 Your Gear Implementation Plan
30-Day Gear Transformation Challenge
Week 1: Foundation
-
Day 1-3: Master your thermometer
-
Day 4-7: Optimize your basic tool kit
Week 2: Sharp Skills
-
Day 8-14: Knife maintenance and sharpening
-
Cutting board organization and care
Week 3: Specialized Tools
-
Day 15-21: Smoking accessories setup
-
Day 22-25: Food prep gear integration
Week 4: Maintenance Mastery
-
Day 26-30: Complete gear audit and maintenance
Gear Storage Solutions Guide
Small Space Solutions:
-
Magnetic knife strips for wall storage
-
Tool rolls instead of bulky cases
-
Stackable bins with clear labels
Large Space Optimization:
-
Pegboard wall systems with custom hooks
-
Mobile tool carts with multiple drawers
-
Climate-controlled storage for electronics
📞 Expert Support Resources
Gear-Specific Help Lines:
-
Thermometer Calibration Help: Live video support sessions
-
Knife Sharpening Questions: Photo-based sharpening advice
-
Tool Repair Guidance: Step-by-step troubleshooting
-
General Gear Questions: Email support gear@themeatmasterusa.com
Manufacturer Support Directory:
-
Thermoworks Support: 1-801-571-9411
-
Victorinox Warranty: 1-800-442-2706
-
Weber Parts & Support: 1-800-446-1071
-
ThermoPro Customer Service: support@thermopro.com
📚 Continuing Your Gear Education
Recommended Learning Path:
-
Start with our checklist – Build your foundation
-
Join weekly workshops – Develop maintenance skills
-
Participate in challenges – Implement what you learn
-
Become a VIP member – Get ongoing support
Seasonal Gear Focus:
-
Spring: Startup maintenance and new tool planning
-
Summer: Entertainment-focused gear optimization
-
Fall: Smoking accessory deep dive
-
Winter: Knife sharpening and tool maintenance
Skill Assessment Checklist:
-
Thermometer calibration and proper use
-
Knife sharpening and maintenance
-
Tool cleaning and storage protocols
-
Gear purchase evaluation skills
-
Emergency repair capabilities
🎉 Your Action Plan
Quick Start (15 Minutes):
-
Download the essential gear checklist (5 minutes)
-
Take the gear finder quiz (5 minutes)
-
Watch the thermometer mastery video (5 minutes)
Weekend Project (2-3 Hours):
-
Complete gear audit using our checklist (30 minutes)
-
Perform maintenance on all tools (1-2 hours)
-
Reorganize storage for efficiency (30 minutes)
30-Day Transformation:
-
Week 1: Foundation tools mastery
-
Week 2-3: Specialized skill development
-
Week 4: Complete system optimization
Remember: Great gear should feel like an extension of yourself—not a source of frustration. Start with the tools that solve your biggest pain points, master them, then gradually build out your toolkit. Quality beats quantity every time.
All resources are completely free. Premium one-on-one gear consultations are available but never required. We believe everyone deserves access to professional-grade BBQ knowledge.
✅ CONCLUSION
The world of BBQ gear can feel overwhelming—endless gadgets, conflicting reviews, and the constant fear of wasting money on the wrong tools. But as we’ve navigated this landscape together, one truth has emerged clear and strong: Mastery isn’t about owning every tool; it’s about owning the right tools.
The perfect BBQ setup isn’t measured by how full your shed is, but by how empty your hands are during a cook. When your thermometer gives you instant confidence, your knives glide through meat like butter, and your tongs feel like an extension of your arm—that’s when you’ve moved from struggling with equipment to commanding your craft.
Remember the philosophy that changes everything:
-
The 80/20 Rule means focusing on the few tools you’ll use constantly
-
“Buy Once, Cry Once” reminds us that quality outlasts cheap substitutes every time
-
Gear vs. Gimmick thinking protects your wallet and your sanity
Your journey doesn’t end here—it just gets more enjoyable. That first bite of steak cooked to perfect doneness because your thermometer didn’t lie, that satisfying slice through a brisket with a razor-sharp knife, the effortless flip of a burger with perfectly balanced tongs—these are the moments where good tools fade into the background and great results take center stage.
Your grill awaits. Now perfectly equipped.
Need a quick reminder? Download our cheat sheets. Facing a specific gear challenge? Our community has your back. The only wrong tool is the one that keeps you from firing up the grill today.