
Expert’s Note: This guide is part of our comprehensive Ultimate Grill & Smoker Maintenance Guide. Find your perfect cleaning tools and keep your equipment in championship form.
You wouldn’t use a sledgehammer to crack a walnut. Yet, that’s exactly what many of us do when we grab the wrong grill brush for our grates. The consequences? Damaged surfaces, stripped seasoning, and in the worst cases, dangerous bristle hazards.
Choosing the right grill brush isn’t about finding the “best” one—it’s about finding the right one for YOUR specific grates. A tool that’s perfect for rugged cast iron could destroy delicate porcelain. A gentle brush meant for chrome will barely make a dent on seasoned stainless steel.
This weekend’s Sunday Experiment is all about solving this exact problem. We tested every major type of grill brush against the most common grate materials. The results will save you money, protect your equipment, and transform your 5-minute clean from a chore into a quick, satisfying ritual.
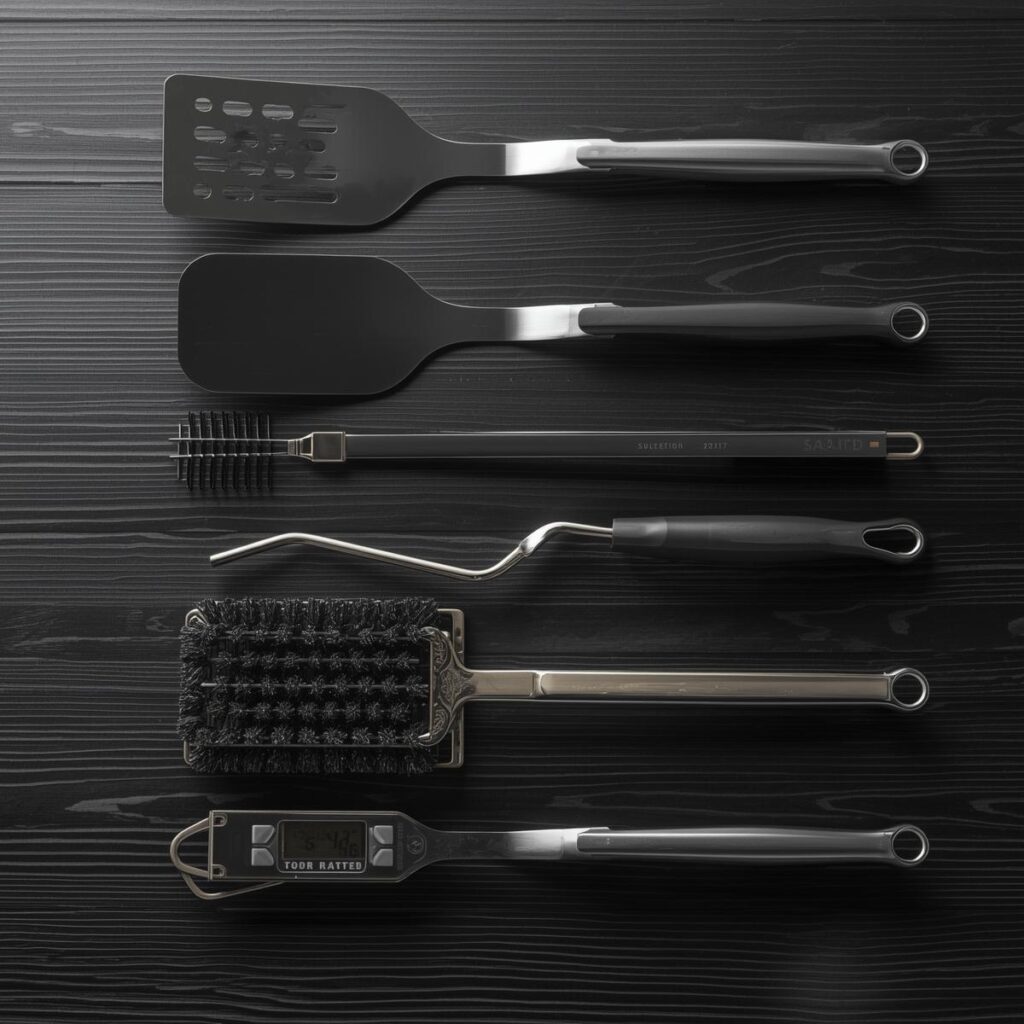
Essential Maintenance Gear: Build your perfect cleaning kit:
First, Know Your Enemy: Identify Your Grate Material
Before you can choose your weapon, you need to know what you’re cleaning. Here’s a quick identification guide:
-
Cast Iron: Heavy, black, may have visible seasoning, magnetic. Feels substantial.
-
Stainless Steel: Shiny, silver, non-rusting, often has a visible “grain” pattern.
-
Porcelain-Coated: Smooth, glass-like surface, usually black. The coating is essentially baked-on glass.
-
Chrome-Plated: Very shiny, often on older grills, can chip to reveal rust underneath.
Why This Matters: Using an aggressive steel brush on porcelain is like using sandpaper on glass. The wrong tool doesn’t just clean poorly—it actively damages your equipment.
The Grill Brush Arena: 6 Contenders Tested
We put every major brush type through rigorous testing on all grate materials. Here are the results:
🥈 Contender 1: Standard Wire Brush
The Classic Workhorse
-
Best For: Stainless steel grates, heavy-duty cleaning
-
Pros: Highly effective, inexpensive, available everywhere
-
Cons: Bristle shedding risk, can damage softer surfaces
-
Safety Note: Always check for loose bristles before and after use. Run your hand over the brush (carefully!) and inspect grates after cleaning.
🥇 Contender 2: Brass/Bristle-Free Brush
The Safe All-Rounder
-
Best For: Cast iron grates, porcelain-coated grates, peace of mind
-
Pros: Won’t damage seasoning, zero bristle risk, gentle on surfaces
-
Cons: Less aggressive on baked-on carbon, may require more effort
-
Why It Works: Brass is softer than steel but still effective. It cleans without scratching or stripping.
🥉 Contender 3: Pumice Stone/Cleaning Block
The Carbon Destroyer
-
Best For: All grate types, baked-on carbon removal, tough jobs
-
Pros: Devastatingly effective on tough residue, no metal contact
-
Cons: Wears down quickly, can be messy (creates dust)
-
Pro Tip: Use when grates are warm (not hot) for best results. The heat softens residue without burning you.
🏅 Contender 4: Nylon/Poly Brush
The Delicate Specialist
-
Best For: Porcelain, chrome-plated, non-stick grates
-
Pros: Completely safe, no scratching, often dishwasher safe
-
Cons: Won’t handle heavy buildup, can melt on very hot grates
-
Ideal Use: Light cleaning, delicate surfaces, quick touch-ups
🎯 Contender 5: Coil Brush
The Precision Cleaner
-
Best For: Stainless steel, between grate wires cleaning
-
Pros: Gets between grates brilliantly, durable construction
-
Cons: Can be too aggressive for soft metals, limited surface contact
-
Design Benefit: The coiled design reaches areas flat brushes miss completely.
🌿 Contender 6: Wooden Scraper/Paddle
The Naturalist
-
Best For: Cast iron maintenance, light cleaning, traditionalists
-
Pros: All-natural material, won’t damage any surface, zero bristle risk
-
Cons: Limited cleaning power, not for heavy buildup
-
Bonus: Often has a scraper edge for tackling tough spots
Pro Tip: Consider a two-brush system. Keep a heavy-duty brush for initial cleaning and a gentle brush for final pass and maintenance. This approach handles any situation.
The Ultimate Matching Guide: Brush to Grate
Print this chart and keep it in your grilling station:
🎯 Grate-to-Brush Matching Chart
| Grate Type | Best Brush | Good Alternative | Avoid |
|---|---|---|---|
| Cast Iron | Brass/Bristle-free | Wooden scraper | Steel wire brushes |
| Stainless Steel | Steel wire brush | Coil brush | Nothing – it’s durable |
| Porcelain-Coated | Nylon brush | Pumice stone | Any metal brush |
| Chrome-Plated | Nylon brush | Bristle-free | Metal brushes |
The Safety Showdown: Bristle vs. Bristle-Free
This is the question that worries every griller: “Are wire brushes safe?”
The Reality: While serious incidents are rare, wire bristles can detach and stick to grates, potentially ending up in food. The consequences can be severe.
Our Verdict: When in doubt, go bristle-free. The peace of mind is worth any small difference in cleaning power.
If You Choose Wire Brushes, Follow These Rules:
-
Inspect before EVERY use – run your hand over it (carefully)
-
Replace at first sign of wear – typically every 6-12 months with regular use
-
Never use excessive pressure – let the brush do the work
-
Do a final visual inspection of grates after cleaning
Advanced Cleaning Techniques
The Warm Grate Advantage:
The perfect cleaning temperature is 300-400°F. At this range, residue softens but won’t burn you. Too cold and it’s like cement; too hot and it’s dangerous.
Emergency Backup: The Aluminum Foil Ball
No brush? Crumple a large ball of heavy-duty aluminum foil and use tongs to scrub. It’s surprisingly effective and works on any grate type.
Complementary Tools:
-
Grill scrapers for edges and corners
-
Putty knives for stubborn spots in the firebox
-
Nylon scrub pads for final polishing
Maintenance & Replacement Guide
When to Retire Your Brush:
-
Wire brushes: Bent bristles, rust, or ANY looseness
-
Nylon brushes: Melted or misshapen bristles
-
Pumice stones: When worn down by 50%
-
All brushes: Every 12 months regardless of condition
Cleaning Your Brush:
-
Simple soap and water rinse after each use
-
Occasional deep clean in soapy water for grease buildup
-
Never store a wet brush – hang it to dry completely
Avoid Common Mistakes: Keep your cleaning safe and effective:
Your Sunday Experiment Challenge
This weekend, conduct your own brush audit:
-
Identify your grate material using our guide above
-
Match it with the recommended brush type from our chart
-
Test your current cleaning effectiveness
-
Notice the difference with the right tool
What to look for:
-
Less effort required
-
No scratched or damaged surfaces
-
No bristle safety concerns
-
Faster, more satisfying cleanup
Ready for Your Sunday Experiment?
Join thousands of grillers who have transformed their cleaning routine with the right tools.
FAQ: GRILL BRUSH SHOWDOWN
Quick Note: These questions are answered in detail in our full guide above. This FAQ summarizes the key points for quick reference.
1. What is the safest type of grill brush overall?
The brass/bristle-free brush is generally considered the safest overall option. It eliminates the risk of wire bristles detaching and ending up in your food, while still being effective enough for most cleaning tasks. It’s safe on all grate types except for the most heavily caked-on stainless steel.
2. How often should I replace my grill brush?
-
Wire brushes: Every 6-12 months, or at the first sign of bent/loose bristles
-
Nylon brushes: When bristles become melted or misshapen
-
Pumice stones: When worn down by about 50%
-
All brushes: Replace annually regardless of visible wear
3. Can a grill brush really damage my grates?
Yes, absolutely. Using the wrong brush can:
-
Strip the seasoning off cast iron grates
-
Scratch and eventually chip porcelain-coated surfaces
-
Create microscopic grooves in stainless steel that trap food particles
Using the right brush for your grate material is crucial for protecting your investment.
4. What should I use if I don’t have a grill brush?
The best emergency alternative is a large ball of heavy-duty aluminum foil. Crumple it into a tight ball and use tongs to scrub your warm grates. It’s surprisingly effective and works on any grate type without risk of damage.
5. Are wire bristle brushes really that dangerous?
While serious incidents are statistically rare, wire bristle ingestion can cause severe internal injuries requiring surgery. The risk is real enough that many professional pitmasters and safety organizations recommend switching to bristle-free alternatives for peace of mind.
6. What’s the best brush for cast iron grates?
Brass/bristle-free brushes are ideal for cast iron because they’re effective at cleaning without stripping away the valuable seasoning you’ve worked hard to build. Steel brushes can remove this protective layer, leading to rust and sticking.
7. Can I use steel wool or SOS pads on my grill?
No, avoid steel wool entirely. It leaves behind small metal particles that can contaminate food and may contain soap or chemicals that shouldn’t be heated and ingested. The fine particles can also embed in grate surfaces.
8. Why does my grill brush seem to work better on warm grates?
Warm grates (around 300-400°F) soften baked-on grease and food residue, making them easier to remove. Cold residue is like cement; extremely hot grates can burn off the brush bristles or be dangerous to handle.
9. What’s the advantage of having two different brushes?
A two-brush system lets you handle any situation:
-
Use a more aggressive brush for initial heavy cleaning
-
Use a gentler brush for final pass and maintenance
This approach is especially useful if you have multiple grate types or cook a variety of foods.
10. How do I clean my grill brush itself?
-
Rinse with warm water and mild soap after each use
-
For deep cleaning, soak in warm, soapy water
-
Always hang to dry completely – never store a wet brush
-
Replace if you notice any mold or persistent odors
11. My grill has multiple grate materials – which brush should I choose?
When in doubt, choose the brush that’s safe for your most delicate grate material. For example, if you have both stainless steel and porcelain grates, use a brush that’s safe for porcelain (like nylon or brass). It’s better to have a brush that’s slightly less aggressive than one that causes damage.
12. Are expensive grill brushes worth the money?
Not necessarily. A $15-25 quality brush from a reputable brand often performs as well as $40+ “premium” options. Focus more on choosing the right TYPE of brush for your needs rather than the price tag. Durability and proper maintenance matter more than initial cost.
Still have questions? Drop them in the comments below or explore our Complete Grill Maintenance Guide for more detailed information.
This FAQ covers the most critical questions grill owners have about brush selection and safety. The right knowledge protects both your equipment and your health!
The right grill brush isn’t a luxury—it’s essential equipment that protects your investment and ensures every cook starts with a perfect, clean surface. This weekend, take 5 minutes to assess your brush situation. If you’re using the wrong tool for your grates, make the switch.
Your future steaks (and your peace of mind) will thank you.