

Brisket Breakdown: Fat Cap, Flat & Point Explained
For many, the Brisket is the ultimate test of a pitmaster’s skill. This legendary cut of beef, a cornerstone of Texas-style BBQ, is a testament to the magic that happens when patience meets the perfect low-and-slow cooking method. But what seems like a simple, singular piece of meat is actually a complex puzzle with three key components: the fat cap, the flat, and the point. Mastering each of these parts is the true secret to unlocking a brisket’s full potential.
This comprehensive guide, a full Brisket Breakdown: Fat Cap, Flat & Point, will demystify the anatomy of this formidable cut. We’ll delve into the purpose of each section, reveal the secrets to preparing and cooking them, and provide you with the knowledge to transform this tough primal into a juicy, flavorful, and tender masterpiece that will have your guests asking for your secrets.
1. The Anatomy of a Whole Brisket
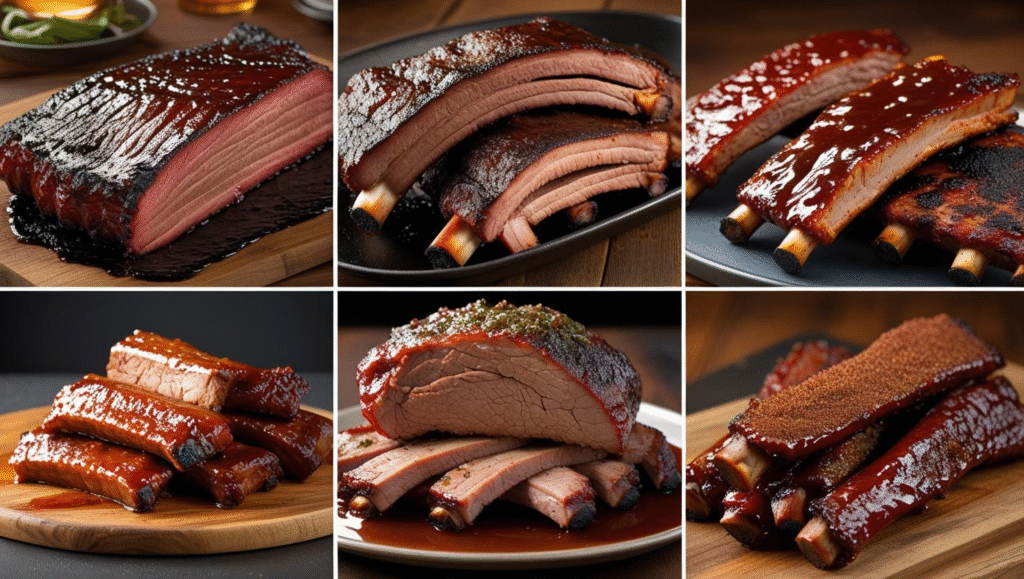
A whole brisket, also known as a “full packer,” is a large cut from the breast section of a cow, beneath the chuck primal. It is a well-used muscle, making it one of the toughest cuts on the animal. But what it lacks in tenderness, it makes up for in rich, beefy flavor and a high concentration of connective tissue and fat, which, when rendered down properly, creates a succulent, moist piece of meat.
The full packer brisket is made of two distinct, overlapping muscles: the flat and the point. Between them lies a thick layer of fat and connective tissue often referred to as the “deckle.” Over the entire cut sits a thick layer of external fat known as the fat cap.
2. The Brisket Flat: The Lean Slicing Side
The flat is the leaner, larger, and more rectangular of the two brisket muscles. It is the more common cut found in grocery stores because it’s easier to manage and ideal for slicing.
Characteristics
The brisket flat has a uniform thickness and a very consistent, long muscle grain. It’s what most people picture when they think of a perfectly sliced brisket. Its leanness is a double-edged sword: it’s great for those who prefer less fat, but it also means it’s more susceptible to drying out if not cooked with care. The lack of significant marbling means it relies on moisture from the cooking process and the fat cap to stay tender.
Preparation
For the flat to cook correctly, proper trimming is essential. You must trim the deckle and any large chunks of hard, excess fat. For the flat portion itself, the goal is to leave a very thin, uniform layer of fat. This provides some moisture and helps with the bark formation without creating a soggy layer between the meat and the crust.
Best Cooking Method
The flat is almost always cooked attached to the point in a full packer brisket. This allows the point’s generous fat content to help keep the flat moist. The entire brisket should be cooked low and slow, ideally at a temperature of 225°F to 250°F. The goal is to slowly break down the tough collagen into gelatin, which makes the meat tender and juicy.
Once the brisket is cooked and rested, the flat can be easily separated from the point. The final result is a beautiful, moist piece of beef that slices into perfect, uniform pieces. It is the quintessential slice of Texas BBQ.
Internal Link: To place this cut in its proper context, explore the details of the BBQ tradition in our guide on American BBQ Styles.
3. The Brisket Point: The Fatty, Flavorful Side
The point is the smaller, thicker, and much more heavily marbled muscle. It sits on top of the flat and is responsible for the incredible richness of a whole brisket.
Characteristics
The point is irregularly shaped and full of dense fat and connective tissue. Its grain runs in a different direction from the flat, which makes it challenging to slice neatly. However, the high fat content makes it incredibly rich, moist, and flavorful. When cooked correctly, the point is the most decadent and savory part of the brisket.
Preparation
The point is usually cooked attached to the flat. When trimming the full packer, you should trim away any silver skin and large, hard chunks of fat, but you should not remove the point from the flat. It is the point’s rendered fat that helps keep the leaner flat from drying out during the long cook.
Best Cooking Method
While the point can be pulled and shredded after the initial cook, its highest and best use is to be transformed into burnt ends. Burnt ends are a Kansas City BBQ tradition and are the perfect way to finish the point.
The process involves a two-stage cook:
- Stage 1: Smoke the whole brisket until it reaches an internal temperature of around 195°F to 205°F.
- Stage 2: Separate the point from the flat. Cube the point into 1-inch pieces. Toss the cubes in a mixture of BBQ sauce, rub, and a little liquid (like beef broth).
- Stage 3: Return the sauced cubes to the smoker for another 1-2 hours, until the sauce caramelizes and the meat is tender and delicious.
The result is a tender, fatty cube of meat with a caramelized glaze that is arguably the most addictive thing in all of BBQ.
Internal Link: For the perfect sauce to use on your burnt ends, consult our BBQ Rubs & Sauces Guide.
4. The Fat Cap: The Protector and Flavor Enhancer
The fat cap is the thick layer of fat that sits on the exterior of the brisket. It is not just an excess to be discarded; it is a critical component that plays a vital role in the cooking process.
Characteristics
The fat cap is composed of a thick layer of fat. When cooked, this fat melts and renders down. It can also be a point of protection for the meat, but only if it’s trimmed correctly.
The Trimming Process
Proper fat cap trimming is one of the biggest secrets to a great brisket. The most common mistake is to leave too much fat, but leaving too little can also be a problem.
- Leaving Too Much: A fat cap that is too thick (over a quarter-inch) will prevent the rub from penetrating and will not fully render. This will result in a greasy, unappealing layer of mushy fat.
- Leaving Too Little: A fat cap that is trimmed too thin (or removed completely) can cause the meat to dry out.
The secret is to trim the fat cap down to a uniform 1/4-inch thickness across the entire brisket. This provides enough insulation to protect the meat from the heat while allowing the fat to fully render and the rub to form a perfect bark.
Internal Link: A good butcher or breaking knife is essential for this process. Learn which knives you need in our guide on The Only 4 Knives You Need for Meat Prep.
To Cook Fat Side Up or Down?
This is one of the most debated topics in BBQ. However, modern wisdom and pitmaster consensus have largely settled on the answer.
- Fat Side Up: The old theory was that the fat would “baste” the meat as it rendered. Most pitmasters now agree this is a myth, as the fat runs down the side of the brisket and ends up on the pan or coals below.
- Fat Side Down: This is the preferred method. The fat cap acts as a shield, protecting the meat from the direct heat source. In a smoker or on a grill, the heat source is almost always from below, so the fat cap is best positioned down to protect the brisket from drying out and scorching.
5. Bringing It All Together: The Full Brisket Cook
Understanding the individual components is one thing; cooking them together is the final challenge.
Preparation Summary
- Trim: Use a sharp knife to trim the brisket, removing the silver skin and the deckle fat. Trim the fat cap down to a uniform 1/4 inch.
- Rub: Apply a generous amount of rub to all sides of the brisket.
- Rest: Let the rub set for at least an hour, or even overnight, in the refrigerator.
The Smoking Process
- Low & Slow: Set your smoker to a consistent temperature between 225°F and 250°F.
- The Cook: Place the brisket in the smoker, fat side down, and cook until it reaches an internal temperature of about 165°F. This is when the “stall” occurs.
- The Stall: The stall is when the brisket’s internal temperature plateaus for hours. It’s caused by evaporative cooling as the meat’s surface moisture evaporates. This is a crucial step in the cook, as it helps create the bark.
- The Texas Crutch: To get through the stall faster and retain moisture, many people wrap the brisket in butcher paper or foil. This is known as the “Texas Crutch.”
Resting the Brisket
The brisket must rest for at least one to two hours after coming off the smoker. This allows the muscle fibers to relax and the juices to redistribute. Skipping this step will result in a dry, tough piece of meat.
Serving a Full Brisket
After the rest, separate the flat and the point. Slice the flat against the grain. Cube the point and either pull it or use it for burnt ends.
For more information on the science of smoking and a fantastic recipe, AmazingRibs.com is an excellent, authoritative resource.
Conclusion
The journey to a perfect brisket is a rewarding one, and it all starts with understanding its complex anatomy. By mastering the art of trimming the fat cap, cooking the flat for perfect slicing, and transforming the point into incredible burnt ends, you’ve conquered the ultimate test in BBQ. Brisket Breakdown: Fat Cap, Flat & Point is not just a guide to a piece of meat; it’s a guide to becoming a true pitmaster.
FAQs:
What’s the difference between the brisket flat and the point? The flat is the leaner, slicing section of the brisket, while the point is the thicker, fattier, and more marbled section.
What’s the purpose of the fat cap? The fat cap protects the meat from the heat source and helps keep the brisket moist during the long cooking process.
Do you cook a brisket fat side up or down? Most pitmasters now cook a brisket fat side down to protect the meat from the direct heat source coming from below.
How do I make burnt ends? Burnt ends are made from the brisket point. After the initial cook, the point is separated, cubed, sauced, and returned to the smoker to caramelize.
What is the “stall” in brisket cooking? The stall is a plateau in the brisket’s internal temperature that can last for hours, caused by evaporative cooling. Wrapping the brisket can help push through the stall.
Pingback: Smoking vs Grilling: The Ultimate Guide to Perfect BBQ
Pingback: Best Pork Cuts for BBQ: Ultimate Grilling & Smoking Guide [2025]
Pingback: The Ultimate Guide to Beef, Pork, and Poultry for BBQ: Cuts, Tips & Techniques
Pingback: Regional BBQ Styles in the USA: Texas, Kansas City, Memphis, and Carolina - The Meat Master USA
Pingback: How to Smoke a Brisket (Texas) - The Meat Master USA
Pingback: Top-Rated Meat Thermometers for Perfect Results [2025] The Meat Master USA