
The Ultimate Smoked Brisket Recipe
For many, brisket is the undisputed king of barbecue. It’s a challenging cut of meat to master, but a perfectly smoked brisket, with its tender, juicy meat and peppery bark, is a deeply rewarding culinary achievement. If you’re looking for a definitive Brisket Recipe that will guide you to success, you’ve come to the right place.
This comprehensive guide will walk you through every critical step, ensuring your next brisket is a melt-in-your-mouth masterpiece that will have everyone asking for your secrets. This isn’t just about cooking; it’s about a low-and-slow journey to BBQ perfection, and with this Brisket Recipe, you’ll be well on your way to earning your pitmaster stripes. For a deeper look at the entire process, check out our ultimate guide to trimming, smoking, and slicing brisket.
Understanding the Cut for This Brisket Recipe
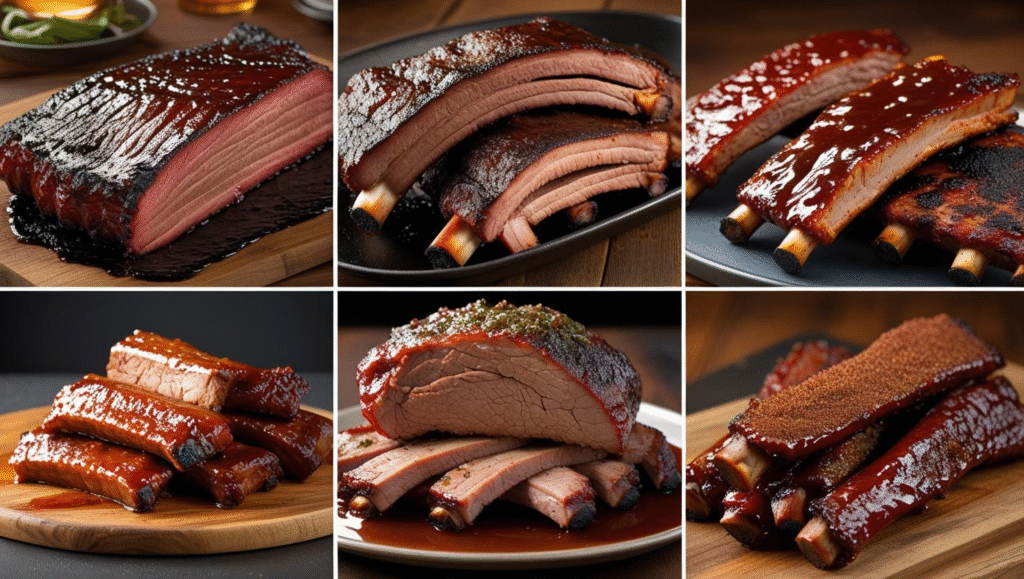
The first step to a successful Brisket Recipe is knowing your meat. A full brisket is a large, tough cut from the cow’s chest, composed of two distinct muscles: the flat and the point. Understanding these two parts is essential for proper preparation and cooking. For a detailed breakdown of each section, see our article on the brisket flat and point.
- The Flat: This is the larger, leaner part of the brisket. It’s the muscle that’s typically sliced for serving, as its uniform shape and lower fat content make it ideal for clean, consistent slices. While it has less fat, it’s prone to drying out if not handled correctly.
- The Point: The smaller, thicker, and fattier section of the brisket. It sits on top of the flat and is rich with marbling and connective tissue. This part is incredibly flavorful and becomes tender after a long cook, making it the perfect choice for creating burnt ends.
When choosing your brisket, look for a USDA Prime or Choice grade. Prime will have more marbling, which contributes to flavor and moisture, but Choice is also an excellent option. Look for a brisket that is flexible and has a good amount of uniform marbling throughout the flat. Avoid briskets that feel stiff or have large, hard chunks of fat.
The Prep: Trimming and Seasoning
Proper preparation is just as important as the cook itself. This stage sets the foundation for the bark, smoke penetration, and overall quality of your final brisket. No great Brisket Recipe skips this step.
Trimming a Brisket
Trimming is arguably the most intimidating part for a beginner, but it’s critical for an even cook and a superior end product.
- Remove Hard Fat: Lay your brisket fat-side up. Look for any hard, unrendered chunks of fat on the fat cap and in the seams between the flat and the point. These will not render and should be removed.
- Trim the Fat Cap: You want to leave a thin, uniform layer of fat to protect the meat from the heat and add moisture. Trim the fat cap down to about a quarter-inch thick. Use a sharp, flexible knife and work slowly, following the contours of the meat. A uniform thickness ensures an even cook and consistent rendering.
- Shape the Brisket: Look at the entire brisket. You want to remove any thin, ragged edges that will cook faster than the rest of the meat and become dry and burnt. Create a more aerodynamic, uniform shape. This also helps with airflow in the smoker.
- Remove Silver Skin: Flip the brisket over to the meat side. Look for any shiny, tough silver skin. This won’t render or break down, so it’s best to remove it with your knife.
- Separate the Flat and Point (Optional): Some advanced pitmasters separate the flat and the point before cooking, but for this Brisket Recipe, we recommend keeping them together. It provides more moisture and is much easier to manage for a single cook.
The Rub for Your Brisket Recipe
The classic Texas-style rub is famously simple: coarse salt and coarse black pepper. This minimal approach allows the rich, beefy flavor of the brisket and the beautiful smokiness to be the stars of the show.
- Ingredients:
- ½ cup coarse kosher salt
- ½ cup coarse ground black pepper
- Application:
- Pat the brisket completely dry with paper towels. This is a crucial step that helps the rub stick and promotes the formation of the delicious “bark.”
- Apply the salt and pepper mixture liberally to all sides of the brisket. Don’t be shy; you want a thick, visible coating. Gently pat the rub onto the meat to ensure it adheres.
- For best results, place the rubbed brisket uncovered in the refrigerator for at least 6-12 hours, or even overnight. This allows the salt to start drawing out and then reabsorbing moisture, creating a “brine” effect and helping the flavors penetrate deeper into the meat.
The Cook: Temperature, Smoke, and Time
Patience is the single most important ingredient in any Brisket Recipe. Brisket requires a long, slow cook to break down its tough connective tissues and melt the intramuscular fat, transforming it into a tender, succulent masterpiece.
Setting Up Your Smoker
Whether you’re using a pellet grill, an offset smoker, an electric smoker, or a charcoal kettle, maintaining a consistent temperature is paramount.
- Target Temperature: Aim for a smoker temperature between 225°F and 250°F (107°C – 121°C). Consistency within this range is more important than hitting a single number.
- Wood Choice: The traditional wood for Texas brisket is post oak, which provides a clean, mild smoke that complements the beefy flavor without overpowering it. You can also use hickory for a stronger flavor or mesquite for a very intense, distinct smoke. For this Brisket Recipe, we recommend a classic post oak. To learn more about wood pairings, check out our ultimate guide to smoking woods.
The Smoking Process
Smoking a brisket is a marathon, not a sprint. A general rule of thumb is to plan for 1.5 to 2 hours per pound, which means a 12-15 pound brisket can take 12-20 hours.
- Initial Smoke (Unwrapped): Place the brisket directly on the grates, fat-side up. Close the lid and maintain your target temperature. During this phase (the first 4-8 hours), the meat will absorb most of its smoke flavor and begin to form its bark. Resist the urge to open the lid frequently, as “if you’re looking, you’re not cooking.”
- The Infamous Brisket Stall: Around the 6-10 hour mark, or when the internal temperature of the brisket reaches approximately 150°F – 170°F (65°C – 77°C), you will almost certainly hit “the stall.” This is when the internal temperature stops rising, sometimes for several hours. It’s caused by evaporative cooling as moisture from the surface of the meat evaporates. Don’t panic! This is a normal part of this Brisket Recipe.
- Wrapping (The Texas Crutch): To push through the stall and keep the meat moist, many pitmasters use the “Texas Crutch.” Once the brisket has a beautiful, dark mahogany bark (after 6-8 hours or when you’re happy with its color), remove it from the smoker. For a full breakdown of the Texas method, check out our post on how to smoke a brisket Texas-style. Wrap it tightly in a double layer of heavy-duty foil or untreated butcher paper. Butcher paper is often preferred as it breathes slightly, preserving more of the bark’s texture. Return the wrapped brisket to the smoker. Wrapping helps push the meat through the stall more quickly and retains moisture.
The Rest: A Critical Step for Any Brisket Recipe
After the long smoke, resist the urge to cut into your masterpiece immediately. The resting phase is absolutely critical for a juicy, tender brisket. This step is non-negotiable for a perfect Brisket Recipe.
- Why Rest? During cooking, the muscle fibers contract, pushing moisture towards the center of the meat. If you slice it too soon, all of those precious juices will run out onto your cutting board, leaving you with dry meat. Resting allows these fibers to relax and reabsorb those juices, ensuring a uniformly moist and tender result.
- How to Rest:
- Once the brisket is done (probes tender and has reached its target temperature), remove it from the smoker.
- Keep it wrapped in foil or butcher paper.
- Place the wrapped brisket in an empty, dry cooler and close the lid.
- Let it rest for a minimum of 1 hour, but ideally 2-4 hours. A well-insulated cooler can keep the brisket at a safe temperature for even longer. This extended rest is a game-changer for moisture and tenderness.
The Finish: Slicing Your Masterpiece
The final step in any Brisket Recipe is slicing. The way you slice can make or break a brisket, no matter how perfectly you cooked it.
- Slicing Against the Grain: Brisket has a long grain to its muscle fibers. You must slice against the grain for maximum tenderness. This shortens the fibers, making each bite easy to chew.
- Separating the Flat and the Point: Because the grain runs in different directions, you must separate the flat and the point. Carefully find the fat seam that divides them and slice through it.
- Slicing the Flat: Slice the flat against the grain, in pencil-thick slices.
- Slicing the Point: The grain of the point runs in a different direction. You can cube it for burnt ends or slice it against the grain to serve.
Brisket Recipe: Troubleshooting and Common Mistakes
Even experienced pitmasters run into challenges. Here’s how to address some common problems with a Brisket Recipe:
- Dry Brisket:
- Cause: Cooked too hot, not rested long enough, or trimmed too much fat.
- Fix: Ensure your smoker temperature is consistent. Always rest the meat. If it’s already dry, you can toss the slices with some beef broth or au jus.
- Tough Brisket (won’t shred easily):
- Cause: Not cooked long enough, or not cooked to a high enough internal temperature. The collagen hasn’t fully broken down into gelatin.
- Fix: Put it back in the smoker (wrapped) until it probes tender. Patience is key.
- No Bark:
- Cause: Wrapped too early, not enough rub, or smoker temperature too low.
- Fix: Ensure a liberal rub application. Avoid wrapping too soon; let the bark set for at least 6-8 hours.
- Overcooked and Crumbly:
- Cause: Cooked too long or at too high a temperature. The meat has lost all its structure.
- Fix: Unfortunately, there’s little you can do to fix this. It’s a sign to adjust your cooking temperature and time for your next Brisket Recipe.
Conclusion
Mastering a Brisket Recipe is a journey, but a deeply satisfying one. From selecting the perfect cut to the meticulous trimming, the magical bark-building rub, the long low-and-slow smoke, and the crucial resting period, every step contributes to the final, mouth-watering result. This isn’t just about feeding people; it’s about creating an experience and sharing the rich tradition of barbecue.
With this detailed guide, you have all the knowledge to craft a brisket masterpiece that will impress your family and friends. Don’t be afraid to experiment, refine your technique, and most importantly, enjoy the process. Happy smoking, and get ready to earn your pitmaster stripes!
Ready to fire up your smoker and become a brisket legend? For more tips on getting started, explore our beginner’s guide to smoking meat and browse our other guides and recipes today!