
How to Pan-Sear Meat Like a Professional Chef
For anyone aspiring to elevate their home cooking, mastering the art of the perfect pan-sear is a game-changer. It’s a foundational technique that transforms a humble piece of meat into a culinary masterpiece, boasting a deep, flavorful crust and a tender, juicy interior. This isn’t just a trick; it’s a science, and understanding it is the key to achieving restaurant-quality results in your own kitchen. This comprehensive guide will demystify the process, walking you through every critical step and sharing the secrets that professional chefs use to achieve that coveted perfect sear. By the end, you’ll have the knowledge and confidence to Pan-Sear Meat Like a Professional Chef, turning everyday meals into extraordinary dining experiences.
The Science Behind the Sear: Unlocking Flavor Through Heat
To truly Pan-Sear Meat Like a Professional Chef, you must first understand the magic that happens when meat meets high heat. This isn’t just about browning; it’s about a complex chemical reaction that unlocks incredible flavors.
The Maillard Reaction
The star of the show when searing is the Maillard reaction. This is a chemical reaction between amino acids and reducing sugars that occurs at temperatures above approximately 300°F (150°C). It’s responsible for the rich, savory, complex flavors and the appealing golden-brown color you see on seared meat, roasted vegetables, and even toasted bread.
- How it works: Unlike caramelization, which involves only sugars, the Maillard reaction involves proteins and sugars interacting. This interaction creates hundreds of new flavor compounds, which are often described as meaty, roasted, nutty, or savory.
- Why a dry surface is critical: Moisture on the surface of the meat will cause the temperature to stay at or below 212°F (100°C) as the water evaporates. The Maillard reaction cannot occur until this moisture has completely evaporated, preventing the formation of that delicious crust. This is why patting your meat dry is arguably the most crucial preparatory step to Pan-Sear Meat Like a Professional Chef.
Fat Rendering
Another important process during searing is fat rendering. The fat on the exterior of the meat, especially in cuts like a ribeye or pork chop, melts and liquifies under high heat. This rendered fat serves several purposes:
- It bastes the meat, keeping it moist.
- It contributes to the flavor of the crust.
- It provides a rich base for pan sauces.
Understanding these scientific principles is the first step to truly mastering how to Pan-Sear Meat Like a Professional Chef.
Essential Tools for Pan-Searing Like a Pro
While the technique is important, having the right equipment makes the process significantly easier and more effective.
- Heavy-Bottomed Pan:
- Cast Iron Skillet: This is the undisputed champion for searing. Cast iron excels at retaining and distributing heat evenly, which is paramount for a consistent, deep crust. Its high thermal mass means it won’t lose much heat when you add the cold meat.
- Heavy-Duty Stainless Steel Pan: A good quality, heavy-bottomed stainless steel pan can also work effectively. Avoid thin, flimsy pans as they won’t hold heat well, leading to an uneven sear.
- High Smoke Point Oil:
- Grapeseed, Avocado, Canola, or Refined Sunflower Oil: These oils have smoke points above 400°F (200°C), making them ideal for high-heat searing.
- Avoid: Extra virgin olive oil, butter (initially), and unrefined oils, as their lower smoke points will cause them to burn, creating bitter, acrid flavors.
- Tongs: Long-handled, sturdy tongs are essential for safely handling hot meat and flipping it without losing heat or spattering.
- Instant-Read Meat Thermometer: This is your secret weapon for achieving perfect doneness every single time without guessing or cutting into your beautifully seared meat. It’s impossible to consistently Pan-Sear Meat Like a Professional Chef without one. For a deeper dive into choosing the right thermometer, check out our guide to the top 5 meat thermometers.
- Wire Rack & Baking Sheet: Useful for bringing meat to room temperature and for resting after searing.
The Step-by-Step Guide to Pan-Searing Like a Professional Chef
Now that you understand the science and have the right tools, let’s break down the process into actionable steps.
1. Choose Your Meat and Bring to Temperature
- Choose Thick Cuts: This technique works best for thicker cuts of meat (at least 1 to 1.5 inches thick), such as a ribeye steak, T-bone steak, pork chop, or chicken breast. Thinner cuts cook too quickly, making it difficult to achieve a deep crust without overcooking the interior.
- Room Temperature is Key: Remove your meat from the refrigerator at least 30 minutes to 1 hour before cooking. For very thick cuts (2+ inches), even longer, up to 2 hours. A cold piece of meat hitting a hot pan will significantly drop the pan’s temperature and result in uneven cooking, with a dreaded “gray band” of overcooked meat on the exterior and a cold center.
2. Prepare the Meat: Pat Dry and Season Liberally
- Pat It Bone Dry: This cannot be stressed enough. Use several layers of paper towels to thoroughly pat all surfaces of the meat dry. Get it as dry as possible. This is the single most important step for achieving a proper crust and ensuring the Maillard reaction can occur efficiently.
- Season Generously: Once dry, season the meat liberally with coarse salt (like kosher or sea salt) and freshly cracked black pepper. Don’t be shy! The coarse salt aids in crust formation. For other meats, you might add garlic powder, onion powder, or other spices. Press the seasoning gently into the meat to ensure it adheres.
3. Heat the Pan to the Right Temperature
- High Heat is Essential: Place your heavy-bottomed pan over high heat.
- Add High Smoke Point Oil: Add just enough oil to thinly coat the bottom of the pan. You don’t want too much oil, as it can cause splattering and a greasy sear.
- Wait for the Shimmer and Smoke: Heat the oil until it begins to shimmer and you see a few wisps of smoke. This indicates the pan is screaming hot and ready for searing. If it’s smoking excessively and burning, it’s too hot; remove from heat for a moment, then reduce slightly.
4. The Initial Sear: The First Side
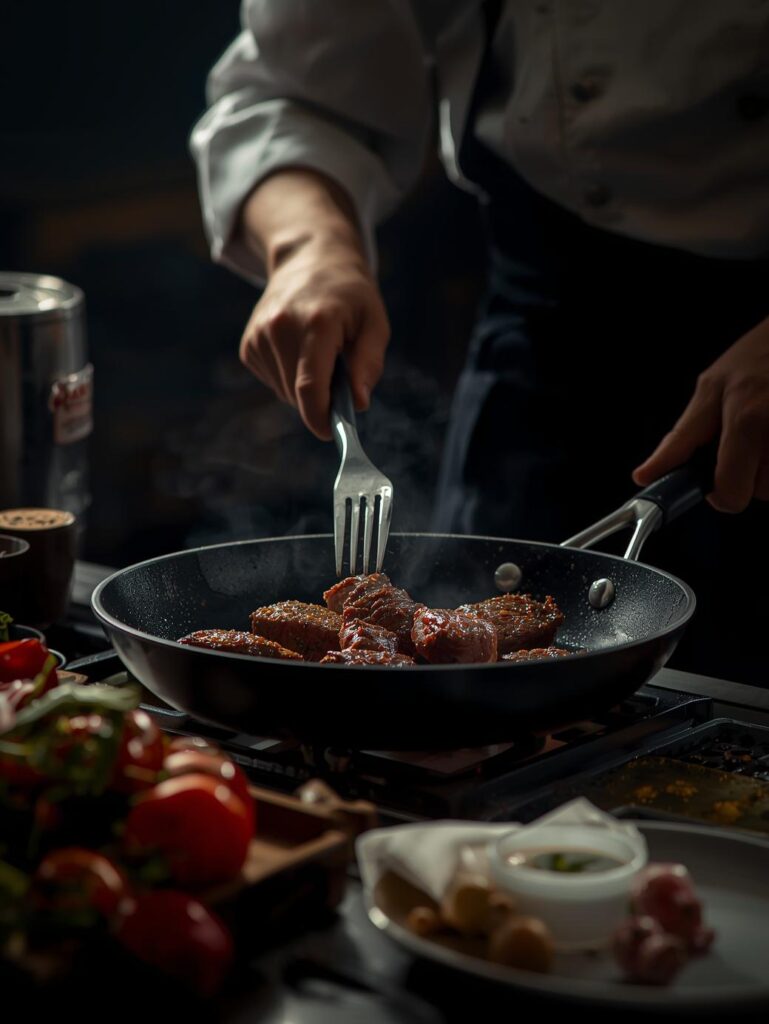
- Carefully Place Meat: Gently place the seasoned meat into the screaming hot pan. You should hear an immediate, aggressive sizzle.
- DO NOT MOVE IT: This is critical. Resist the urge to move, poke, or lift the meat. Let it sear undisturbed for 2 to 4 minutes, depending on the thickness of the meat and the heat of your pan.
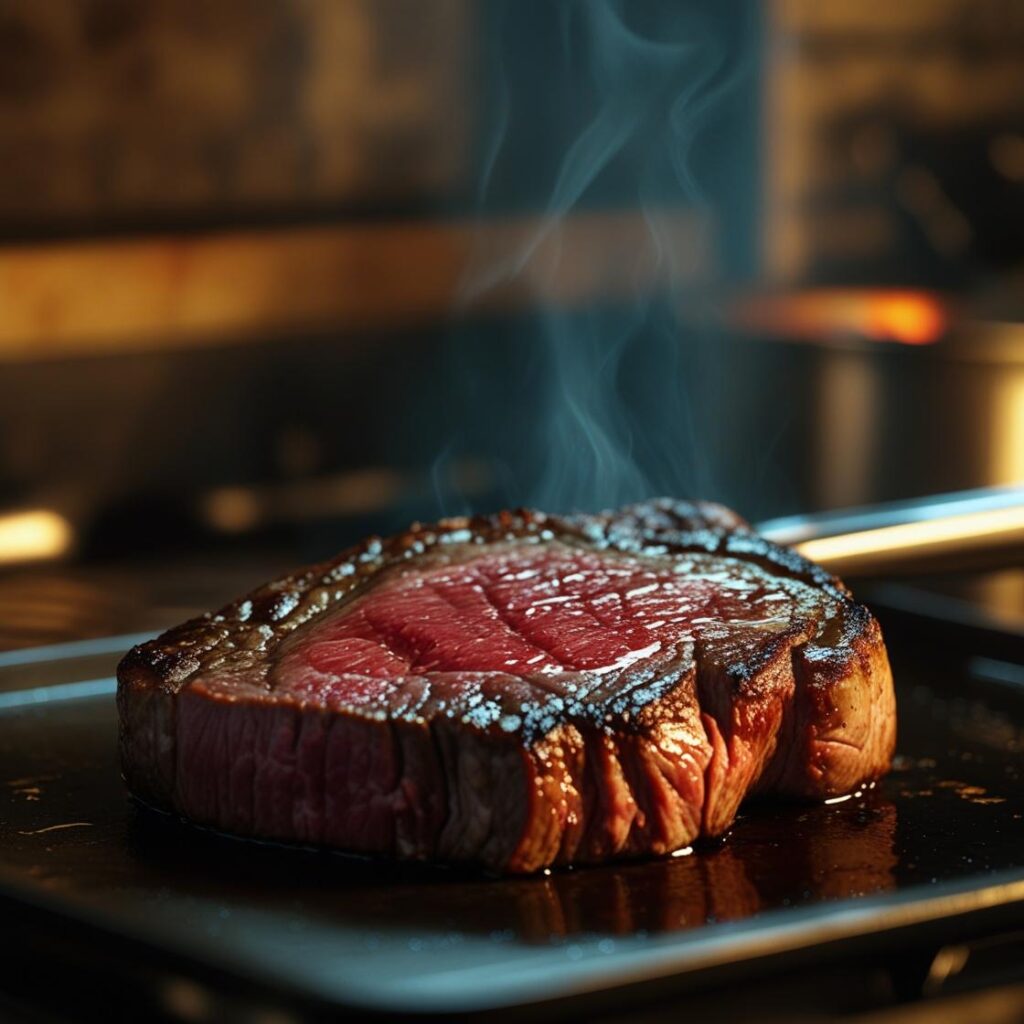
- Check for Release: The meat will naturally release from the pan once a sufficient crust has formed. If it’s sticking, it’s not ready. When you lift it with tongs, you should see a deep, dark golden-brown crust.
5. Flip and Sear the Second Side (and Edges)
- Flip Once: Using tongs, flip the meat to the other side. Sear for another 2 to 4 minutes until a similar crust develops.
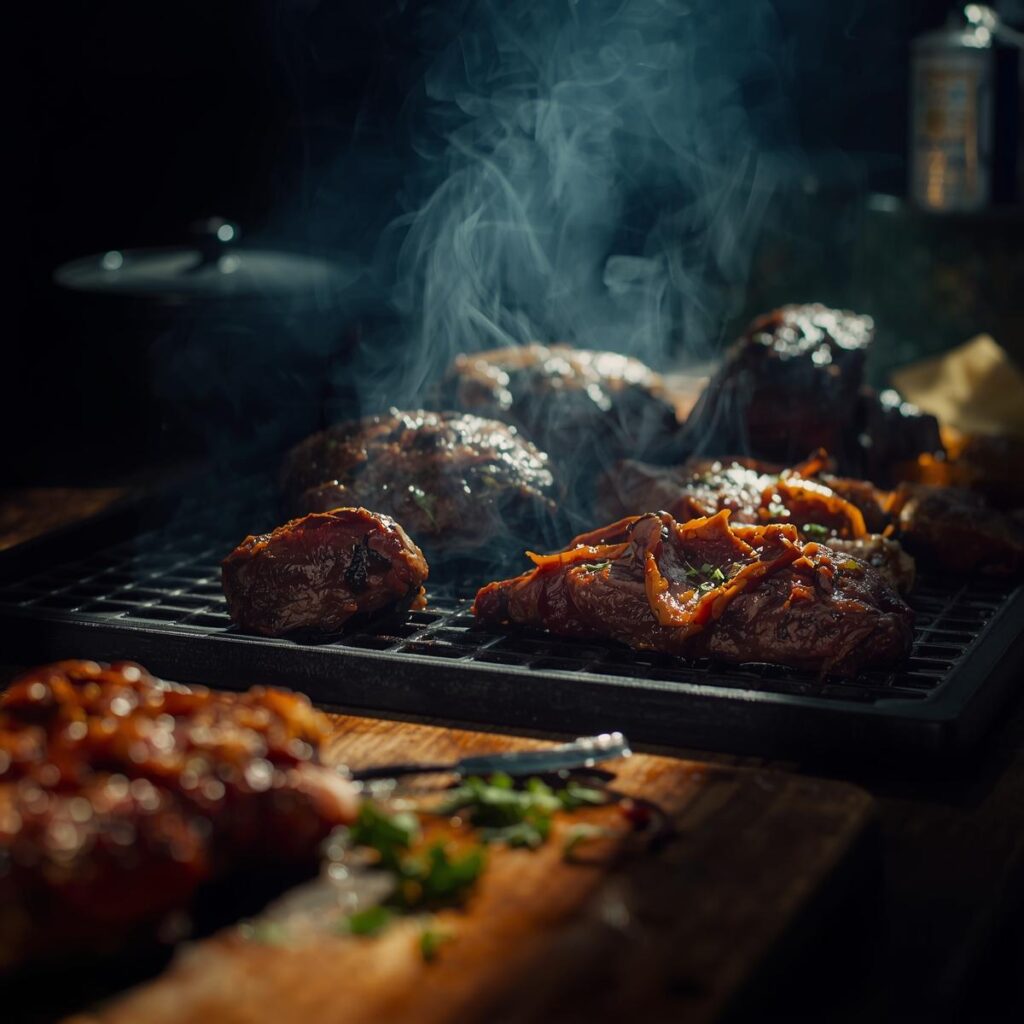
- Sear the Edges: For thicker cuts, use your tongs to stand the meat on its fatty edges (if applicable) and sear for 1-2 minutes per edge. This renders the fat, adding flavor and ensuring an even cook around the perimeter.
6. The Butter Baste and Finishing Cook
This step adds incredible richness and aromatics, and gently finishes the cooking process.
- Reduce Heat & Add Aromatics: Reduce the heat to medium-low. Add 2-3 tablespoons of unsalted butter to the pan. As the butter melts, add a few smashed cloves of garlic and a sprig or two of fresh herbs like rosemary or thyme.
- Baste Continuously: Tilt the pan slightly. Using a large spoon, continuously baste the foaming, aromatic butter over the top of the meat. Continue basting for 1 to 3 minutes, or until the meat reaches a temperature about 5-10°F (3-6°C) below your desired final doneness.
- Oven Finish (Optional for Very Thick Cuts): For very thick steaks (2+ inches), after searing and basting, you might transfer the entire oven-safe pan to a preheated oven (typically 375°F / 190°C) to gently finish cooking the interior without burning the crust. Cook until it reaches your target internal temperature. This is similar to the Smoking Steak method but without the smoke.
7. Check for Doneness with a Thermometer
- The Only True Way: Insert an instant-read meat thermometer into the thickest part of the meat, avoiding any bone.
- Target Temperatures:
- Rare: 120-125°F (49-52°C)
- Medium-Rare: 130-135°F (54-57°C) (Often ideal for most steaks)
- Medium: 140-145°F (60-63°C)
- Medium-Well: 150-155°F (66-68°C)
- Well-Done: 160°F+ (71°C+) (Generally not recommended for premium cuts).
- Remove Early: Remember to remove the meat from the heat when it is 5-10°F (3-6°C) below your target temperature, as it will continue to cook as it rests (carryover cooking). For general food safety, you can always consult the USDA food safety chart.
8. Rest Your Meat! (Crucial Step)
- Why Rest: This is perhaps the most overlooked yet vital step. As meat cooks, its muscle fibers contract, pushing all the internal juices towards the center. If you cut into the meat immediately, those precious juices will spill out onto your cutting board, leaving you with a dry, less flavorful piece of meat. Resting allows the muscle fibers to relax and reabsorb those juices, ensuring a uniformly moist and tender result.
- How to Rest: Transfer the seared meat to a clean plate or cutting board. Tent it loosely with foil (don’t wrap tightly, as this will steam the crust). Rest for 5 to 10 minutes for individual steaks, or up to 15-20 minutes for larger roasts.
- Slice Against the Grain: Once rested, slice the meat against the grain for maximum tenderness.
Common Pitfalls and Professional Solutions
Even with the best instructions, issues can arise. Knowing how to troubleshoot is key to how to Pan-Sear Meat Like a Professional Chef.
- “My Meat is Gray and Tough!”:
- Problem: Pan wasn’t hot enough, meat wasn’t dry enough, or you moved the meat too much. Overcooked.
- Solution: Ensure your pan is screaming hot. ALWAYS pat meat bone dry. Leave it undisturbed for the initial sear. Use a thermometer to avoid overcooking.
- “My Pan is Smoking Too Much/Oil is Burning!”:
- Problem: Oil’s smoke point is too low, or the pan is excessively hot.
- Solution: Switch to a high smoke point oil. If the pan is too hot, remove it from the heat for 30 seconds, then reduce the flame slightly before adding the meat.
- “My Crust is Soft/Steamed!”:
- Problem: Meat wasn’t dry, pan wasn’t hot enough, or too much meat was added at once (overcrowding).
- Solution: Pat dry. High heat. Cook in batches if necessary to maintain pan temperature.
- Pro Tip: Make a Pan Sauce: Don’t let the flavorful brown bits (fond) at the bottom of the pan go to waste! After removing the meat and resting it, deglaze the pan with a splash of wine, broth, or even water. Scrape up the fond with a wooden spoon, reduce slightly, and stir in a pat of cold butter for a quick, delicious pan sauce. This is a hallmark of how to Pan-Sear Meat Like a Professional Chef.
- Pro Tip: Butter Basting Enhancement: For extra flavor, you can also add a small knob of butter, fresh herbs (like thyme or rosemary), and smashed garlic cloves to the pan during the last minute or two of searing/basting. Tilt the pan and spoon the infused butter over the steak. For a great external resource with visual aids on how to perfect your pan-sear, a guide from Serious Eats can be very beneficial.
Conclusion
Mastering how to Pan-Sear Meat Like a Professional Chef is more than just a technique; it’s an understanding of heat, science, and patience. By embracing the Maillard reaction, utilizing the right tools, and meticulously following each step from preparation to resting, you can consistently achieve a perfectly cooked piece of meat with an irresistible crust and a wonderfully juicy interior.
This skill will not only elevate your steak dinners but also improve your cooking of chicken, pork, and even certain vegetables. So, fire up that cast-iron skillet, get your tongs ready, and embark on your journey to becoming a pan-searing master.
Ready to try your hand at cooking with professional precision? Grab your favorite cut of meat and start searing tonight!