
Expert’s Note: This is the definitive guide to the technique that revolutionized home steak cooking, featured in our Ultimate Guide to Grilling Steak. Master reverse searing, and you’ll consistently achieve steakhouse-quality results that will make you question why anyone still cooks steak the traditional way.
REVERSE SEARING 101: THE FOOLPROOF METHOD FOR PERFECT STEAK EVERY TIME
“For generations, we’ve been taught to sear first and finish gently—a method that almost guarantees a thick, overcooked ‘gray band’ around your steak while you struggle to guess the internal temperature. Reverse searing flips this process on its head, giving you something once thought impossible: perfect edge-to-edge pink from crust to center, with a sear so dramatic it crackles. This isn’t just another cooking method—it’s the elimination of guesswork from steak perfection.”

Reverse Searing 101: The Foolproof Method for Perfect Steak Every Time
Download our free Reverse Searing Step-by-Step Guide with temperature charts and timing.
The reverse sear method represents the single biggest advancement in home steak cooking since the invention of the meat thermometer. By gently bringing your steak up to temperature using low, indirect heat before applying a blistering final sear, you gain unprecedented control over doneness while eliminating the overcooked edges that plague traditional methods. This guide will take you from curious beginner to reverse sear master, explaining not just the “how” but the “why” behind every step.
🔬 THE SCIENCE BEHIND THE REVOLUTION
Understanding why reverse searing works so well will transform how you approach steak cooking forever.
⚙️ The Thermal Physics Advantage
Traditional searing creates a massive temperature gradient—extremely hot outside, cool inside. This causes several problems:
Why Traditional Searing Fails
- The Gray Band: The area between crust and center overcooks while you wait for the center to reach temperature
- Temperature Guesswork: You’re cooking blind, hoping the center reaches the right temp before the edges turn to leather
- Inconsistent Results: Different thicknesses and starting temperatures make timing unreliable
🎯 How Reverse Searing Solves These Problems
Perfect Temperature Control
You bring the steak to within 10-15°F of your target temperature slowly and evenly, then use a quick sear to finish. No guesswork, no gray bands.
Superior Crust Development
The slow cook dries the surface completely, creating the ideal conditions for an incredible, crackling sear when it hits high heat.
Even Edge-to-Edge Doneness
Because the entire steak reaches nearly the same temperature before searing, you get perfect pink from edge to edge.
🎯 IS YOUR STEAK A GOOD CANDIDATE FOR REVERSE SEARING?
Reverse searing works best with specific types of steaks. Choosing the right cut is your first step to success.
🎯 Reverse Sear Suitability Guide
| Steak Type | Thickness | Reverse Sear Rating | Notes |
|---|---|---|---|
| Ribeye, Strip, Filet Mignon | 1.5″ or thicker | ⭐⭐⭐⭐⭐ Excellent | Ideal candidates – benefit most from method |
| Porterhouse, T-Bone | 1.5″ or thicker | ⭐⭐⭐⭐☆ Very Good | Great results, handles dual textures well |
| Standard Cut Steaks | 1″ to 1.25″ | ⭐⭐⭐☆☆ Good | Works well but benefits are less dramatic |
| Thin Steaks | Less than 1″ | ⭐☆☆☆☆ Poor | Not recommended – use direct high heat instead |
| Skirt, Flank, Hanger | Any thickness | ☆☆☆☆☆ Avoid | Not suitable – these need quick, high-heat cooking |
Pro Tip: The Thickness Test. If your steak is thinner than your thumb is wide (about 1 inch), reverse searing won’t provide significant benefits. Save this method for thick, premium cuts where the dramatic improvement in edge-to-edge doneness really shines.
🛠️ EQUIPMENT YOU’LL NEED
Reverse searing requires a few key tools, but you probably already have most of them.
🎯 Essential Tools
- Instant-Read Thermometer – Non-negotiable
- Wire Rack & Baking Sheet – For air circulation
- Oven or Grill – For low-temperature cooking
- Cast Iron/Searing Surface – For final sear
- Tongs or Spatula – For handling
🚀 Nice-to-Have Upgrades
- Leave-in Probe Thermometer – For hands-off monitoring
- Cooling Rack – For resting steak
- Infrared Thermometer – To check pan temperature
- Smoking Wood – For added flavor (on grill)
📝 STEP-BY-STEP REVERSE SEAR MASTERCLASS
Follow these steps precisely for foolproof results every single time.
⏰ Step 1: Preparation (24 hours to 45 minutes before)
Dry Brining for Optimal Results
- Pat Steak Dry: Use paper towels to thoroughly dry all surfaces
- Season Generously: Apply kosher salt to all sides (about ½ tsp per pound)
- Rest on Rack: Place steak on wire rack over baking sheet, uncovered
- Refrigerate: Let rest in refrigerator for at least 45 minutes, up to 24 hours
Why this matters: Dry brining seasons the meat throughout and dries the surface for superior crust development.
🔥 Step 2: Low-Temperature Cooking
The Slow Heat Rise
- Preheat Oven/Grill: Set to 225-250°F (107-121°C)
- Place Steak: Keep steak on rack over baking sheet for air circulation
- Cook Slowly: Insert thermometer and cook until 10-15°F below target temperature
- Target Temperatures:
- Rare: Remove at 105-110°F
- Medium-Rare: Remove at 115-120°F
- Medium: Remove at 125-130°F
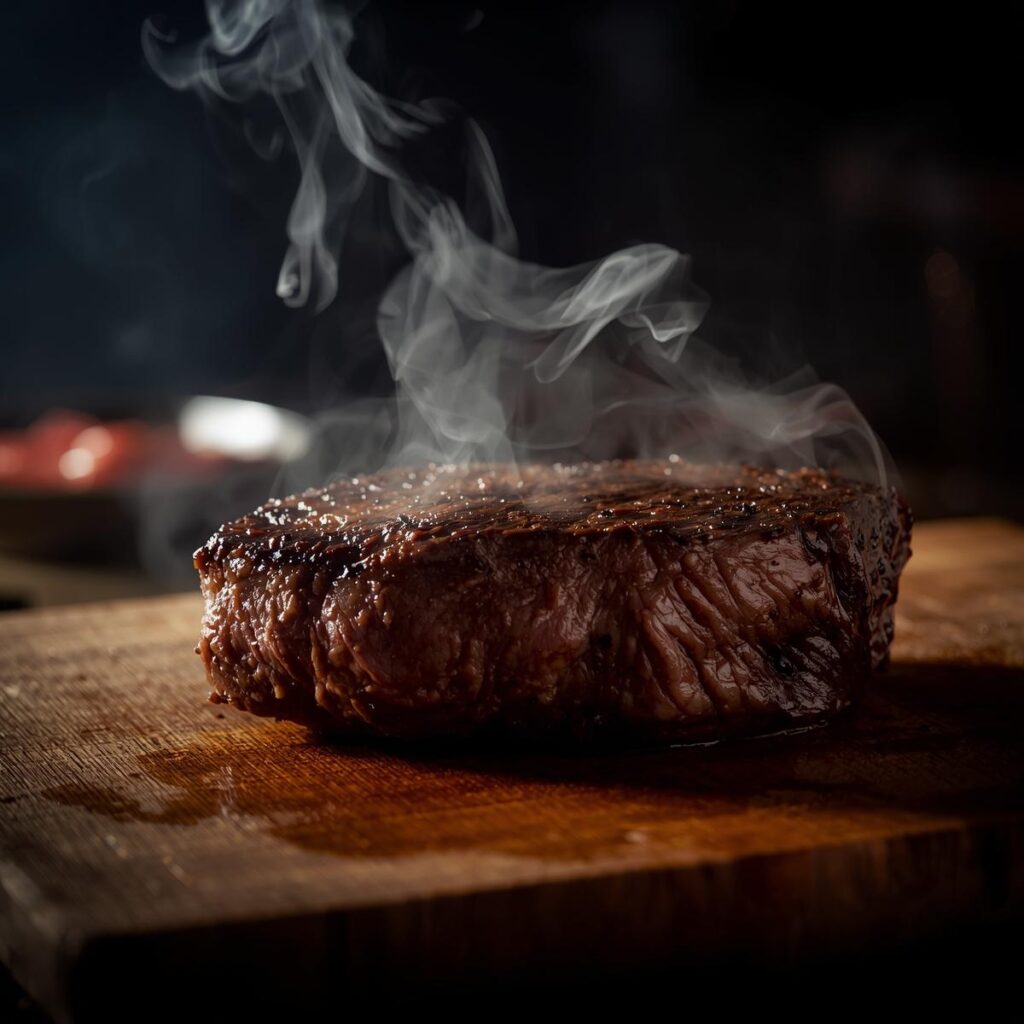
⏳ Step 3: The Critical Rest Period
This step is non-negotiable and serves two crucial purposes:
Surface Drying
As the steak rests, surface moisture evaporates, creating the perfect conditions for an incredible sear. A dry surface means better Maillard reaction.
Temperature Equalization
The internal temperature will even out, and the surface will cool slightly, preventing overcooking during the sear.
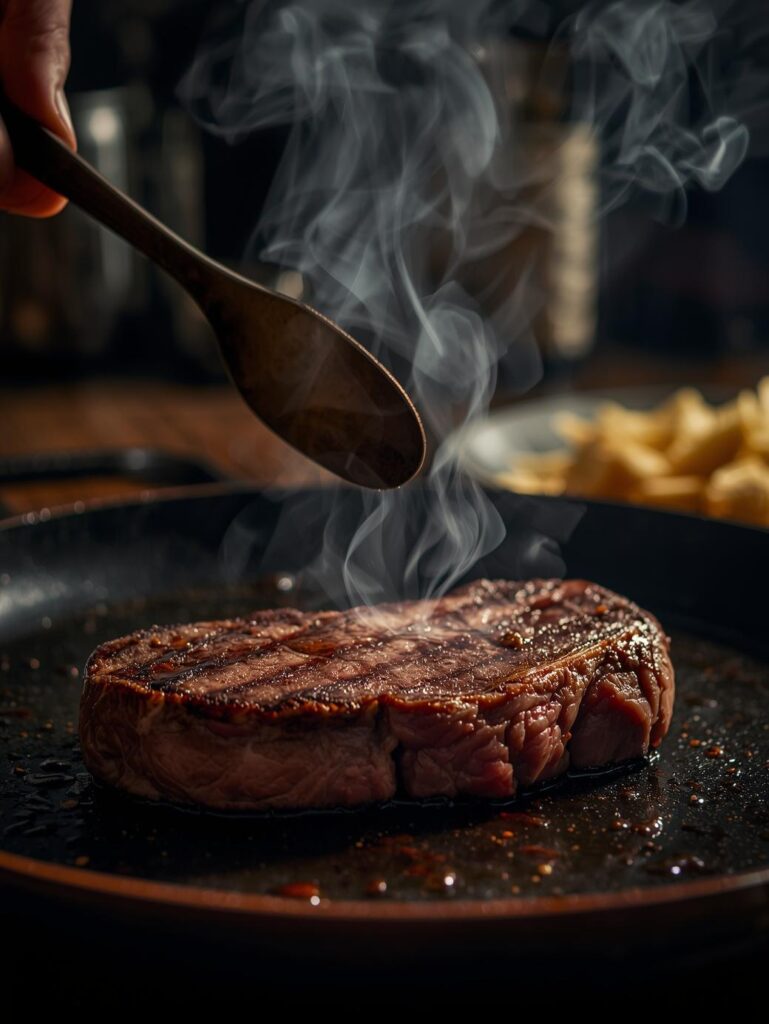
⚡ Step 4: The Blazing Hot Sear
Searing Protocol
- Heat Source: Get cast iron, grill, or carbon steel screaming hot (500°F+)
- Add Fat: Use high-smoke-point oil (avocado, grapeseed) if needed
- Sear Quickly: 45-60 seconds per side for most steaks
- Don’t Move: Let a crust develop before flipping
- Optional Butter Bast: Add butter, garlic, and herbs for last 30 seconds
🧘 Step 5: The Final Rest
Yes, you rest twice with reverse searing—and both are essential:
Second Rest Benefits
- Juice Redistribution: Allows juices disturbed by searing to reabsorb
- Carryover Cooking: Temperature will rise 5-10°F to your final target
- Perfect Serving Temp: Steak will be exactly at your desired doneness
Resting Time: 5-10 minutes on a warm plate or cooling rack
🌡️ REVERSE SEAR TEMPERATURE GUIDE
Precision temperature control is what makes reverse searing so foolproof.
🎯 Reverse Sear Temperature Targets
| Doneness | Remove from Oven | After Searing & Resting | Visual Cues |
|---|---|---|---|
| Rare | 105-110°F | 120-125°F | Cool red center, very soft |
| Medium Rare | 115-120°F | 130-135°F | Warm red center, perfect texture |
| Medium | 125-130°F | 140-145°F | Warm pink center, firming up |
| Medium Well | 135-140°F | 150-155°F | Slight pink, mostly gray-brown |
🚨 TROUBLESHOOTING COMMON REVERSE SEAR ISSUES
🎯 Reverse Sear Problem Solver
| Problem | Likely Cause | Solution |
|---|---|---|
| Steak overcooked after searing | Removed from oven too close to target temp | Remove at lower temperature (10-15°F below target) |
| Poor crust development | Surface not dry enough, heat not high enough | Rest longer before searing, get pan hotter |
| Gray band still present | Searing too long, not resting between stages | Sear 45-60 seconds max per side, ensure proper rest |
| Steak tastes steamed | Oven temperature too high during slow phase | Use 225-250°F maximum for slow cook |
| Uneven cooking | Poor air circulation in oven | Always use wire rack, don’t crowd oven |
🏁 YOUR FIRST PERFECT REVERSE SEAR
Your mission: Start with a 1.5-inch thick ribeye or strip steak. Follow these steps exactly, trusting the process even when it feels counterintuitive. When you slice into that first reverse-seared steak and see the perfect edge-to-edge pink, the dramatic crust, and taste the incredible texture, you’ll understand why this method has revolutionized home steak cooking.
Reverse searing does require more time than traditional methods, but it trades active cooking time for passive, predictable results. The 45-90 minutes of slow cooking are mostly hands-off, and the precision you gain is worth every minute.
Once you master reverse searing, you’ll never go back to guessing. This method turns steak cooking from an art into a science—and the results speak for themselves.

“Mastering reverse searing through this foolproof method gives you a powerful foundation in precision cooking, but it’s just one essential technique in the complete BBQ and grilling repertoire. Discover how reverse searing fits into the broader world of cooking methods and learn when to choose it over other approaches in our comprehensive BBQ Methods & Techniques Encyclopedia.”
Master Precision Cooking: Continue your reverse sear education with these essential guides: