
Table of Contents Hide ContentsSmoking Brisket: Complete Guide for Tender Perfection
Master Smoking Brisket with our complete guide. Learn trimming, seasoning, temperature control, and the Texas crutch for tender, juicy results every time.
Smoking brisket is the ultimate test of a pitmaster’s skill and patience. This majestic cut of beef, known for its tough texture and abundant fat, transforms through low and slow smoking into something sublime: tender, juicy, and packed with smoky flavor. Achieving this transformation requires more than just time; it demands knowledge and technique. This complete guide to Smoking Brisket will walk you through every critical step, from selecting the right packer cut to the final slice, ensuring your next brisket is your best yet.
The journey to perfect Smoking Brisket can seem daunting, but broken down into manageable steps, it becomes an achievable and incredibly rewarding process. We’ll cover the science behind the smoke, the importance of the stall, and the techniques that champion pitmasters use to create that perfect bark and smoke ring. Whether you’re a beginner or looking to refine your skills, this guide will provide the knowledge you need for tender perfection.
Understanding the Brisket: The Foundation of Success
To master Smoking Brisket, you must first understand the cut itself. A full “packer” brisket consists of two distinct muscles layered with fat.
-
The Point (or Deckle): The thicker, fattier end of the brisket. This is where burnt ends originate. It’s marbled with intramuscular fat, which makes it incredibly flavorful and forgiving.
-
The Flat: The leaner, more uniform section. It has less fat marbling, making it more prone to drying out if overcooked. This is the part most commonly sliced for sandwiches.
The key to success lies in cooking both muscles to perfection simultaneously. A layer of fat between them, known as the “fat cap,” bastes the meat from within during the long cook. Selecting a brisket with good pliability and a consistent thickness in the flat is your first step toward success. For more on beef cuts, see our [Complete Guide to Beef Ribs].
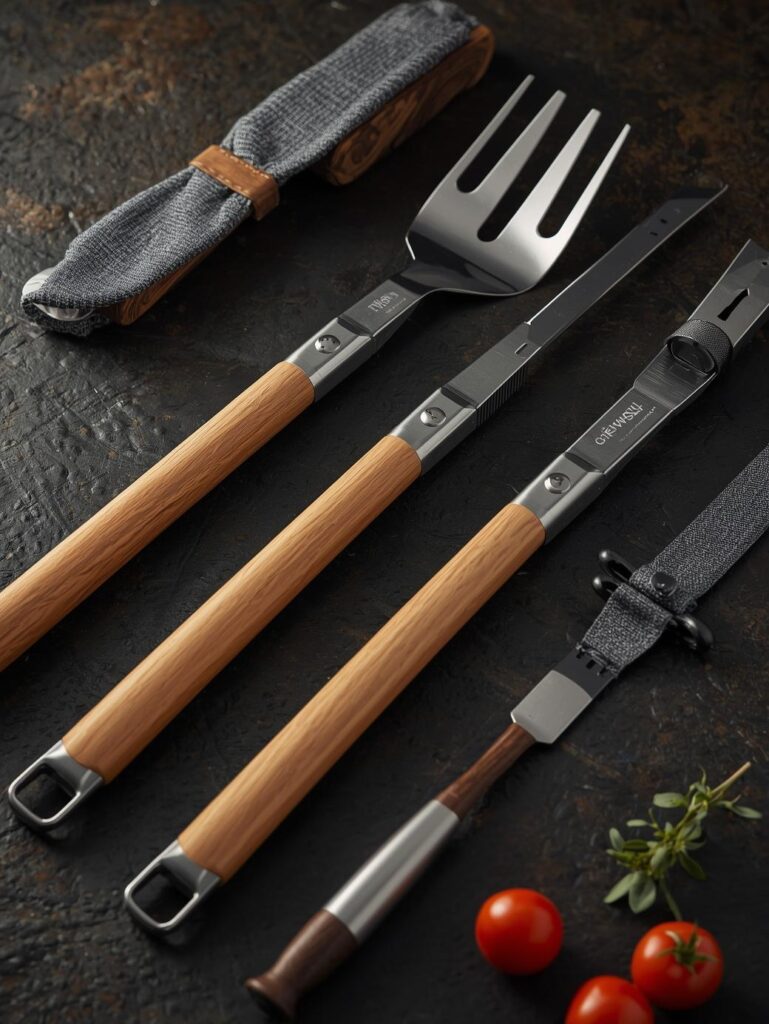
Essential Equipment for Smoking Brisket
You don’t need a competition-grade smoker, but the right tools are non-negotiable.
-
A Reliable Smoker: Offset, pellet, ceramic, or bullet smokers all work. Consistency is more important than the type.
-
Fuel & Wood: Use a base of charcoal or pellets for heat. For smoke, hardwood chunks are ideal. Post oak is the traditional Texas choice, providing a clean, mild smoke. Hickory and mesquite are stronger; use them sparingly or mixed with oak.
-
Digital Thermometer with Multiple Probes: This is your most critical tool. You need one probe to monitor the smoker’s internal temperature and at least one to monitor the brisket’s internal temperature. A leave-in probe allows you to monitor the cook without opening the smoker. We recommend checking our review of [Top-Rated Meat Thermometers].
-
Sharp Boning Knife: For precise trimming.
-
Heavy-Duty Butcher Paper or Aluminum Foil: For the wrapping stage.
-
Insulated Cooler: For the mandatory, lengthy rest.
The Step-by-Step Process for Smoking Brisket
Step 1: The Trim – Shaping for Success
Trimming is about aerodynamics and fat management. A well-trimmed brisket cooks more evenly and develops a better bark.
-
Trim the Fat Cap: Leave about 1/4 inch of fat to protect the meat. Remove any hard, waxy fat that won’t render.
-
Round the Edges: Round off any sharp corners or thin flaps of meat. These will burn long before the rest of the brisket is done.
-
Create a Uniform Shape: Aim for a consistent, aerodynamic shape so heat and smoke flow evenly over the entire surface.
Step 2: The Seasoning – Less is More
Texas-style brisket celebrates the meat’s natural flavor. A simple rub, often called a “dalmatian rub,” is classic.
-
The Classic: Coarse black pepper and kosher salt in a 50/50 or 60/40 pepper-to-salt ratio.
-
Application: Apply the seasoning generously to all sides. The bark will form from this seasoning, so don’t be shy. Let the seasoned brisket sit at room temperature for about an hour while you preheat the smoker.
Step 3: The Smoke – Low, Slow, and Steady
Preheat your smoker to 225-250°F (107-121°C). Once it’s producing clean, thin blue smoke, place the brisket on the grates with the point (thicker end) facing the main heat source.
-
Fat Cap Up or Down? This is debated. Fat cap up lets the fat baste the meat; fat cap down can protect the meat from heat if your heat source is below. Either can work.
-
The Stall: After a few hours, the internal temperature will stall around 150-170°F as evaporative cooling occurs. This can last for hours. Be patient; it’s a natural part of the process.
Step 4: The Wrap – Powering Through the Stall
When the brisket’s internal temperature hits around 165-175°F and the bark has set to a deep mahogany color, it’s time to wrap.
-
Butcher Paper vs. Foil: Butcher paper is breathable, preserving the bark’s texture while still speeding up the cook. Foil (the “Texas Crutch”) steams the meat, resulting in a softer bark but a faster cook through the stall.
-
Method: Wrap the brisket tightly to eliminate air pockets. Return it to the smoker.
Step 5: Determining Doneness – Probe Tender is Key
Brisket is done by feel, not just temperature. Start checking for tenderness when the internal temperature reaches 195°F (90°C).
-
The Test: Insert a thermometer probe or a wooden skewer into the point and the flat. It should slide in with little to no resistance, like pushing into a jar of warm peanut butter. The target temperature is usually between 200-205°F (93-96°C).
Step 6: The Rest – The Non-Negotiable Final Step
This is the most critical step for a juicy brisket. Remove the brisket from the smoker and let it rest, still wrapped.
-
The Method: Place the wrapped brisket in an empty cooler (with no ice) and pack towels around it to retain heat. Rest for a minimum of 2 hours, but 4-6 hours is even better.
-
Why it Matters: The rest allows the muscle fibers to reabsorb the juices that have been pushed to the center. Slicing too soon will release these juices, resulting in a dry brisket.
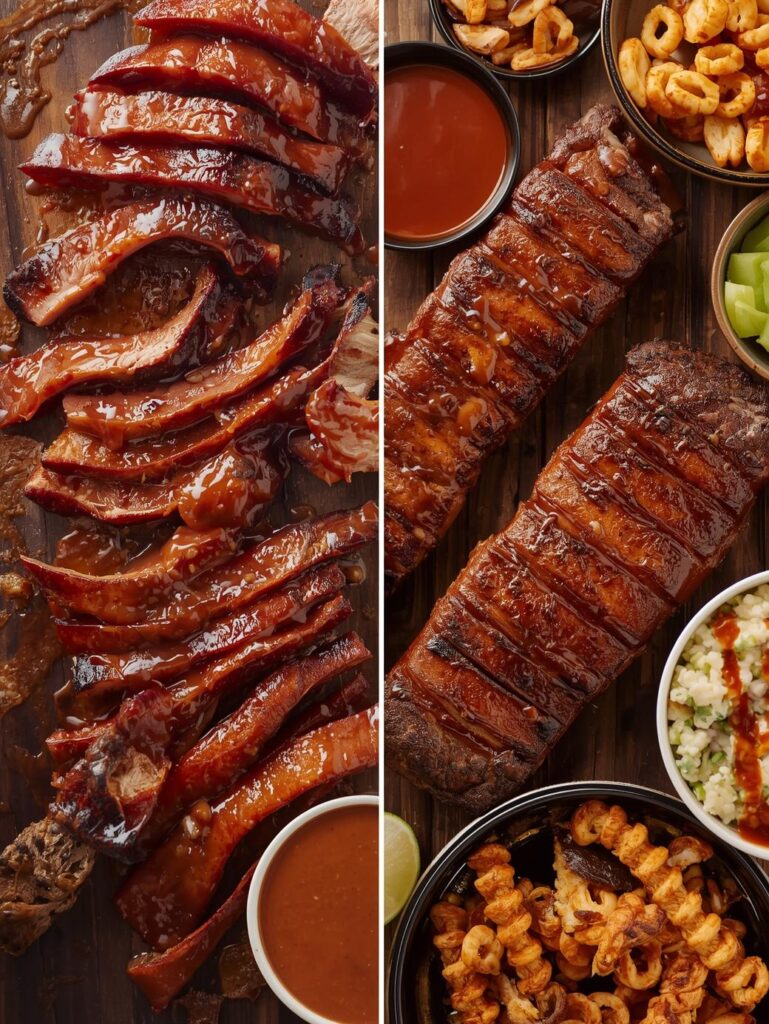
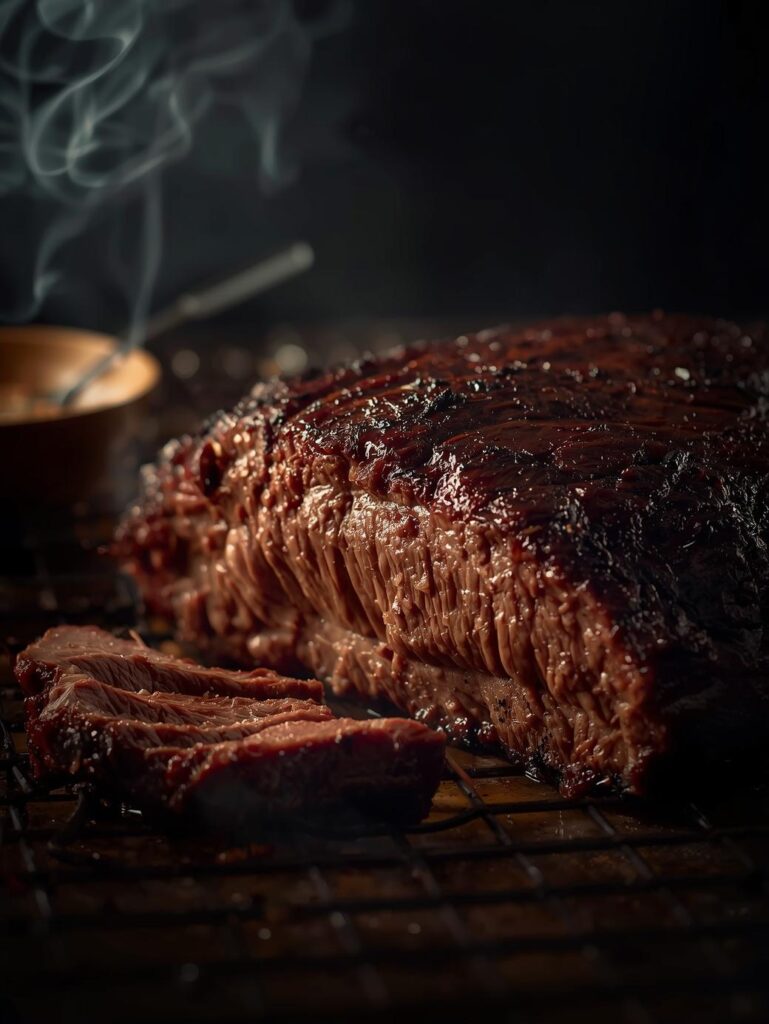
Step 7: Slicing – Against the Grain
Slicing properly is the final act of the pitmaster.
-
Separate the Point and Flat: Find the layer of fat between the two muscles and slice to separate them.
-
Slice the Flat: Identify the direction of the muscle fibers (the grain) and slice perpendicularly (against the grain) into pencil-width slices.
-
Slice the Point: Rotate the point 90 degrees and slice against the grain for serving, or cube it for burnt ends.
Pro Tips for Smoking Brisket Perfection
-
Spritzing: After the first 3-4 hours, spritz the brisket every 60-90 minutes with water, apple cider vinegar, or apple juice to prevent the surface from drying out and to aid bark formation.
-
Don’t Peek: Maintain a “if you’re lookin’, you ain’t cookin'” mentality. Every time you open the smoker, you lose heat and smoke, adding significant time to your cook.
-
Start Early: A full packer brisket can take 1 to 1.5 hours per pound. It’s better to finish early and rest the brisket in a cooler for several hours than to have hungry guests waiting.
Smoking Brisket FAQ
Q: How long does it take to smoke a brisket?
A: A general rule is 1 to 1.5 hours per pound at 225-250°F. However, the stall can greatly extend this. A 12-pound brisket can take 12-16+ hours. Always cook to probe tenderness, not time.
Q: What is the best wood for smoking brisket?
A: Post oak is the traditional choice for Central Texas-style brisket. It provides a clean, mild smoke that doesn’t overpower the beef. Hickory is also a popular, stronger-flavored alternative.
Q: Why did my brisket turn out tough?
A: The most common reason is undercooking. The brisket didn’t reach a high enough internal temperature for the collagen to fully render into gelatin. Next time, cook until it’s truly probe-tender.
Q: What is the “Texas Crutch”?
A: It’s the method of wrapping the brisket in aluminum foil during the cook to power through the stall faster. It prevents the brisket from drying out and significantly reduces cooking time, though it can soften the bark.
Conclusion: Your Journey to Brisket Mastery
Smoking Brisket is a pursuit that blends art, science, and patience. While it demands respect for the process, the reward—a perfectly tender, smoky, and juicy brisket—is worth every minute. Remember the key pillars: a good trim, simple seasoning, steady temperatures, the wrap, and, above all, a long, patient rest.
Do not be discouraged by a less-than-perfect first attempt. Each brisket is a learning experience. Now that you’re armed with this knowledge, you’re ready to embark on your own brisket journey. Fire up your smoker, be patient, and get ready to create something unforgettable. Share your brisket success stories with us using #BrisketPerfection.
Further Reading:
- Smoking Beef Short Ribs: The King of BBQ Flavor – 2025
- Smoking Pulled Pork: Low and Slow for Maximum Flavor
- Smoking Ribs: Fall-Off-the-Bone Every Time – 2025
- Smoking Salmon: Step-by-Step for Rich, Smoky Flavor – 2025
You Might Also Like:
- Smoking Sausages: How to Get the Perfect Snap
- Smoking Steak – The Meat Master USA – 2025
- Smoking Turkey: Juicy Meat with Crispy Skin – 2025/26 ed.
- Smoking vs Grilling: The Ultimate Guide to Perfect BBQ [2025]