Table of Contents Hide ContentsSmoking Cheese: Cold Smoking Techniques Explained
Master Smoking Cheese with our guide to cold smoking techniques. Learn how to infuse creamy cheeses with smoky flavor without melting them.
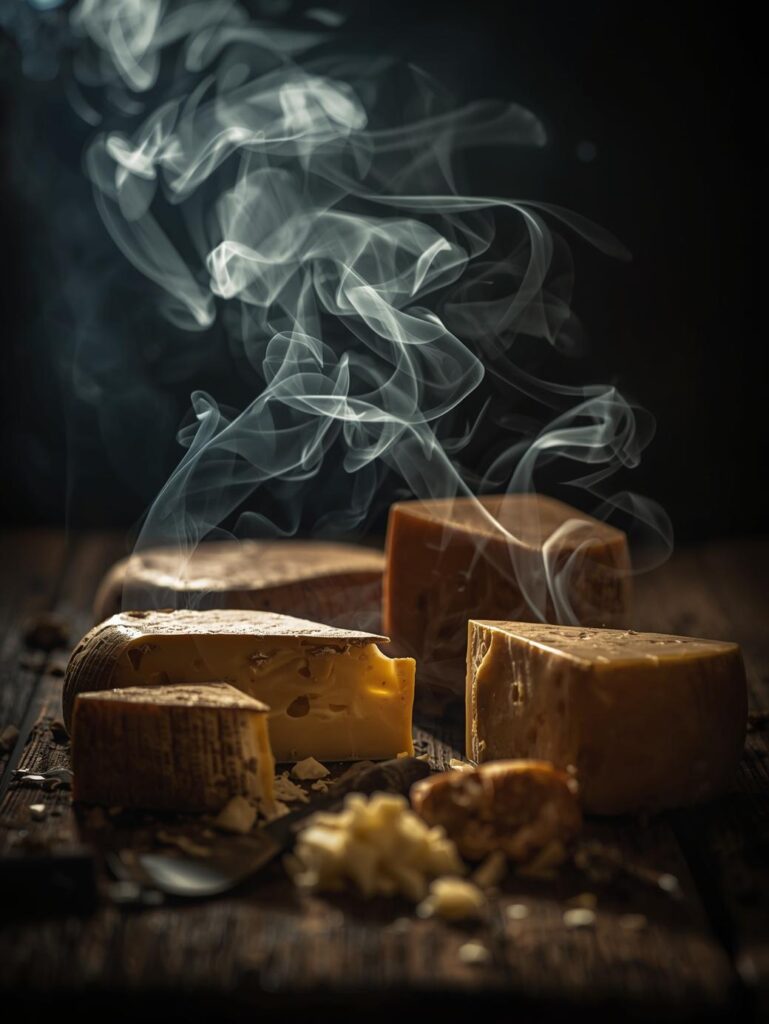
The rich, creamy tang of cheese combined with the deep, woody notes of smoke is a match made in culinary heaven. However, the process of Smoking Cheese is fundamentally different from smoking meat. You can’t simply place a block of cheddar in your hot smoker—it would instantly melt into a puddle. The secret lies in cold smoking, a technique that infuses flavor using smoke alone, without applying significant heat. This guide will demystify the process of Smoking Cheese, walking you through the essential equipment, techniques, and safety tips to create your own gourmet smoked cheeses at home.
Cold smoking might sound intimidating, but with the right approach, it’s an accessible and incredibly rewarding project. The goal is to keep the cheese below 90°F (32°C) while exposing it to cool smoke for several hours. This allows the smoke particles to adhere to the cheese’s surface and penetrate slightly, creating a complex flavor profile without compromising its texture. Let’s explore the techniques that make this possible.
What is Cold Smoking? The Fundamental Principle
Cold smoking is the process of flavoring food with smoke at a temperature low enough that the food does not cook. For cheese, this means maintaining an environment typically below 90°F (32°C), and ideally between 65-80°F (18-27°C).
This is the opposite of hot smoking, which cooks and tenderizes food at temperatures above 165°F (74°C). When Smoking Cheese, the cold smoke merely deposits flavor compounds onto the surface of the cheese. The cheese itself remains solid and firm throughout the process. The flavor then mellows and distributes during a crucial post-smoke resting period.
Essential Equipment for Cold Smoking Cheese
You don’t need a professional cold smoker, but you do need a way to generate smoke remotely from the cooking chamber.
1. The Smoke Generator
This is the most critical piece. You need a device that produces smoke without intense heat.
-
Smoke Tube or Maze: These are stainless steel tubes or labyrinths that you fill with wood pellets or dust. You light one end, and it smolders for hours with very little heat output. This is the most popular and affordable method.
-
Electric Smoke Generator: Some specialized devices use a small heating element to smolder wood chips or dust with minimal heat.
-
DIY “Mailbox” Mod: A common hack involves connecting a separate box (like a metal mailbox) to your grill or smoker using dryer ducting. You place a smoke generator in the mailbox, and the smoke travels through the duct into the main chamber, cooling along the way.
2. The Smoking Chamber
This is where the cheese will be placed. It can be almost any contained space:
-
A Kettle Grill: Excellent because you can keep the vents barely open to allow smoke in but let heat out.
-
A Cardboard Box: A surprisingly effective, disposable option for a one-time use. Always use extreme caution and monitor constantly.
-
A Dedicated Cold Smoker: The ideal but most expensive option.
3. Other Essentials
-
Wire Racks: To place the cheese on, allowing smoke to circulate on all sides.
-
Digital Thermometer: To monitor the temperature inside the chamber vigilantly.
-
Wood Pellets or Dust: Use fine sawdust or pellets designed for smoking. Mild woods are best.
Step-by-Step: The Cold Smoking Process for Cheese
Step 1: Choose and Prepare the Cheese
Best Cheeses for Smoking: Hard and semi-hard cheeses hold up best.
-
Excellent Choices: Cheddar, Gouda, Monterey Jack, Pepper Jack, Swiss, Provolone, Mozzarella (low-moisture, block form).
-
Avoid: Soft, high-moisture cheeses like Brie, Camembert, or fresh mozzarella, as they are more delicate.
Preparation:
-
Cut the cheese into blocks no larger than 1 lb each. This increases the surface area for smoke absorption.
-
Let the cheese sit uncovered in the refrigerator for a few hours to dry the surface slightly. A dry surface accepts smoke better.
Step 2: Wait for the Right Weather
Ambient temperature is everything. The best time to cold smoke cheese is during the cooler months.
-
Ideal Conditions: A cool, dry day with temperatures between 40-60°F (4-15°C). This makes it easy to keep your smoking chamber cool.
-
Avoid: Hot, sunny days. If the ambient temperature is above 70°F (21°C), it becomes very difficult to prevent the cheese from melting.
Step 3: Set Up Your Cold Smoking System
-
Arrange Your Chamber: Place your wire racks inside the grill or box.
-
Position the Smoke Generator: If using a tube or maze, place it as far away from the cheese as possible. For a mailbox mod, connect the ducting.
-
Light the Smoker: Follow the manufacturer’s instructions to light your pellet tube or dust maze. You want a steady stream of thin, blue smoke, not thick, white smoke.
Step 4: Monitor the Smoke and Temperature
-
Place the Cheese: Once the smoke is clean, place the cheese blocks on the racks, ensuring space between them for circulation.
-
Close the Lid: Close the chamber, but leave vents wide open to allow heat to escape. The goal is a smoke-filled but cool environment.
-
Watch the Temp: Place a thermometer probe next to the cheese. If the temperature starts climbing above 90°F (32°C), you may need to open the lid briefly or use frozen water bottles placed in the chamber to cool it down.
Step 5: Smoking Time and Wood Selection
-
Smoking Time: Smoke the cheese for 2 to 4 hours. Taste is subjective, so you can sample a small piece after 2 hours to see if you want a stronger flavor.
-
Wood Choices: Use mild woods to avoid overpowering the delicate cheese.
-
Apple: Sweet, mild, and classic for cheese.
-
Cherry: Slightly sweet and fruity.
-
Alder: Very mild, excellent for fish and cheese.
-
Pecan: Nutty and sweet.
-
Avoid strong woods like hickory or mesquite for your first attempts.
-
The Critical Step: Resting and Mellowing
When the cheese first comes out of the smoker, the flavor can be sharp and acrid. Do not eat it immediately! The resting period is non-negotiable.
-
Wrap Tightly: Individually wrap each block of cheese tightly in parchment paper or wax paper, then again in plastic wrap.
-
Refrigerate: Place the wrapped cheese in the refrigerator.
-
Wait: Let it rest for at least 2 weeks. The smoke flavor will mellow, distribute evenly throughout the cheese, and transform from harsh to smooth and complex.
Pro Tips for Success
-
Freeze the Cheese First: For an extra layer of safety on a warmer day, freeze the cheese blocks for 30-60 minutes before smoking. This gives you a larger temperature buffer.
-
Don’t Over-smoke: It’s easier to add more smoke flavor in a future batch than to fix a batch that tastes like an ash tray. Start with 2 hours.
-
Vacuum Seal for Storage: After the initial 2-week mellowing, vacuum sealing is the best way to store smoked cheese for months.
Smoking Cheese FAQ
Q: Can I cold smoke cheese without special equipment?
A: It’s challenging. The simplest method is to use a pellet tube inside a standard grill on a very cold day. Specialized equipment like a tube or maze makes the process much more reliable and safe.
Q: How long does smoked cheese last?
A: Properly vacuum-sealed and refrigerated, cold-smoked cheese can last for several months. If wrapped in plastic, consume within 2-3 weeks.
Q: Why does my smoked cheese taste bitter?
A: Bitterness is usually caused by thick, white smoke (creosote) or over-smoking. Ensure your smoke generator is producing clean, thin, blue smoke, and don’t exceed 4 hours of smoking time.
Q: Can I hot smoke cheese?
A: Not successfully. Hot smoking temperatures will melt the cheese. The “smoked” cheeses you see that are soft or spreadable are typically made with liquid smoke flavoring.
Conclusion: Unlock a World of Flavor
Smoking Cheese through cold smoking is a simple yet profound way to elevate a everyday ingredient into a gourmet treat. While it requires patience—both during the smoking process and the subsequent resting period—the payoff is immense. The ability to create custom, wood-smoked cheeses from the comfort of your home is a unique and satisfying skill.
Now that you understand the techniques, wait for a cool day, gather your equipment, and embark on your first cheese-smoking adventure. The result will be a delicious testament to your patience and skill. Share your creations with us using #SmokedCheeseMaster.
Further Reading:
- Smoking Salmon: Step-by-Step for Rich, Smoky Flavor
- Smoking Sausages: How to Get the Perfect Snap
- Smoking Steak – The Meat Master USA
- Smoking Turkey: Juicy Meat with Crispy Skin
- Smoking vs Grilling: The Ultimate Guide to Perfect BBQ
You Might Also Like:
- Smoking Beef Short Ribs: The King of BBQ Flavor
- Smoking Brisket: Complete Guide for Tender Perfection
- Smoking Chicken Wings: Flavor Bombs for Game Day
- Smoking Pulled Pork: Low and Slow for Maximum Flavor
- Smoking Ribs: Fall-Off-the-Bone Every Time

