
Table of Contents Hide ContentsSmoking Pulled Pork: Low and Slow for Maximum Flavor
Master the art of Smoking Pulled Pork. Our guide covers wood selection, temperature control, and the low & slow method for juicy, flavorful results. 150 characters.
There’s a special kind of magic that happens when a tough, fatty cut of pork transforms into something succulent, smoky, and fall-apart tender. This magic is the direct result of patience and fire, the core principles behind Smoking Pulled Pork. This iconic barbecue dish isn’t just a meal; it’s an event. Achieving that perfect bark, the deep smoke ring, and the juicy, shreddable texture requires a low and slow approach that unlocks maximum flavor. This guide will walk you through every step, from selecting the right cut to the final pull, ensuring your next Smoking Pulled Pork project is your best yet.
The journey to perfect Smoking Pulled Pork is a rewarding one that demystifies the process. While it takes time, the active work involved is minimal. It’s about understanding the science of heat, smoke, and meat. We’ll cover the essential equipment, the importance of the “stall,” and the techniques that pitmasters use to create this barbecue masterpiece. Get ready to fire up your smoker and embark on a culinary adventure.
The Foundation: Choosing the Right Cut for Smoking Pulled Pork
Not every piece of pork is destined to become pulled pork. The key is to choose a cut rich in collagen and intramuscular fat. This connective tissue, when exposed to low heat for a long time, breaks down into gelatin, creating incredible moisture and tenderness.
The Champion: Pork Shoulder (Boston Butt)
This is the undisputed king of Smoking Pulled Pork. Despite its name, it comes from the upper part of the pig’s front shoulder.
-
Why it works: It’s marbled with fat and full of connective tissue, making it ideal for long cooking.
-
What to look for: A well-marbled roast with a firm, white fat cap. A size of 6-8 pounds is perfect for home smoking.
The Alternative: Picnic Shoulder
Coming from the lower part of the shoulder, the picnic roast is also a good option. It’s often a bit leaner and contains the shank bone. It can be used interchangeably with the Boston butt, though it may take slightly less time to cook.
Essential Equipment for Smoking Pulled Pork
You don’t need a professional rig to succeed. Here’s what you’ll need:
-
A Smoker: Anything from a simple charcoal kettle grill to an electric or pellet smoker will work. The key is the ability to maintain a steady, low temperature.
-
Fuel & Wood: Charcoal or wood pellets for heat. For smoke flavor, use wood chunks or chips. The best woods for Smoking Pulled Pork are:
-
Hickory: The classic choice, providing a strong, bacon-like flavor.
-
Apple or Cherry: Fruitwoods that offer a milder, sweeter smoke.
-
Oak: A great middle-ground, offering a heavy smoke flavor without overpowering.
-
-
Digital Thermometer: This is non-negotiable. A good thermometer with a probe that can stay in the meat throughout the cook is essential for monitoring the internal temperature without opening the smoker. Check out our review of [Top-Rated Meat Thermometers].
-
Heavy-Duty Aluminum Foil or Butcher Paper: For the crucial wrapping stage.
-
Insulated Cooler: For the mandatory rest after cooking.
The Step-by-Step Process for Smoking Pulled Pork
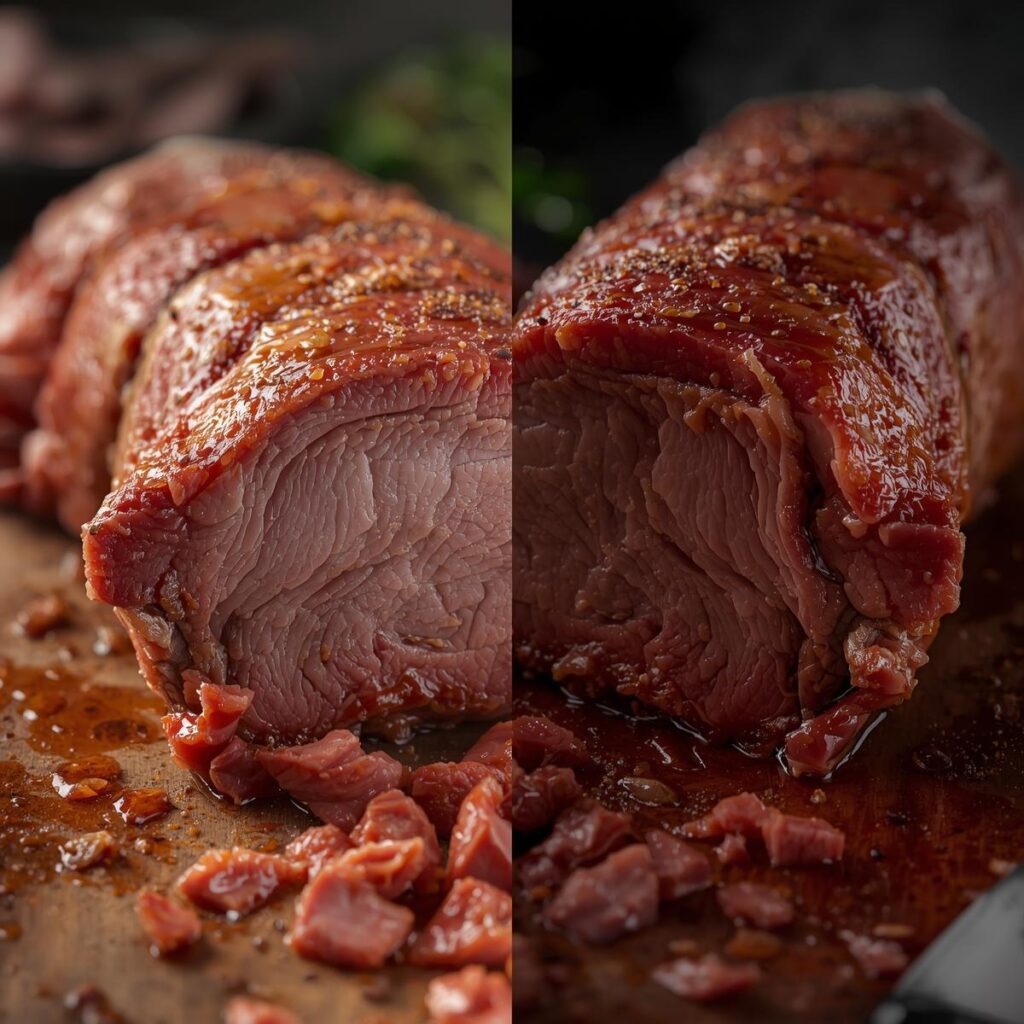
Step 1: Preparation and Trimming
Remove the pork shoulder from its packaging and pat it dry with paper towels. Place it on a cutting board, fat-side up. Using a sharp boning knife, trim any hard, thick areas of the fat cap down to about ¼-inch thickness. This allows the seasoning to penetrate and the smoke to flavor the meat. Leave a thin layer to baste the meat during the long cook.
Step 2: Applying the Rub
A great bark starts with a great rub. You can use a store-bought pork rub or make your own. A simple, effective rub might contain:
-
Kosher Salt
-
Coarse Black Pepper
-
Brown Sugar
-
Paprika
-
Garlic Powder
-
Onion Powder
-
Chili Powder
Generously apply the rub to all sides of the pork shoulder, pressing it into the meat. For the best flavor, let the seasoned pork sit in the refrigerator, uncovered, for at least 4 hours or preferably overnight. This allows the salt to penetrate the meat in a process known as dry brining. Learn more about this technique in our guide to [dry brining].
Step 3: Setting Up the Smoker and The Smoke
About 30 minutes before you plan to cook, preheat your smoker to a stable 225°F to 250°F (107°C to 121°C). This low temperature is critical for the slow breakdown of collagen. Add your wood chunks or chips to the hot coals or to your smoker’s box. Once the smoker is smoking cleanly (thin, blue smoke instead of thick, white smoke), you’re ready to cook.
Step 4: The Cook: Patience is a Virtue
Place the pork shoulder directly on the grill grates, fat-side up. Insert your thermometer probe into the thickest part of the meat, avoiding the bone if present. Close the lid and walk away. The goal is to maintain that steady 225-250°F temperature. Resist the urge to open the lid frequently, as this causes significant heat loss and extends the cooking time.
Step 5: Navigating “The Stall”
After a few hours, you’ll notice the internal temperature of the pork stall, often around 150-170°F. This is completely normal. The “stall” happens when the meat sweats and evaporative cooling prevents the temperature from rising. This can last for several hours. The key is patience. You can power through it, or you can wrap the pork in foil or butcher paper to push through the stall faster. Wrapping will soften the bark but speed up the cook.
Step 6: Knowing When It’s Done
Smoking Pulled Pork is done when it’s “probe tender,” not just when it hits a specific temperature. Start checking around 195°F. The pork is ready when a thermometer probe or a skewer slides into the meat with little to no resistance, like pushing into a stick of soft butter. The target temperature is usually between 195°F and 205°F (90°C and 96°C).
Step 7: The Crucial Rest
Once the pork is probe-tender, carefully remove it from the smoker. Wrap it tightly in foil and then in an old towel. Place it in an insulated cooler (with no ice) to rest for at least 1 hour, but preferably 2. This rest period is not optional. It allows the juices to redistribute throughout the meat, resulting in a much juicier final product.
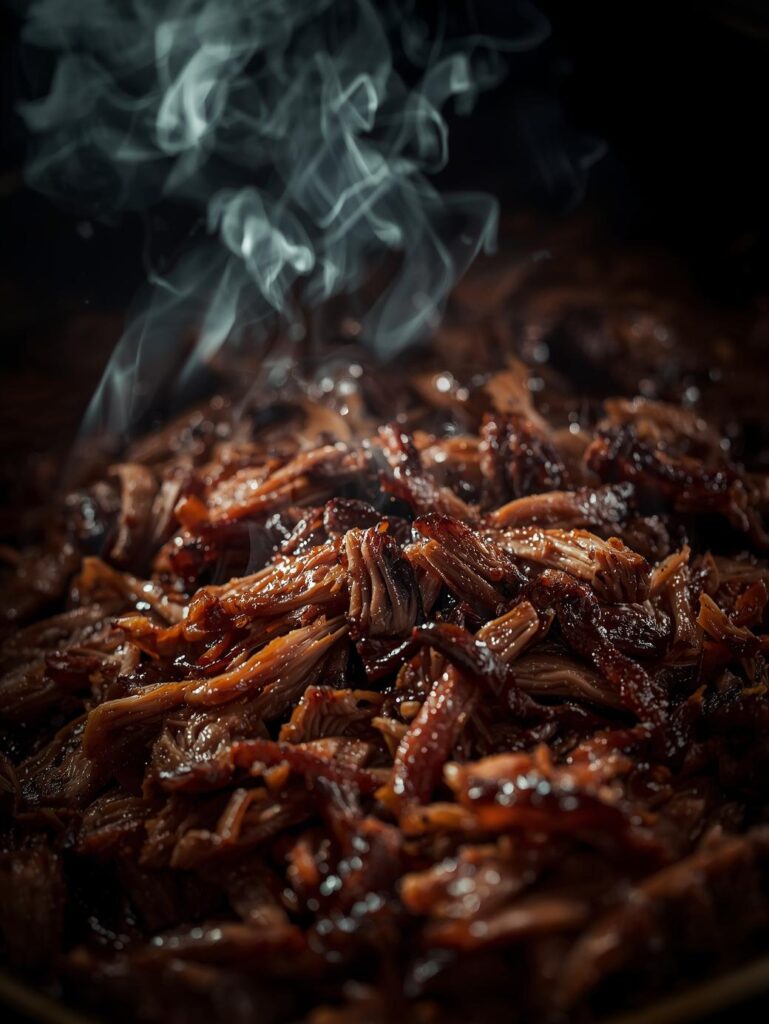
Step 8: The Pull
After the rest, place the pork shoulder in a large pan. Using insulated gloves or two forks, begin to pull the meat apart. It should shred easily. Discard any large chunks of fat. You can then mix the shredded meat with your favorite barbecue sauce, or serve the sauce on the side. For sauce inspiration, see our [BBQ sauces guide].
Pro Tips for the Best Smoking Pulled Pork
-
Spritzing: Every hour or two after the first 3 hours, you can spritz the pork with apple cider vinegar, apple juice, or a combination. This helps keep the surface moist and aids in bark formation.
-
The Bone Test: If your pork shoulder has a bone, it’s done when the bone can be wiggled freely and pulled out cleanly.
-
Saving the Juices: After resting, you will find flavorful juices in the foil. Skim off the excess fat and drizzle these juices back over the pulled pork for an extra boost of moisture and flavor.
Smoking Pulled Pork FAQ
Q: How long does it take to smoke a pork shoulder?
A: The general rule is 1.5 to 2 hours per pound at 225°F. However, this is just an estimate. The stall can significantly extend the time. A 8-pound shoulder can take anywhere from 12 to 16 hours. Always cook to tenderness, not time.
Q: What is the best wood for smoking pulled pork?
A: Hickory is the classic, robust choice. Fruitwoods like apple and cherry are excellent for a sweeter, milder profile. A blend of hickory and apple is a popular combination. Our [Ultimate Guide to Smoking Woods] has more details.
Q: Can I smoke a pork shoulder overnight?
A: Yes, but it requires preparation. Use a smoker that can hold temperature steadily for hours, and a reliable thermometer with a high-temperature alarm to alert you if anything goes wrong.
Q: What internal temperature is safe for pulled pork?
A: According to the <a href=”https://www.fsis.usda.gov/food-safety/safe-food-handling-and-preparation/food-safety-basics/safe-temperature-chart” target=”_blank” rel=”noopener nofollow”>USDA</a>, pork is safe to eat at 145°F. However, for pulled pork, you need to go much higher (195-205°F) to break down the connective tissue and make it shreddable.
Conclusion: Your Barbecue Masterpiece Awaits
Smoking Pulled Pork is a true test of a pitmaster’s patience and skill, but the rewards are immense. The process of transforming a humble pork shoulder into a tender, flavorful feast is incredibly satisfying. By following these steps—focusing on low temperatures, patient cooking, and a proper rest—you are guaranteed to produce a dish that will amaze your family and friends.
Remember, the journey is part of the experience. So fire up your smoker, embrace the wait, and get ready to create the best Smoking Pulled Pork of your life. We’d love to see your results! Share your pulled pork masterpieces with us on social media using the hashtag #SmokingPulledPorkMaster.
Further Reading:
- BBQ Grilling vs Smoking: Key Differences and When to Use Each Method
- BBQ Guides: Your Ultimate Resource for Grilling & Smoking Mastery
- BBQ Mistakes to Avoid: Expert Tips for Perfect Grilling
- BBQ: More Than a Meal: Your Guide to Grilling & Smoking
You Might Also Like:
- BBQ Recipes: Grill, Smoke & Sear Your Way to Delicious Meals
- BBQ Rubs & Sauces Guide
- BBQ Styles: A Global Guide
- BBQ Tips: 25 Pro Secrets for Perfect Grilling and Smoking


Pingback: Smoking Brisket: Complete Guide for Tender Perfection
Pingback: The Ultimate Grilling and Smoking Guide
Pingback: Smoking Cheese: Cold Smoking Techniques Explained
Pingback: BBQ Techniques Explained: A Master Guide