
Master authentic Texas-style brisket with our ultimate guide. Learn how to choose, trim, season, and smoke a brisket to perfection with a perfect smoke ring and bark. Foolproof steps for beginners and pros.
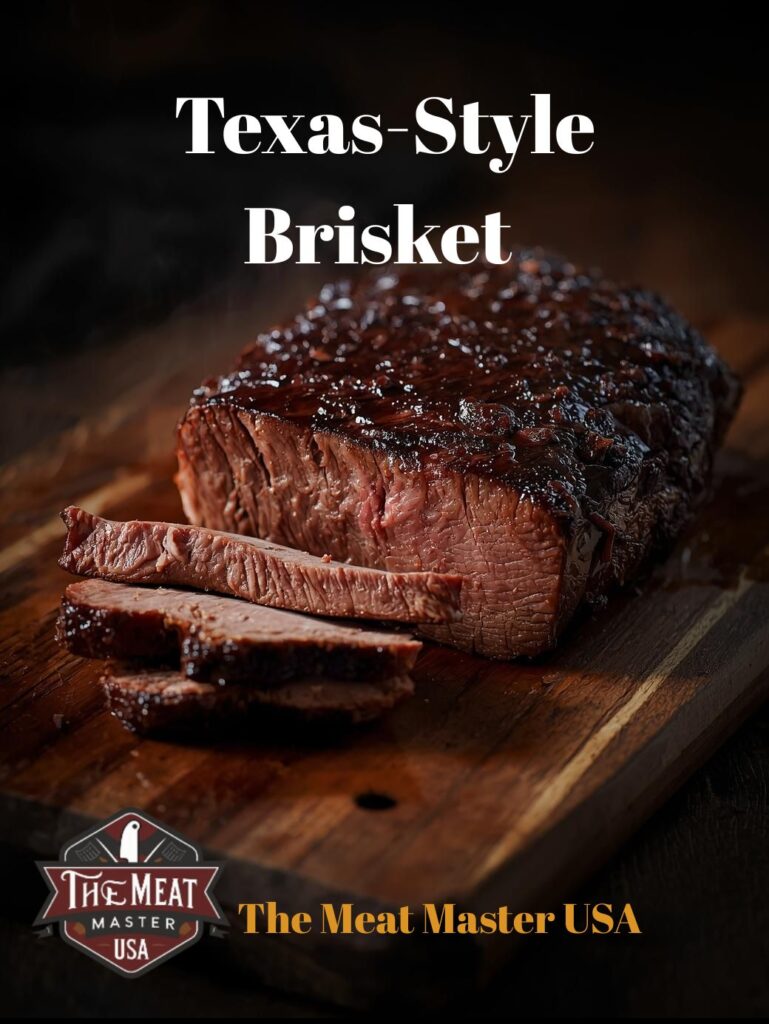
How to Smoke a Texas-Style Brisket
There is no greater test of a pitmaster’s patience and skill than a Texas-style brisket. It is a masterpiece of low-and-slow cooking, a glorious slab of beef transformed by smoke and time. The perfect Texas brisket has a deep black “bark,” a beautiful pink “smoke ring,” and a tender, juicy interior that pulls apart with a gentle tug. While the journey may seem daunting, this guide will break down the process into simple, foolproof steps. By the time you’re done, you’ll have a result that will not only be delicious but will impress everyone who tries it.
What is Texas-Style Brisket?
The philosophy behind Texas-style brisket is one of beautiful simplicity. Unlike other BBQ traditions that rely on complex sauces and marinades, the Texas method is all about the pure marriage of three things: high-quality beef, wood smoke, and a simple rub of salt and pepper. The goal is to let the flavor of the meat be the star, amplified by a perfect crust and a deep, smoky flavor.
Choosing the Right Brisket: Your #1 Key to Success
Before you even think about lighting your smoker, you need to choose the right brisket. This is the most crucial step and will dictate the quality of your final product.
- Grade Matters: Look for USDA Prime or Choice grade brisket. The higher fat content of these grades melts during the long cook, keeping the meat juicy and tender.
- Look for Good Marbling: The more intramuscular fat (marbling) you see in the meat, the better. This fat is your insurance policy for a moist and flavorful result.
- Whole Packer vs. Flat: Always buy a “whole packer” brisket. It contains both the “point” (the fatty, thicker muscle) and the “flat” (the leaner, thinner muscle). The fat and muscle from the point will baste the flat as it cooks, ensuring the entire brisket stays moist.
The Tools You’ll Need (The Brisket Checklist)
Having the right gear makes all the difference in a long cook. Here’s a quick checklist of your essentials.
- A Good Smoker: Whether it’s an offset smoker, a pellet grill, or a kamado, a good smoker is your canvas.
- Thermometers: You’ll need two: one to monitor your grill’s temperature and an [suspicious link removed] to check the brisket’s internal temperature and tenderness.
- A Sharp Boning Knife: For trimming your brisket.
- Butcher Paper: The secret to the Texas crutch, which helps power through the “stall.”
- Heavy-Duty Gloves: For handling the hot brisket.
- A Large Cooler: For the non-negotiable resting period.
The Texas Brisket Trinity: Trim, Season, Smoke
These three steps are the core of the Texas brisket tradition. Master them, and you’re well on your way to a perfect result.
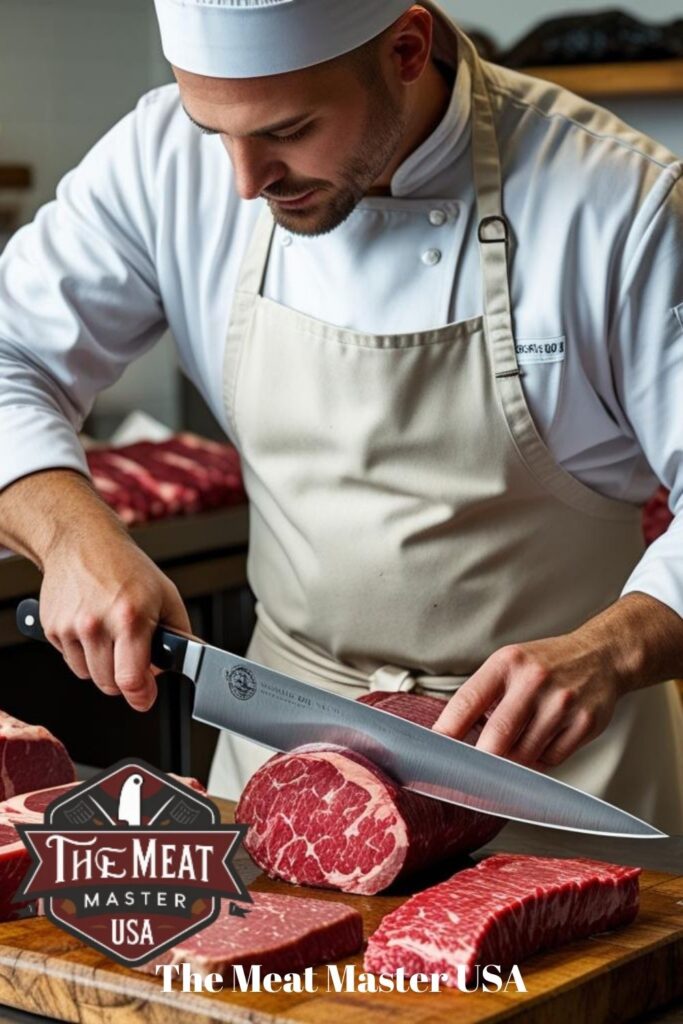
Step 1: How to Trim a Brisket Like a Pro
The goal of trimming is not to remove all the fat, but to remove the hard fat that won’t render and to create an aerodynamic shape for even cooking.
- Pro Tip: Trim the hard, waxy fat from the flat and point. Leave about a ¼-inch of fat on the fat cap to protect the meat and provide moisture.
- Goal: Shape the brisket into an even rectangle to ensure it cooks uniformly.
Step 2: The Simple Texas Rub (Salt & Pepper)
The beauty of a Texas brisket is its simplicity. The only rub you need is a classic 50/50 mix.
- The Mix: Combine coarse black pepper and kosher salt in a 1:1 ratio.
- Why it Works: The coarse pepper creates the famous black “bark,” while the kosher salt penetrates the meat to season it from the inside out.
- Application: Be generous! The coarse salt won’t over-salt the meat, and the pepper forms the delicious crust.
Step 3: Setting Up Your Smoker for the Long Haul
A successful brisket cook relies on a stable, consistent temperature and clean smoke.
- Target Temperature: Maintain a steady temperature between 225-250°F (107-121°C).
- Wood Choice: The traditional wood is Post Oak, but hickory and pecan also work well.
- The Fire: Aim for “thin blue smoke”—a faint, transparent wisp of smoke that smells sweet. Thick white smoke is dirty and will leave a bitter taste on your brisket. For more, see our guide on How to Smoke Meat Like a Pitmaster.
The Smoking Process: A Timeline of Patience
A brisket cook is a marathon, not a sprint. Here’s what to look for along the way.
- The Stall (~150-170°F): This is a critical phase where the brisket’s temperature rise stalls for hours. It’s caused by evaporative cooling from the surface of the meat. Just be patient and trust the process.
- To Wrap or Not to Wrap? The “Texas crutch” involves wrapping the brisket in butcher paper to power through the stall. Wrapping traps moisture and helps the internal temperature rise more quickly, but be aware it can soften your bark.
- How to Know When It’s Done: While the target temperature is ~200-205°F (93-96°C), doneness is determined by tenderness. Use the “probe test”: the brisket is done when a thermometer or probe slides into the meat with almost no resistance, like a hot knife through butter.
The Most Important Step: Resting Your Brisket
You’ve spent 12 hours on your brisket; don’t ruin it in the last 15 minutes. Resting is non-negotiable.
- Why it’s Important: As the meat cooks, the juices are pushed to the center. Resting allows them to redistribute throughout the entire brisket. Cutting it too early will cause the juices to spill out, leaving you with dry meat.
- How to Rest: Place your still-wrapped brisket in a cooler with some towels for at least two hours.
How to Slice a Brisket Correctly
The final step requires careful technique to ensure every bite is tender.
- Separating the Point and the Flat: The flat and point have grains that run in opposite directions. Separate the two muscles by slicing along the fat layer between them.
- Slicing Against the Grain: Always slice against the grain of the meat. This shortens the muscle fibers, making the meat incredibly tender and easy to chew.
Serving Your Texas Masterpiece
A classic Texas brisket is traditionally served on a slice of white bread, with a side of onions and pickles. BBQ sauce is always served on the side, never on the meat itself.
Texas Brisket FAQ: Your Questions Answered
Q: What if my brisket is dry? A: A dry brisket is usually a sign of one of two things: it wasn’t rested long enough, or it was overcooked. Make sure to rest your brisket for at least 2 hours, and always rely on the probe test for tenderness rather than just the target temperature.
Q: How long does it take per pound? A: The old adage “it’s done when it’s done” is the best answer. On average, a brisket can take between 60-90 minutes per pound, but a variety of factors like smoker temperature, weather, and the “stall” can affect the time.
Q: Can I use a gas or charcoal grill instead of a smoker? A: It’s possible, but challenging. You will need to set up a two-zone fire to create an indirect heat side and maintain a low temperature for the entire cook. Our Two-Zone Grilling Guide can help you get started.
Q: My bark isn’t dark enough. What happened? A: A light bark is often caused by a rub with too little pepper or from the smoke not being clean. Make sure to use a coarse, 1:1 salt and pepper rub and maintain a steady stream of thin, blue smoke throughout the cook.
Conclusion
Your first brisket will be a learning experience, but it’s a delicious one. Don’t be discouraged if it’s not perfect—every pitmaster has their own brisket story. You’ve now learned the authentic Texas method, and with practice, you’ll be on your way to smoking your own masterpiece.
Now get out there and start grilling! We’ve got plenty of other guides and tips to help you on your journey.
Internal Links:
- The Ultimate Guide to Steak & BBQ
- How to Smoke Meat Like a Pitmaster
- Steak Doneness Made Simple
- Why Resting Your Steak Makes it Juicy
- Two-Zone Grilling Techniques Explained
Categories:

Pingback: How to Cook Pork Belly: Crackling & Burnt Ends 2025 - The Meat Master USA
Pingback: The Ultimate Guide to Smoking Woods (Pairing Chart) 2025 - The Meat Master USA
Pingback: Texas BBQ vs Kansas City BBQ: What's the Difference? 2025 - The Meat Master USA
Pingback: Pulled Pork: The Ultimate Shoulder Guide
Pingback: Meat Temperature Chart: Safe Internal Temps for Every Cut - The Meat Master USA