
Table of Contents Hide ContentsThe Juiciest Beer Can Chicken Recipe
Beer can chicken is a BBQ classic for a reason. This guide breaks down the simple method that uses internal steaming to create a chicken that is incredibly juicy and tender. From choosing the best beer to the step-by-step grilling process, this guide is all you need for a perfectly cooked chicken with a crispy skin.
1. Introduction
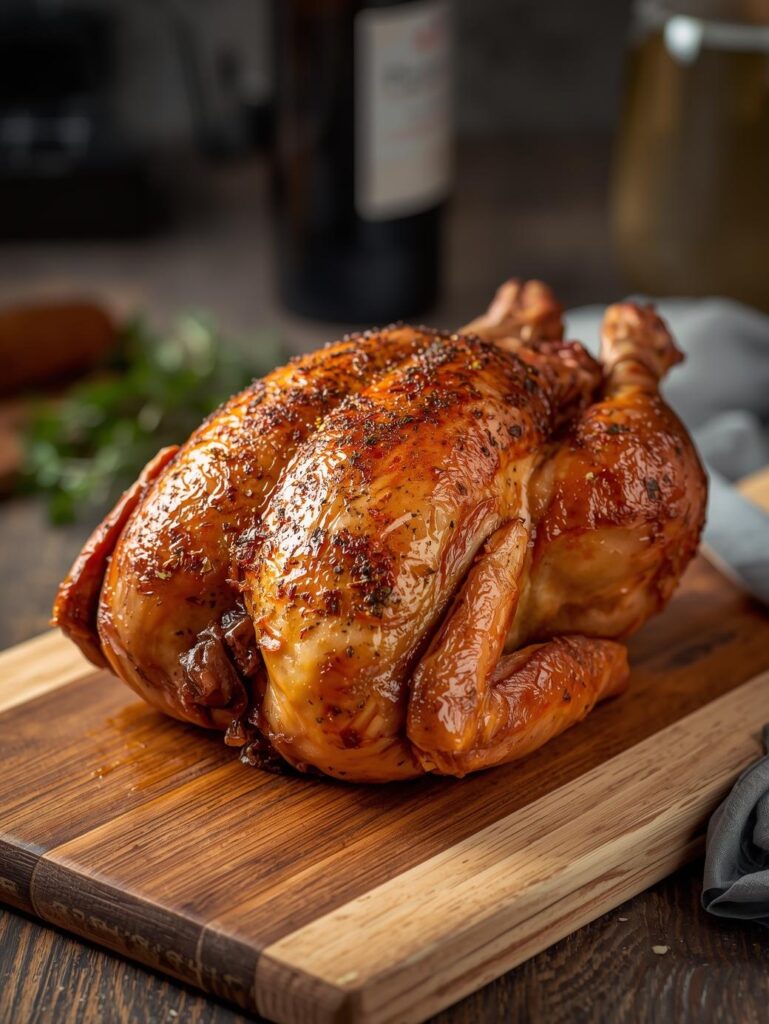
There’s a reason beer can chicken is a backyard BBQ classic: it’s a showstopper that delivers on its promise of a wonderfully moist and flavorful bird. The simple magic of placing a chicken on top of a beer can ensures that it cooks evenly while the liquid steams the meat from the inside. This guide will walk you through everything you need to know, from choosing the right beer to a step-by-step cooking process that guarantees juicy, tender results.
2. What You’ll Need
- Whole Chicken: A bird in the 3-5 pound range is ideal for even cooking.
- Beer: A standard 12-ounce can of your favorite beer.
- Seasoning: A simple mix of salt, pepper, paprika, and garlic powder works perfectly.
- Equipment: A grill or smoker with a lid, a reliable meat thermometer, and a disposable aluminum drip pan.
3. Choosing the Right Beer
The beer you choose can subtly affect the final flavor.
- Light vs. Dark: Lighter lagers and pale ales add a mild, yeasty flavor that won’t overpower the chicken. Darker stouts or porters can add a deeper, richer flavor but may be too strong for some.
- Alternatives: For non-alcoholic options, try apple cider, chicken broth, or root beer for a sweet twist.
- Matching Flavors: A simple, savory rub pairs well with most beers. If you use a sweeter rub, consider a lighter, more refreshing beer to balance it out.
4. Prepping the Chicken
Proper prep is key for a crispy skin and even cook.
- Clean and Dry: Remove the giblets and neck from the cavity. Thoroughly pat the chicken dry with paper towels, inside and out. Dry skin is essential for a crispy finish.
- Trimming: Trim any excess fat around the cavity opening and neck.
5. Seasoning & Rubs
Seasoning is where you build the base flavor.
- Classic Rub: A simple BBQ rub made with paprika, salt, garlic powder, onion powder, and a touch of brown sugar is all you need.
- Application: Apply the rub liberally to the entire exterior of the chicken. For extra flavor, gently loosen the skin over the breast meat and rub some seasoning directly on the meat.
6. Setting Up the Grill/Smoker
You’ll need an indirect heat setup to prevent burning the bottom of the chicken.
- Grill: For a charcoal grill, arrange the coals on one side and place the chicken on the opposite side. For a gas grill, turn on one or two burners and place the chicken on the side with no burners on.
- Smoker: Set your smoker to a consistent temperature between 325-350°F (160-175°C).
- Wood Chips: Add a handful of wood chips (Hickory, Pecan, or Apple) to your smoker or in a smoker box on your grill for a subtle smoky flavor.
7. The Beer Can Method – Step by Step
This is the fun part.
- Prepare the Can: Open a full 12-ounce can of beer and pour out (or drink!) about half of the liquid. You can optionally punch a few extra holes in the top of the can.
- Mount the Chicken: Slide the chicken’s cavity opening securely over the top of the can, with the legs acting as a tripod for stability.
- Position on the Grill: Place the chicken upright on the indirect side of your grill or in the center of your smoker. Place a drip pan underneath to catch the rendered fat and juices.
- Safety First: Be careful when moving the chicken, as the can will be hot.
8. Cooking Time & Temperature
Patience is a virtue when cooking a whole bird.
- Cook Time: Plan for an average cook time of 20-25 minutes per pound. A 4-pound chicken will take about 1.5 to 2 hours.
- Monitoring Temperature: Use a meat thermometer to check for doneness. Insert it into the thickest part of the breast and thigh, avoiding the bone.
- Target Temperatures: The chicken is done when the breast meat reaches 165°F (74°C) and the thighs reach 170°F (77°C).
9. Finishing & Resting
These final steps are critical for a juicy result.
- Safe Removal: Use a pair of tongs and thick gloves to carefully lift the chicken off the beer can. The can will be extremely hot.
- Resting: Transfer the chicken to a cutting board and let it rest for 10-15 minutes. This allows the juices to redistribute, ensuring every bite is moist and flavorful.
10. Carving and Serving
Carve your perfectly cooked chicken and enjoy.
- Carving Method: Remove the legs and thighs first, then slice the breast meat against the grain.
- Serving Suggestions: Serve with classic sides like creamy coleslaw, potato salad, or a fresh green salad.
11. Troubleshooting & Common Mistakes
- Chicken Too Dry: This is a classic sign of overcooking. Always cook to temperature, not time. Using a drip pan with liquid can also help.
- Rubbery Skin: The skin was likely not patted dry enough. A higher cooking temperature (325-350°F) and indirect heat are also essential.
12. Conclusion
The beer can chicken method is simple, effective, and results in one of the juiciest, most flavorful roasted chickens you’ll ever taste. It’s a fantastic technique for both beginner grillers and seasoned pitmasters.
Now that you know the secrets, try it out for your next cookout! Share a photo of your perfectly juicy chicken with us or check out our other BBQ and grilling recipes.
Frequently Asked Questions
Q: Does the beer really add flavor to the meat? A: The beer’s primary role is to create steam inside the chicken, which keeps the meat incredibly moist. While it does add a subtle flavor, the majority of the taste comes from your seasoning rub and the smoke from the grill.
Q: My chicken keeps tipping over. What can I do? A: This is a common issue, especially with smaller chickens. To prevent it, ensure the can is placed on a flat, stable surface. You can also form a tripod with three small balls of aluminum foil around the can’s base for added stability. For a more permanent solution, a vertical chicken roaster is a great investment.
Q: Can I make beer can chicken in the oven? A: Yes. The principles are the same, but you will miss out on the smoky flavor. To adapt the recipe, place the chicken and can on a baking sheet and cook in the oven at 400°F (200°C) until it reaches the correct internal temperature.
Q: Why isn’t my chicken skin crispy? A: The most common mistake is not patting the chicken completely dry before applying the rub. Moisture is the enemy of crispy skin. Also, ensure your grill or smoker is running at the proper temperature (325-350°F) to help the skin crisp up.
Internal Links:
- The Ultimate Guide to Pork Ribs (Baby Back vs. Spare)
- The Juiciest Beer Can Chicken Recipe
- Two-Zone Grilling Techniques Explained
- How to Season Meat: Rubs, Marinades, and Brines Explained
- The Best Cuts of Meat for Smoking vs. Grilling
- The Ultimate Guide to Steak & BBQ
Categories:


Pingback: BBQ Guides: Your Ultimate Resource for Grilling & Smoking Mastery - The Meat Master USA