
Expert’s Note: This guide is part of our comprehensive Ultimate Grill & Smoker Maintenance Guide. Bookmark this page to keep your equipment in perfect shape for years to come.
The Ultimate Guide to Grill and Smoker Maintenance
“A clean grill isn’t just about looks—it’s the difference between a perfect sear and a stuck-on disaster, between consistent temperatures and frustrating flare-ups.”
1. Introduction: Why Maintenance is Non-Negotiable
Why Grill Maintenance Isn’t Optional – It’s Essential
Let’s be honest. After a fantastic barbecue, the last thing anyone wants to do is clean up. That charred, greasy grill can look like a daunting task, so it’s easy to just close the lid and promise to deal with it “next time.” But what if I told you that skipping this crucial step is the single biggest mistake backyard chefs make?
A clean grill isn’t just about looks—it’s the difference between a perfect sear and a stuck-on disaster, between consistent temperatures and frustrating flare-ups. Think of maintenance not as a chore, but as the secret ingredient that guarantees every meal you cook is your best one.
This weekend, we’re starting a new Sunday Experiment. We’re going to change your relationship with your grill. Consider this your first lesson in a routine that will save you money, time, and a whole lot of frustration.
New to grill maintenance? Start with these essential guides:
Weekend Prep
- Grill Maintenance 101 – The complete care guide
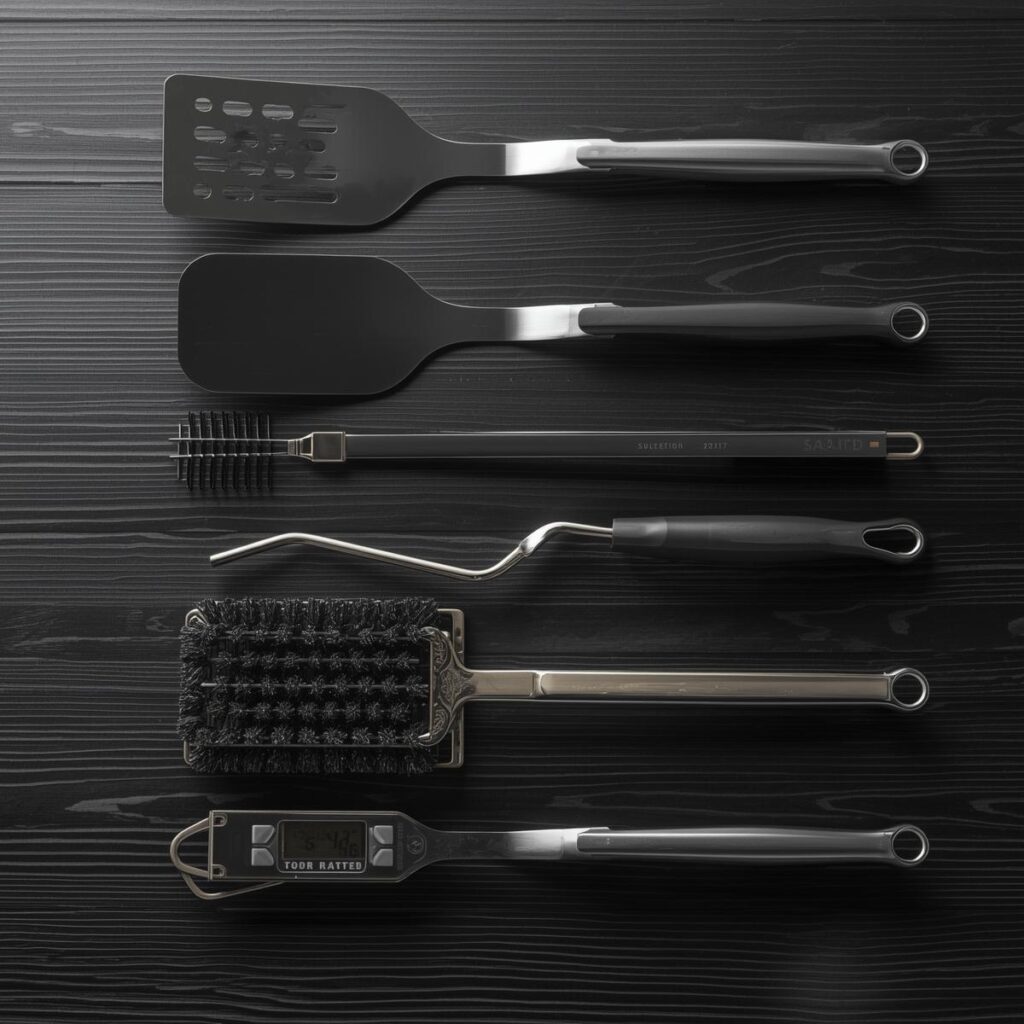
- Essential BBQ Tools – Must-have gear for cleaning
- Grill Cleaning Methods – We tested them for you
- Grill Investment Guide – Protect your equipment
The 5 Reasons You Can’t Afford to Neglect Your Grill
1. Extend Your Equipment’s Lifespan by 3-5 Years
Your grill is an investment. A $500 grill that lasts 5 years costs $100 per year. That same grill, with proper care, can last 10 years, cutting your cost to $50 per year. Rust, grease buildup, and clogged burners are slow killers. Simple maintenance fights back, protecting your wallet for the long haul. For more on protecting your investment, see our guide on The Ultimate BBQ Equipment Buying Guide.
2. Prevent Dangerous Grease Fires and Flare-Ups
That layer of grease at the bottom of your grill isn’t just messy—it’s fuel. When it ignites, it doesn’t just create a little flare-up for your steak; it can create a fireball that damages your grill and is a genuine safety hazard. Regular cleaning removes this fuel source, making your grilling experience safer and more controlled.
3. Ensure Consistent Temperatures for Perfect Results
Ever wonder why one part of your grill is scorching hot while another is barely warm? Crusted-on grime and clogged burner ports are often the culprits. A clean grill delivers even heat distribution, which is the foundation of every great cooking technique in our BBQ Methods & Techniques Encyclopedia. Whether you’re using the reverse sear or two-zone cooking, temperature control starts with a clean machine.
4. Protect Your Significant Investment
High-end grills and smokers can easily cost over $1,000. Letting a tool that valuable degrade from neglect is like never changing the oil in a luxury car. The components—stainless steel burners, cast-iron grates, electronic controllers—are designed to last, but only if they’re protected from corrosive grease and carbon buildup.
5. Ensure Food Safety and Prevent Cross-Contamination
Old, burnt-on food residue is a breeding ground for bacteria. Cooking on a dirty surface can lead to off-flavors and, worse, can transfer harmful bacteria from last week’s chicken to tonight’s burgers. A clean grill is a safe grill, ensuring that the only thing you’re serving your family and friends is delicious, safe food.
Now that you know why it’s so crucial… Let’s dive into the simple, effective maintenance routine that will become second nature.
This isn’t about spending hours scrubbing every weekend. It’s about building smart, simple habits that integrate seamlessly into your cooking process. In the following sections, we’ll break down the exact steps—from a 5-minute post-cook clean to a seasonal deep dive—that will keep your grill performing like new, year after year.
The Maintenance Mindset: Building Habits That Last
Let’s shift your perspective. Right now, you might see cleaning as the unfortunate end of the grilling process—the boring part that comes after the fun. What if we flipped that script?
The Core Philosophy: Maintenance isn’t a chore—it’s the final, crucial step of the cooking process.
Just as resting your steak is non-negotiable for a juicy result, caring for your grill is the final step that ensures your next cook is just as successful. It’s the pitmaster’s equivalent of a chef sharpening their knives and cleaning their station. It’s a sign of respect for your tools and your craft.
This isn’t about adding hours of work to your weekend. It’s about building small, efficient habits that become as automatic as preheating your grill. By breaking it down into a simple hierarchy, maintenance becomes manageable and almost effortless.
Essential Maintenance Gear: The right tools make all the difference:
🛠️ Habit-Building Gear
- 🧤 Heat-Resistant Gloves – For safe post-cook cleaning
- 🧽 Quality Grill Brushes – The cornerstone of easy cleaning
- 🔧 Scrapers & Putty Knives – For tough grease
- 📦 Ash Vacuums & Tools – Pellet grill essentials
The 5-Tier Maintenance Habit System
Adopt this rhythm, and you’ll never face a daunting, deep-cleaning marathon again.
Tier 1: After Every Cook (The 5-Minute Quick Clean)
This is the most important habit you will ever build. It prevents problems before they start.
-
When: Immediately after you’ve finished cooking, while the grill is still warm (not scorching hot!).
-
The “Why”: Warm grease is liquid and easy to wipe. Burnt-on, carbonized grease is a nightmare to remove. This simple step does 80% of the work for you.
-
Mindset Shift: This isn’t “cleaning.” It’s “closing up the kitchen” for the night.
Tier 2: Weekly (The 15-Minute Deep Inspection)
A quick once-over to catch what the daily clean might miss.
-
When: Once a week, or after 2-3 heavy cooking sessions.
-
The “Why”: This is your proactive check for grease buildup in the drip pan, ash accumulation in charcoal/pellet grills, and any early signs of wear or rust.
-
Mindset Shift: This is your “weekly vehicle check”—quick, preventative, and smart.
Tier 3: Monthly (The Full Maintenance Check)
Your comprehensive system review.
-
When: Once a month, or every 20-30 hours of grill time.
-
The “Why”: This ensures all components are functioning correctly. You’ll check burner tube cleanliness, inspect seals on smokers, and verify everything is in working order.
-
Mindset Shift: This is like changing your grill’s “air filter”—it keeps the core system running efficiently.
Tier 4: Seasonally (The Deep Clean & Inspection)
Align your maintenance with the changing weather.
-
When: At the start of grilling season (Spring) and before storing or winterizing (Fall).
-
The “Why”: Prepares your grill for heavy use or protects it during hibernation. This is when you address rust, re-season cast iron, and make any necessary adjustments.
-
Mindset Shift: This is “spring cleaning” or “winter prep” for your outdoor kitchen—a seasonal ritual.
Tier 5: Annually (The Full Teardown & Restoration)
The ultimate refresh.
-
When: Once a year, ideally during your off-season or a slow period.
-
The “Why”: This extends the life of your grill significantly. A full teardown lets you clean areas you can’t normally reach, replace worn-out parts, and restore your equipment to like-new condition.
-
Mindset Shift: This is your grill’s “annual physical”—a comprehensive health check that guarantees more years of service.
🔥 The Sunday Experiment Challenge
Your mission this week: Master the Tier 1 habit. Commit to the 5-minute post-cook clean after every single grill session. By next Sunday, it will feel as natural as turning on the gas.
By embracing this tiered mindset, you’re not just maintaining a piece of equipment; you’re building a system that ensures perfection, safety, and longevity. In the next section, we’ll break down exactly what to do at each tier, giving you the clear, actionable steps for a flawless grill.
Ready to dive into the first and most important habit? Let’s master the 5-Minute After-Cook Clean.
The Maintenance Pyramid: Your Path to Perfection
Think of grill care as a pyramid. You build a strong foundation with simple, daily habits. Each level you ascend requires a bit more effort but delivers exponentially greater rewards in performance and longevity. Forget overwhelming deep-cleans; this system makes maintenance manageable and effective.
Pyramid Level 1 Essentials: The right tools for the foundation:
🛠️ Level 1 Gear
- 🔥 Grill Brush – Your most used tool
- 🧤 Long-Handled Scraper – For grates and interior
- 🥘 Drip Pan Liners – For easy grease management
- 🧴 Grill Wipes/Spray – Quick exterior clean
Level 1: After-Every-Use Maintenance (5-10 minutes)
This is the foundation. Do this consistently, and you prevent 90% of all grill problems.
For Gas Grills:
-
Burn Off & Brush: After cooking, turn the heat to high and close the lid for 10-15 minutes. This incinerates leftover food particles. Then, open the lid and vigorously scrub the grates with a brush while they’re hot.
-
Empty the Grease Trap: Once the grill is cool enough to handle, always check and empty the grease tray or drip pan. This is your #1 defense against dangerous flare-ups.
-
Quick Wipe-Down: Use a damp cloth or a grill-safe cleaner to wipe the exterior lid and body, preventing buildup of dirt and grease.
For Charcoal Grills:
-
Safe Ash Removal: Crucially, wait until the grill is completely cold. Once cooled, open the bottom vent and use an ash tool to remove all ashes from the bowl. This prevents corrosion and ensures proper airflow for your next cook.
-
Grate Brushing: While the grates are still warm (but not dangerously hot), give them a good brush to remove food residue.
-
Bowl Scrape: Use a grill scraper or putty knife to remove any stuck-on debris from the charcoal bowl.
For Pellet Grills:
-
Fire Pot Cleanout: After the grill has cooled, vacuum out the ash from the fire pot. A small ash vacuum is the best tool for this. This is critical for consistent ignition and temperature.
-
Grate Brushing: Brush the cooking grates clean as you would with any grill.
-
Grease Management Check: Ensure the grease drain cup isn’t full and the channel is clear to prevent grease backups and potential fires.
Level 2: Weekly Deep Clean (20-30 minutes)
This is your proactive check-up to keep everything running smoothly.
-
Remove and Soak Grates: Take the grates out. For cast iron, see our Cast Iron Care Guide for proper cleaning. For stainless steel, a soak in warm, soapy water works well.
-
Clean Burners/Tubes (Gas Grills): With the grates removed, inspect the burner tubes for clogs or corrosion. Use a brush or a specialized burner cleaning tool to clear any blocked ports.
-
Inspect for Grease Buildup: Look in the corners and under the flame tamers. If grease is accumulating, scrape it out now before it becomes a problem.
-
Check Fuel & Connections: Ensure you have enough propane or pellets. For gas, check the hose for cracks or wear.
Level 3: Monthly Maintenance (45-60 minutes)
This is a comprehensive system review to ensure peak performance.
-
Full Disassembly and Deep Clean: Remove grates, flavorizer bars, heat deflectors, and other interior components. Give every part a thorough cleaning.
-
Inspect Seals and Gaskets: Check the door gasket on your smoker or the lid seal on your kettle. Are they intact and creating a good seal? Replace if worn out.
-
Check Igniters and Starters: Test your electronic igniter. If it’s weak, it might be time for a replacement. For charcoal chimneys, ensure they are rust-free.
-
Verify Temperature Accuracy: Use an oven thermometer to check if your grill’s built-in thermometer is reading correctly. If it’s off by more than 25°F, you may need to calibrate or replace it. This is key for following our Ultimate Meat Temperature Guide.
Pro Tip: Put a monthly reminder in your calendar! Consistency at Level 3 is what separates good grillers from great pitmasters.
Level 4: Seasonal Overhaul (2-3 hours)
This is the ultimate reset, guaranteeing years of reliable service.
-
Full Teardown and Restoration: Disassemble your grill as much as safely possible. Consult your manual.
-
Rust Treatment and Prevention: Address any rust spots with a wire brush, apply a high-heat rust reformer, and touch up with high-heat paint.
-
Part Replacement as Needed: This is the time to replace worn-out grates, corroded burners, frayed igniter wires, or cracked wheels.
-
Performance Testing: After reassembly, do a full test run. Check for gas leaks (with a soapy water solution), verify temperature stability, and ensure all controls are working perfectly.
By following this pyramid, you build a strong foundation of habit that makes each subsequent level easier. The time you invest pays you back tenfold in flawless cooks, a longer-lasting grill, and the pride of owning a tool that’s always ready for action.
In the next section, we’ll get into the nitty-gritty: the essential tools and products that make every level of this pyramid easier and more effective.
Essential Maintenance Tools & Products: Your Arsenal for a Pristine Grill
You wouldn’t try to carve a prime rib with a butter knife. Similarly, having the right tools for grill maintenance transforms a dreaded chore into a quick, satisfying task. This isn’t about buying every gadget on the market—it’s about curating a core arsenal of effective, durable tools that will last for years.
Think of this as building your grill’s “toolkit,” much like the essential gear we recommend in our Ultimate BBQ Equipment Buying Guide.
Starter Kits & Top Picks: Jump right in with our tested recommendations:
🛠️ Curated Tool Guides
- 🏆 Best Grill Brushes – Safe and effective options
- ⭐ Top-Rated Tool Kits – All-in-one solutions
- 📦 Essential Gear List – Our master checklist
- 🔥 Pro-Grade Tools – For the serious pitmaster
Must-Have Tools: The Foundation of Your Kit
1. Grill Brushes: Your First Line of Defense
Not all brushes are created equal. The right one depends on your grate type.
-
Stainless Steel Bristle Brushes: Best for porcelain-coated and stainless steel grates. Look for a scraper edge to tackle stubborn bits.
-
Nylon/Bristle-Free Brushes: A safer alternative that eliminates the risk of loose wires. Excellent for non-stick coatings and delicate surfaces.
-
Pumice Stones/Blocks: Incredibly effective at scraping off carbonized gunk without metal. Great for all grate types.
-
Brass Wire Brushes: The ideal choice for cast iron grates as they are less likely to damage the seasoning.
2. Scrapers and Putty Knives
Your heavy-duty problem-solvers.
-
Grill Scrapers: Designed to fit the contours of your grill’s interior and grates.
-
5-in-1 Painter’s Tool/Putty Knife: An inexpensive, versatile workhorse for scraping grease from corners and the grease tray.
3. Nylon Brushes for Delicate Parts
A set of small, stiff nylon brushes is indispensable for cleaning burner tubes (on a cold gas grill), cleaning around knobs, and scrubbing hard-to-reach areas without causing damage.
4. Ash Vacuum for Pellet Grills & Charcoal
Do not use a household vacuum! A dedicated, heat-resistant ash vacuum is a game-changer for pellet grill owners, making quick work of fire pot cleanouts. It’s also fantastic for quickly emptying ash from kamado-style cookers.
5. Grease Management Supplies
Prevention is better than cure.
-
Drip Pan Liners (Aluminum Foil/Disposable Pans): Line your grease tray for effortless cleanup.
-
Grease Canister: A dedicated, sealable container for safe disposal of hot grease.
Cleaning Products: Choosing Your Weapon
Natural Cleaners (The DIY Approach)
-
White Vinegar: A fantastic degreaser and disinfectant. Perfect for wiping down exteriors and soaking grates.
-
Baking Soda: A mild abrasive that’s great for making a paste to scrub tough stains without scratching.
-
Lemon Juice: Its acidity helps break down grease and leaves a fresh scent.
Commercial Grill Cleaners
-
Spray-On Degreasers: Formulated to cut through tough, baked-on grease quickly. Ideal for the interior walls of your grill.
-
Specialized Grill Cleaners: Often citrus-based and designed to be grill-safe, effectively dissolving carbon buildup.
Degreasers and Rust Removers
-
Heavy-Duty Degreaser: For the really tough jobs, like cleaning the grease catch pan or the bottom of the firebox.
-
Naval Jelly / Rust Converter: For treating rust spots before they spread. Converts rust into a protective, paintable surface.
Seasoning Oils for Cast Iron
-
High-Smoke Point Oils: Grapeseed oil, avocado oil, or plain vegetable oil are perfect for re-seasoning cast iron grates and accessories. Avoid olive oil as it has a low smoke point. Our guide on Cast Iron Care dives deeper into this.
Safety Gear: Non-Negotiable Protection
⚠️ Safety First: Never skip safety gear. A grill is a powerful tool, and maintenance involves heat, chemicals, and sharp edges.
-
Heat-Resistant Gloves: Your most important piece of safety equipment. They protect you when brushing hot grates, handling warm components, and dealing with unexpected flare-ups. Far superior to standard oven mitts.
-
Eye Protection: Safety glasses are essential when scrubbing or scraping to protect your eyes from flying debris, rust particles, or chemical splashes.
-
Proper Ventilation: Always work in a well-ventilated area, especially when using commercial chemical cleaners. Fumes can be harmful if inhaled in an enclosed space.
Ready to clean? Avoid these common mistakes:
🎯 Troubleshooting
- ❌ Common BBQ Mistakes – Maintenance errors to avoid
- 🥩 Tough Steak Fix – Often starts with a dirty grill
- 🔥 Grilling Errors – How maintenance prevents them
- 🔧 Maintenance FAQ – Your questions answered
With this arsenal at your disposal, you’re equipped to handle everything from a quick post-cook brush-down to a full seasonal deep clean. In the next section, we’ll put these tools to work with our Grill-Specific Maintenance Guides, giving you the exact steps for your type of grill.
Grill-Specific Maintenance Guides: Your Custom Care Plan
Every grill has its own personality and, more importantly, its own maintenance needs. A one-size-fits-all approach doesn’t work. Below, you’ll find the exact care routine for your specific type of grill. Follow this guide, and you’ll keep your equipment running perfectly for decades.
Find Your Grill Guide: Jump to your specific equipment type:
🎯 Quick Navigation
Gas grills are all about consistency and safety. The key is keeping the gas flowing and the burners clean.
Weekly:
-
Burner Tube Cleaning: With the grill OFF AND COLD, inspect the burner tubes. Use a nylon brush or a specialized burner cleaning tool to clear any clogged ports. Blocked ports lead to uneven heating and dangerous flame flare-ups.
-
Igniter Check: Push the igniter button. You should see a strong spark at all burner ports. A weak or no spark means it’s time to clean the electrode tip with a dry brush or consider a battery replacement.
-
Grease Management: This is non-negotiable. Check and empty the grease tray or drip pan. A full tray is the most common cause of dangerous grease fires.
Monthly:
-
Hose and Connection Inspection: Visually inspect the gas hose for cracks, brittleness, or damage. Check the connections at the tank and manifold for tightness.
-
Regulator Testing: If your grill struggles to reach high heat or the flames are unexpectedly low, you may have a “bypass” in the regulator. Turn off the tank valve, disconnect the regulator, then reconnect and slowly reopen the valve to reset it.
-
Heat Shield Cleaning: Remove and clean the flavorizer bars or heat diffuser plates. These protect the burners from drips and help distribute heat evenly.
Annually:
-
Full Gas System Check: Conduct a leak check. Apply a soapy water solution to all gas connections and the hose with the gas on (but the grill off). If you see bubbles, you have a leak. Tighten the connection or replace the faulty part immediately.
-
Replacement of Worn Parts: This is the time to proactively replace any corroded burners, worn-out igniters, or crumbling heat shields.
🪵 Charcoal Grill Maintenance
Charcoal grills are simple but require diligent ash management and rust prevention.
After Each Use:
-
Ash Removal: CRITICAL: Wait until the grill is COMPLETELY COLD. Ash is an insulator and can trap moisture, leading to a rusty bowl. Remove all ash after every use to ensure proper airflow and prevent corrosion.
-
Grate Cleaning: Brush grates while they are still warm from the cook to easily remove food residue.
-
Bowl Scraping: Use a putty knife or grill scraper to remove any stuck-on debris from the interior bowl.
Seasonally:
-
Rust Prevention on Ash Pan: If your grill has a separate ash pan, check it for rust. Sand away any rust and treat with a high-heat paint.
-
Vent Maintenance: Ensure the top and bottom vents move freely and aren’t seized up by rust. A light coating of cooking oil on the vent threads can help prevent this.
-
Leg and Wheel Inspection: Tighten any loose bolts on the cart, legs, and wheels. Ensure wheels roll freely.
🌲 Pellet Smoker Maintenance
Pellet grills are amazing, but they are precision machines. Their maintenance is about protecting the mechanical and electronic components.
Critical Daily/Weekly:
-
Fire Pot Cleaning: Before a long cook, or at least once a week, vacuum the ash out of the fire pot. Excess ash can smother the fire, causing the grill to shut down mid-cook.
-
Auger Inspection: Listen for any unusual grinding sounds when the auger is feeding pellets. This could indicate a jam or a failing motor.
-
Grease Drain Management: Pellet grills produce a lot of grease. Ensure the grease channel and drain cup are clear to prevent a dangerous grease fire inside the grill.
Monthly Must-Dos:
-
Full Auger System Check: Run the grill empty until pellets are no longer feeding to clear the auger. This helps prevent jams.
-
Controller Calibration: Verify your grill’s temperature reading with a reliable external thermometer like the ones in our Top 5 Meat Thermometers guide. Some controllers allow for calibration if the reading is off.
-
Fan and Motor Inspection: Ensure the combustion fan is running smoothly and the exhaust is clear. Any obstruction here will ruin temperature control.
🍶 Kamado/Ceramic Grill Care
Kamados are incredibly efficient and durable, but their ceramic construction requires specific care to prevent thermal shock and damage.
-
Thermal Shock Prevention: Never spray cold water on a hot ceramic grill. The rapid temperature change can cause the ceramic to crack. Always let the grill cool down completely before cleaning.
-
Gasket Replacement: The felt gasket on the lid and base will wear out over time. If you see smoke leaking from the lid or have trouble holding low temperatures, it’s time to replace the gasket.
-
Fire Box Maintenance: The ceramic fire box is fragile. When removing ash, be gentle to avoid cracking it. Inspect it periodically for hairline cracks.
-
Stand and Hardware Care: The cart, hinge, and hardware hold significant weight. Tighten bolts and screws regularly and check the hinge mechanism for smooth operation.
Pro Tip: Take photos with your phone during disassembly! It makes reassembling your grill after a deep clean foolproof.
By following these specific guides, you’re not just cleaning your grill—you’re performing precision care that ensures peak performance and maximum lifespan. In the next section, we’ll tackle one of the most common challenges: Deep Cleaning Procedures for grates, burners, and grease systems.
Deep Cleaning Procedures: Mastering the Critical Components
When it’s time for a Level 3 or 4 clean from our Maintenance Pyramid, you need to know how to handle your grill’s core components properly. Mishandling these can shorten their life or ruin your cook. Here’s your definitive guide to deep cleaning the heart of your grill.
Deep Clean Essentials: The right products for a serious clean:
🛠️ Deep Clean Gear
- 🥘 Cast Iron Care Kit – Seasoning oils & scrapers
- 🧽 Specialty Brushes – For grates and burner tubes
- 🔥 Degreasers & Cleaners – Tough on grease, safe on grills
- 🛡️ Protective Gear – Gloves and safety glasses
Grill Grates: The Heart of Your Cook
Your grates are where the magic happens. Proper care here directly impacts flavor and sear.
Cast Iron Grates: The Flavor Champions
-
Cleaning Without Stripping Seasoning:
-
While the grill is warm (not scorching hot), scrub with a stiff brass brush (not steel, which can damage seasoning).
-
For stuck-on food, use a grill stone or pumice block.
-
Wipe with a damp cloth. Avoid soap as it can break down the seasoned layer.
-
-
Re-seasoning Process: If they look dull or you accidentally used soap:
-
Clean thoroughly and dry completely.
-
Apply a thin, even coat of a high-smoke point oil (grapeseed, avocado, or vegetable oil).
-
Place grates in a 450°F+ grill or oven for 1 hour. Let cool in the grill. Our Cast Iron Care Guide has the full tutorial.
-
-
Rust Prevention: The key is a good seasoning layer. If rust appears, scrub it off with vinegar or a salt paste, then re-season immediately. Never store cast iron grates wet.
Stainless Steel Grates: The Workhorses
-
Proper Brushing Techniques: Use a stainless steel brush for the most effective cleaning. Scrape with the grain of the metal to avoid unnecessary scratches.
-
Stain Removal: For water spots or discoloration, use a dedicated stainless steel cleaner or a paste of baking soda and water.
-
Polishing and Protection: After cleaning and while the grates are warm, wipe them with a light coat of cooking oil. This prevents “tea-staining” and surface rust, keeping them looking new.
Porcelain-Coated Grates: The Easy-Clean Option
-
Gentle Cleaning Methods: The coating is essentially glass. Use a nylon brush or bristle-free scrubber to avoid scratching. Soak in warm, soapy water to loosen debris.
-
Chip and Crack Prevention: Never use metal brushes or tools. Avoid thermal shock—don’t spray a hot grate with cold water. Handle carefully to avoid banging them against hard surfaces.
-
When to Replace: If you see rust bleeding from underneath the coating or the porcelain is chipped extensively, it’s time for new grates. The exposed base metal will rust quickly.
Burner Maintenance: The Engine of Your Gas Grill
Clogged or corroded burners are the #1 cause of uneven heating and flame issues.
-
Clearing Clogged Ports:
-
With the grill OFF AND COLD, remove the grates and flavorizer bars to access the burners.
-
Use a specialized burner cleaning tool or a stiff nylon brush to clear each port. A unfolded paperclip can work for stubborn clogs.
-
Ensure the flame can travel evenly across the entire burner tube.
-
-
Corrosion Prevention: Keep your grill covered when not in use. Ensure the drip tray is managed so grease doesn’t pool underneath the burners, as the acidic byproducts of old grease accelerate corrosion.
-
Replacement Indicators: It’s time for a new burner if you see:
-
Large rust holes, especially on the bottom of the tube.
-
Persistent uneven flames even after cleaning.
-
A visible “hot spot” where the metal is thinning and glowing excessively.
-
Grease Management Systems: Your Fire Prevention System
This isn’t just about cleanliness—it’s about safety. A neglected grease system is a fire waiting to happen.
-
Tray Cleaning and Replacement:
-
Foil Liners are Your Best Friend. Line your grease tray with heavy-duty aluminum foil for effortless cleanup. Replace the foil after it becomes heavily soiled.
-
For a baked-on tray, remove it and let it soak in hot, soapy water before scraping it clean.
-
-
Drain Tube Maintenance:
-
This is a commonly overlooked fire hazard. If your grill has a grease drain channel or tube, ensure it is clear of obstructions.
-
Use a pipe cleaner or a long, flexible brush to clear any blockages. A clogged tube will cause grease to back up into the grill body.
-
-
Fire Prevention Strategies:
-
Empty the Grease Trap After Every Major Cook.
-
Never let grease accumulate more than 1/4 inch deep in any part of the system.
-
Keep a fire extinguisher rated for grease fires (Class B) nearby whenever you grill.
-
If a grease fire starts, turn off the burners (if gas), close the lid and all vents to cut off oxygen. Never use water on a grease fire.
-
⚠️ Safety Check: Before your next big barbecue, perform a full grease system inspection. It takes 5 minutes and could prevent a disaster.
Mastering these deep cleaning procedures ensures the core functional parts of your grill are in peak condition. In the next section, we’ll help you plan your year with our Seasonal Maintenance Calendar, so you always know the right task for the right time.
Seasonal Maintenance Calendar: Your Year-Round Grill Care Roadmap
Your grill’s needs change with the seasons. A proactive, seasonal approach prevents problems before they start and ensures your equipment is always ready for action. Follow this calendar to align your maintenance with nature’s rhythm.
Seasonal Checklists: Download and print your guides:
📅 Seasonal Resources
- 🖨️ Printable Maintenance Calendar – Your year-round checklist
- 🔥 Spring Grill Prep Guide – Getting ready for the season
- ❄️ Winter Shutdown Checklist – Step-by-step storage guide
- 📦 Seasonal Supply List – What to stock for each season
Spring Startup: The Grand Reopening
After a long winter, your grill needs a thorough wake-up call before the prime grilling season begins.
-
Post-Winter Inspection:
-
Exterior: Check for any cracks in the cart, rust on the body, and ensure the lid opens and closes smoothly.
-
Interior: Look for nests from critters (a common issue!), inspect for rust or corrosion, and check that all components are in place.
-
Gas Grills: Perform a leak check on all connections with a soapy water solution.
-
-
Deep Cleaning After Storage:
-
This is a Level 3 or 4 clean. Perform a full disassembly. Clean grates, burners, flavorizer bars, and the interior thoroughly to remove any dust or contaminants that settled during storage.
-
-
Part Replacement Before Grilling Season:
-
Now is the time to replace worn-out igniter batteries, corroded burners, or chipped grates. Don’t discover a critical part is broken when you have guests arriving.
-
-
Fuel System Check:
-
Gas: Ensure your propane tank is full or your natural gas line is clear.
-
Pellet: Check that leftover pellets are not damp or clumped. It’s often best to start with a fresh bag.
-
Charcoal: Stock up on new charcoal; old charcoal can absorb moisture and become difficult to light.
-
Summer Maintenance: Heavy-Use Management
Grilling season is in full swing! Your focus shifts from deep restoration to consistent upkeep during peak usage.
-
Heavy-Use Cleaning Schedule:
-
Stick rigorously to your 5-minute post-cook clean.
-
Increase your Weekly Deep Clean to possibly twice a week if you’re grilling daily.
-
Pay extra attention to the grease management system, as frequent use leads to rapid buildup.
-
-
Heat Management in High Temps:
-
Grills can run hotter in direct summer sun. Be mindful of ambient temperatures when following recipes from our Temperature Guide—you may reach your target temp faster.
-
Keep your propane tank out of direct sunlight to prevent pressure buildup.
-
-
Monsoon/Humidity Considerations:
-
In humid climates, moisture is the enemy. Be extra vigilant about ash removal in charcoal grills, as damp ash causes rapid corrosion.
-
If caught in a rain shower, ensure the grill is completely dry before covering it. A wet grill under a cover is a rust incubator.
-
Fall Preparation: Gearing Down Gracefully
As the weather cools and grilling frequency may slow, it’s time to prepare your grill for the harsher conditions ahead.
-
Increased Cleaning Frequency:
-
Falling leaves can clog vents and get into your grill. Be more diligent about checking and cleaning the exterior.
-
Give the grill a thorough clean before the holiday cooking season (Thanksgiving turkey!).
-
-
Rust Prevention as Weather Changes:
-
Cooler nights and morning dew create perfect conditions for condensation and rust.
-
Apply a light coat of oil to cast iron grates and any other bare metal surfaces to create a protective barrier.
-
-
Stocking Maintenance Supplies:
-
Before winter hits, ensure you have a high-quality grill cover, any spare parts you might need, and a supply of fuel so you’re not caught short.
-
Winter Shutdown/Storage: The Great Hibernation
Your strategy here depends on one question: Will you be a Winter Warrior or put the grill into Full Hibernation?
-
Proper Cleaning for Storage:
-
This is your most important clean of the year! Perform a Level 4 Seasonal Overhaul. You want to put the grill away perfectly clean. Any leftover grease or food will attract pests and cause corrosion over the winter.
-
-
Cold Weather Protection:
-
For Pellet Grills: Store pellets indoors in a sealed container to prevent moisture absorption, which can clog the auger.
-
For all grills: If storing a propane tank outdoors, ensure the valve is closed and the grill is disconnected.
-
-
Indoor Storage vs. Outdoor Protection:
-
Indoor Storage (Ideal): A garage or shed protects from the elements. Ensure the grill is clean and dry to avoid attracting pests.
-
Outdoor Protection (Required if left outside): A high-quality, vented grill cover is non-negotiable. It must be breathable to prevent moisture from being trapped inside.
-
-
Cover Selection and Use:
-
Choose a durable, weather-resistant cover that is specifically sized for your grill.
-
Ensure the grill is COMPLETELY COOL and DRY before putting the cover on. A cover traps moisture, so putting it on a damp grill guarantees mold and rust.
-
Pro Tip: Set calendar reminders for each seasonal transition! A quick “Spring Grill Prep” alert in early March ensures you’re ready for the first perfect grilling day.
By syncing your maintenance with this seasonal calendar, you transform reactive repairs into proactive care. In the next section, we’ll tackle Troubleshooting Common Problems, so you can diagnose and fix issues before they ruin your cookout.
Troubleshooting Common Problems: Your Quick-Fix Guide
Even with perfect maintenance, issues can arise. Knowing how to quickly diagnose and fix common problems will save your cookout and extend your grill’s life. Here’s your go-to guide for the most frequent headaches.
Troubleshooting Tools: Have the right gear for quick fixes:
🛠️ Fix-It Gear
- 🌡️ Digital Thermometer – For temperature calibration
- 🔧 Multi-Tool Kit – For adjustments and repairs
- 🧽 Cleaning Tools – Often the solution to many problems
- 🛡️ Fire Safety Gear – Extinguisher and gloves
Temperature Issues: The Foundation of Good Cooking
Inconsistent Heat: Causes and Fixes
-
Cause: Clogged burner tubes (gas), uneven charcoal arrangement, or grease buildup on heat diffusers.
-
Fix:
-
Gas: Turn off grill, cool completely, and clean burner ports with a nylon brush or specialized tool.
-
Charcoal: Use the two-zone setup method for consistent heating areas.
-
All Grills: Ensure heat deflectors or flavorizer bars are clean and properly positioned.
-
Hot/Cold Spots: Diagnosis and Solutions
-
Diagnosis: Use the bread test. Place white bread slices over entire cooking surface and toast for 2-3 minutes. The browning pattern reveals your heat zones.
-
Solutions:
-
Gas: Clean burners thoroughly. If spots persist, you may need burner replacement.
-
Charcoal: Rotate food regularly or adjust charcoal placement.
-
Pellet: Check pellet quality and auger feed rate consistency.
-
Temperature Gauge Calibration
-
Test Accuracy: Place a reliable digital thermometer next to your built-in gauge. Compare readings at 350°F.
-
Calibration: If off by more than 25°F:
-
Many gauges can be adjusted via a nut on the back
-
For non-adjustable gauges, note the variance and cook accordingly
-
Consider replacement if consistently inaccurate
-
Ignition Problems: When Your Grill Won’t Start
Electronic Igniter Maintenance
-
Weak/No Spark: Check battery first (if applicable). Clean electrode tip with steel wool or emery cloth. Ensure electrode is properly positioned ⅛” from burner.
-
Clicking But No Ignition: Check for clogged burner ports or blocked gas flow.
Manual Lighting Techniques
-
Gas Grills: Always have long matches or a grill lighter available. Turn gas on, insert flame near burner, then ignite.
-
Charcoal: Use a chimney starter for reliable, even lighting every time.
Fuel Flow Issues
-
Propane Tank: Check if tank is empty. Reset regulator by turning off tank valve, disconnecting regulator, then reconnecting and slowly reopening.
-
Natural Gas: Ensure valve is fully open and line is clear.
-
Pellets: Check for clogs in hopper or auger. Use high-quality, dry pellets.
Rust and Corrosion: The Silent Killer
Prevention Strategies
-
Keep It Clean: Regular cleaning prevents acidic food residues from eating through metal.
-
Keep It Dry: Always cover a completely cool, dry grill.
-
Keep It Oiled: Light oil coating on metal surfaces creates protective barrier.
-
Proper Storage: Indoor storage is best; if outdoors, use a quality ventilated cover.
Treatment Methods
-
Surface Rust: Scrub with wire brush, treat with rust converter, touch up with high-heat paint.
-
Pitted Rust: Remove loose material, fill with high-heat epoxy putty, sand smooth, and paint.
-
Cast Iron: Use vinegar soak followed by vigorous scrubbing and immediate re-seasoning.
When Replacement is Necessary
-
Structural Rust: Holes in firebox or critical support structures
-
Burner Tubes: More than 30% of ports clogged or significant bottom corrosion
-
Grates: Extensive flaking (porcelain) or deep pitting that traps food particles
Grease Fires and Prevention: Safety First
Proper Grease Management
-
Empty trays after every major cook
-
Use foil liners for easy cleanup
-
Clean drip pans weekly during heavy use
-
Inspect drain tubes monthly for blockages
Emergency Procedures
-
DON’T use water – this will cause flaming grease to splatter
-
DO turn off burners (if safe to reach)
-
DO close lid and all vents to smother the fire
-
DO keep a Class B fire extinguisher within reach
-
DO call 911 if fire spreads or cannot be contained
Prevention Systems
-
Regular Cleaning: This is your best defense
-
Drip Pan Management: Never let grease accumulate more than ¼ inch deep
-
Temperature Control: Avoid excessive high-heat cooking with fatty foods
-
Vigilance: Never leave a hot grill unattended
⚠️ Safety First: When in doubt about any repair, consult a professional. Gas systems and structural integrity are not areas for guesswork.
Need More Help? Explore our comprehensive maintenance guides:
🔧 Further Reading
- 📖 Complete Maintenance Guide – Detailed step-by-step solutions
- ❌ Common BBQ Mistakes – Avoid these frequent errors
- 🔥 Techniques Encyclopedia – Master the fundamentals
- 🛠️ Equipment Care Guide – Proper tool maintenance
Most grill problems are preventable with proper maintenance. By addressing issues early and using these troubleshooting techniques, you’ll ensure years of reliable performance from your grill. In our final section, we’ll provide you with a complete Maintenance Log and Checklist System to keep everything organized.
Advanced Maintenance Topics: Becoming a Grill Restoration Expert
Once you’ve mastered routine maintenance, a world of advanced techniques opens up. Whether you’re rescuing a classic grill from the scrap heap or optimizing your current setup, these pro-level skills will take your grill game to the next level.
Advanced Restoration Gear: Tools for the serious enthusiast:
🔧 Pro-Level Tools
- 🛠️ Angle Grinder & Wire Wheels – For heavy rust removal
- 🎨 High-Heat Paint & Primer – Professional finish restoration
- 📊 Multimeter – For electrical diagnostics
- 🔍 Inspection Camera – For hard-to-see areas
Restoring Old Grills: Bringing Classics Back to Life
There’s something special about saving a quality grill from the landfill. Vintage Weber kettles, classic gas grills, and old offset smokers often have better construction than modern equivalents.
Assessment and Planning
-
Structural Integrity: Check for rust holes in the firebox, cracked welds, or compromised legs. Some rust is fixable; structural damage may be a deal-breaker.
-
Parts Availability: Research if replacement parts (burners, grates, igniters) are still available before investing time and money.
-
Cost vs. Value: A $20 used grill might need $100 in parts. Is the final product worth the investment compared to a new grill?
Rust Removal Techniques
-
Mechanical Removal: Use an angle grinder with a wire wheel for large areas. For detailed work, use a Dremel with abrasive attachments.
-
Chemical Treatment: Evapo-Rust or naval jelly can dissolve rust in hard-to-reach places without damaging good metal.
-
Electrolysis: The gold standard for serious restorers. Uses an electrical current to pull rust off iron parts. Completely removes rust from pores without damaging the base metal.
Part Sourcing and Replacement
-
Manufacturer Parts: Always check the OEM first for critical components like gas valves and regulators.
-
Aftermarket Suppliers: Companies like BBQ Parts, Grill Parts, and Amazon carry universal parts that often work perfectly.
-
Fabrication: For unavailable parts, local machine shops can sometimes fabricate brackets, handles, or custom components.
Bringing Vintage Equipment Back to Life
-
Disassembly: Photograph every step. Bag and label all hardware.
-
Surface Prep: Sandblast or chemically strip old paint and rust.
-
Refinishing: Use high-temperature spray paint (1200°F rating) for body parts. Consider ceramic coating for high-heat areas.
-
Reassembly: Replace all worn hardware with stainless steel. Use high-temperature anti-seize on threaded parts.
DIY Repairs vs. Professional Service: Knowing Your Limits
What You Can Safely Do Yourself
-
Grate and Burner Replacement: Simple bolt-on parts
-
Igniter System Repair: Battery replacement and electrode cleaning
-
General Cleaning and Maintenance: All routine tasks from our maintenance pyramid
-
Cosmetic Repairs: Painting, handle replacement, wheel maintenance
-
Rust Treatment: Surface rust removal and prevention
When to Call a Professional
-
Gas Line Repairs: If you smell gas or find leaks in hard lines
-
Regulator/Valve Replacement: Critical safety components
-
Structural Welding: Frame or firebox repairs
-
Electrical Issues: Pellet grill control board problems
-
Warranty Coverage: If your grill is still under manufacturer warranty
Cost-Benefit Analysis
-
DIY Example: $50 in parts + 3 hours of your time vs. $200 professional service call
-
Consider: Your skill level, tool availability, and the value of your time
-
Rule of Thumb: If it involves gas pressure, structural integrity, or complex electronics, professional help is often worth the cost
Performance Upgrades: Beyond Basic Maintenance
Aftermarket Parts That Improve Maintenance
-
Stainless Steel Grates: Last longer and are easier to clean than cast iron or porcelain
-
Infrared Burners: Provide intense heat while being less prone to clogging
-
Ceramic Briquettes: Better heat distribution than metal flavorizer bars and easier to clean
-
Upgraded Thermometers: More accurate than stock gauges
Mods for Easier Cleaning
-
Grease Management Systems: Add secondary drip pans or modify drain systems
-
Removable Ash Pans: Convert fixed systems to removable for easier cleaning
-
Custom Carts: Build storage for tools and cleaning supplies directly into your grill station
-
Magnetic Tool Holders: Keep brushes and scrapers within easy reach
Automation and Monitoring Systems
-
WiFi Thermometers: Monitor grill and food temps from your phone (see our Top 5 Meat Thermometers)
-
Pellet Grill Upgrades: Aftermarket controllers with better temperature stability
-
Gas Grill Monitoring: Tank level sensors and remote ignition systems
-
Smart Home Integration: Voice control and automated temperature programming
Pro Restoration Tip: The best grill restoration candidates are often mid-range models from reputable brands. Cheap grills aren’t worth restoring, and high-end grills rarely need it.
Ready for Your Next Project? Explore these related guides:
Project Inspiration
- Complete Restoration Guide – Start-to-finish projects
- Grill Modifications – Customizing your equipment
- DIY BBQ Projects – Build your own accessories
- Upgrade Planning – When to modify vs. replace
These advanced techniques transform maintenance from a chore into a rewarding hobby. Whether you’re restoring a classic or optimizing your current setup, these skills ensure your equipment will deliver exceptional performance for years to come. In our final section, we’ll provide the ultimate organizational tool: your complete Maintenance Log and Checklist System.
Safety First: The Non-Negotiable Rules of Grill Maintenance
Throughout this guide, we’ve focused on how to maintain your grill. Now, let’s focus on the most important aspect: doing it safely. A damaged grill can be replaced; your safety cannot. These rules are not suggestions—they are the foundation of everything we’ve discussed.
⚠️ SAFETY FIRST: YOUR GRILL MAINTENANCE COMMANDMENTS
Critical Safety Rules
1. Never Service a Hot Grill
-
The Rule: Always allow your grill to cool completely before beginning any disassembly or cleaning, unless specifically instructed to clean grates while warm (e.g., post-cook brushing).
-
The Why: Severe burns are the most common grill-related injury. Metal components can retain heat long after the flames are out. Grease can remain scalding hot.
-
The Exception: The only time to work on a warm grill is for the 5-minute post-cook grate brush. Even then, use long-handled tools and heat-resistant gloves.
2. Gas Safety Procedures
-
Leak Checks Are Mandatory: Any time you reconnect a gas line or smell gas, you must perform a leak check. Apply a soapy water solution to all connections and hoses with the gas on (but grill off). Bubbles indicate a leak.
-
Check Your Hose: Regularly inspect the gas hose for cracks, brittleness, or damage. Replace it every 5 years, regardless of visible wear.
-
No Sparks: If you suspect a gas leak, do not ignite the grill. Do not turn on or off any electrical switches nearby. Turn off the gas at the tank and address the leak.
3. Electrical Safety for Pellet Grills
-
Unplug Before Servicing: Always unplug your pellet grill before cleaning the auger, fire pot, or any internal components.
-
Keep it Dry: Never operate a pellet grill in the rain or clean electrical components with a wet cloth. Water and electricity are a deadly combination.
-
Respect the Electronics: The control board is sensitive. Avoid static discharge and never attempt to repair it yourself.
4. Proper Tool Usage
-
Use the Right Tool for the Job: Don’t use a knife as a screwdriver or a pair of pliers as a hammer. This damages your tools and can cause injury.
-
Wear Eye Protection: Any time you are scraping, scrubbing, or using chemicals, wear safety glasses. Flying debris, rust particles, or a splash of cleaner can cause serious eye injury.
-
Gloves are a Must: Wear heavy-duty, heat-resistant gloves when handling warm components and cut-resistant gloves when working with sharp metal edges.
5. Fire Extinguisher Requirements
-
You Must Have One: Keep a Class B (grease/fuel) or Class ABC (multi-purpose) fire extinguisher within 10 feet of your grill. Do not rely on a garden hose or baking soda.
-
Know How to Use It: Remember the acronym PASS:
-
PULL the pin.
-
AIM the nozzle at the base of the fire.
-
SQUEEZE the handle.
-
SWEEP from side to side.
-
-
Know When to Bail: If a grease fire cannot be immediately contained by closing the lid and turning off the fuel, use the extinguisher. If the fire spreads at all, call 911 immediately and get everyone to safety.
Essential Safety Gear: Don’t start without this equipment:
Safety Essentials
- Heat-Resistant Gloves – For handling warm components
- Safety Glasses – Eye protection is non-negotiable
- Fire Extinguisher – Class B for grease fires
- Proper Tools – Avoid makeshift solutions
The Ultimate Safety Checklist: Before You Start Any Maintenance
-
Grill is COMPLETELY COOL to the touch
-
Gas is TURNED OFF at the source (for gas grills)
-
Unit is UNPLUGGED (for pellet/electric grills)
-
Fire extinguisher is WITHIN REACH
-
I am wearing HEAT-RESISTANT GLOVES
-
I am wearing SAFETY GLASSES
-
I am working in a WELL-VENTILATED AREA (if using chemicals)
-
I have the PROPER TOOLS for the job
The Final Word on Safety: There is no maintenance task so urgent that it cannot wait for the grill to cool down or for you to get the proper safety gear. Taking shortcuts here risks everything.
By making these safety rules second nature, you ensure that every maintenance session ends as successfully as it began. In our final section, we’ll provide you with the ultimate organizational tool to keep your grill in perfect condition: the Maintenance Log and Checklist System.
Maintenance Log and Checklist System: Your Organized Path to Perfection
Knowledge is power, but organization is freedom. A simple, consistent tracking system transforms grill maintenance from a guessing game into an automated habit. This final section gives you everything you need to build your own personalized maintenance command center.
Get Organized: Start with our ready-to-use resources:
📋 Printable Resources
- 📝 Complete Checklist Pack – All schedules in one PDF
- 🖨️ Maintenance Log Sheet – Track your service history
- 📦 Parts Inventory Template – Know what you have & need
- 📅 Seasonal Calendar – Year-round maintenance plan
Printable Resources: Your Physical Command Center
Daily/Weekly/Monthly Checklists
-
Post-Cook Quick-Clean (5 minutes)
-
Brush grates while warm
-
Empty grease tray/drip pan
-
Wipe down exterior
-
Check fuel levels
-
-
Weekly Deep Inspection (15 minutes)
-
Remove and inspect grates
-
Check burner tubes/ports
-
Inspect for grease buildup
-
Test igniter operation
-
Verify thermometer accuracy
-
-
Monthly Maintenance (45-60 minutes)
-
Full disassembly and deep clean
-
Inspect seals and gaskets
-
Check electrical connections
-
Test safety systems
-
Lubricate moving parts
-
Seasonal Maintenance Calendar
SPRING STARTUP (March-May) ☑️ Post-winter inspection ☑️ Deep cleaning after storage ☑️ Part replacement before season ☑️ Fuel system check SUMMER MAINTENANCE (June-August) ☑️ Heavy-use cleaning schedule ☑️ Heat management in high temps ☑️ Humidity/moisture control FALL PREPARATION (September-November) ☑️ Increased cleaning frequency ☑️ Rust prevention treatment ☑️ Stock maintenance supplies WINTER SHUTDOWN (December-February) ☑️ Proper cleaning for storage ☑️ Cold weather protection ☑️ Indoor storage preparation
Part Inventory and Replacement Schedule
| Part | Last Replaced | Expected Life | Need to Order |
|---|---|---|---|
| Cooking Grates | Jun 2024 | 3-5 years | |
| Burner Tubes | Apr 2024 | 2-3 years | |
| Igniter Battery | Aug 2024 | 1 year | 🔋 |
| Grill Cover | Mar 2024 | 2 years | |
| Grease Tray Liners | Weekly | – | 📦 |
Service History Log
Date: March 15, 2024 Service: Spring Startup Tasks: Full disassembly, burner cleaning, grate seasoning Parts Replaced: Igniter battery, heat shields Notes: Found minor rust on bottom shelf - treated with high-heat paint Next Service Due: Weekly inspection - April 1, 2024
Digital Tools: Your Modern Maintenance Solution
Mobile App Recommendations
-
Notes/Keep App: Perfect for quick checklists and photo documentation
-
Google Sheets/Excel Online: Ideal for maintenance logs and parts inventory
-
Todoist/Trello: Great for setting recurring maintenance reminders
-
Manufacturer Apps: Many grill brands now offer maintenance tracking features
Reminder System Setup
📱 PHONE REMINDERS: • "Saturday AM - Weekly Grill Check" (Recurring weekly) • "1st of Month - Monthly Maintenance" (Recurring monthly) • "March 1 - Spring Startup" (Recurring yearly) • "December 1 - Winter Shutdown" (Recurring yearly) 📧 EMAIL CALENDAR: • Set seasonal reminders 2 weeks before each season change • Schedule part replacement reminders based on expected lifespan
Photo Documentation for Warranties
-
Before/After Shots: Document major cleaning and restoration projects
-
Serial Numbers: Store photos of model and serial number tags
-
Damage Documentation: Photograph any defective parts for warranty claims
-
Installation Proof: Take pictures during part replacement for service records
Pro Organization Tip: Create a “Grill Maintenance” folder in your phone’s photos app. Immediately save all grill-related photos here for instant access during repairs or warranty calls.
Your First 30-Day Maintenance System Setup
-
Week 1: Print checklists and place in plastic sleeve near grill
-
Week 2: Set up digital reminders in your calendar app
-
Week 3: Create parts inventory in notes app or spreadsheet
-
Week 4: Take baseline photos of your grill’s current condition
Maintenance Success Stories: See how organization pays off:
Real Results
- Extended Grill Lifespan – How tracking adds years
- Cost Savings – Catching issues early saves money
- Warranty Success – How documentation helps claims
- Perfect Results – Consistent maintenance = better cooking
This system isn’t about creating more work—it’s about working smarter. By investing 30 minutes to set up these tools, you’ll save countless hours of frustration and expensive repairs down the road. A well-maintained grill isn’t just about longevity; it’s about the confidence that comes from knowing your equipment is always ready to deliver perfection.
From Maintenance to Mastery
You’ve now completed the ultimate guide to grill and smoker maintenance. You have the knowledge, the techniques, the safety protocols, and the organizational systems to keep your equipment performing like new for years to come.
Remember: Maintenance isn’t a cost—it’s an investment. An investment in perfect sears, in safety around your family, and in the longevity of your equipment. The few minutes you spend caring for your grill pay dividends in every meal you create.
Your journey to maintenance mastery begins with one simple step: Commit to the 5-minute post-cook clean. Master that habit, and everything else will fall into place.
Now go forth with confidence, knowing your grill is ready for whatever culinary masterpiece you create next. Happy grilling
Conclusion: The Payoff of Perfect Maintenance
Conclusion: The Payoff of Perfect Maintenance
We began this journey with a simple premise: that a clean grill isn’t about looks, but about performance, safety, and respect for your craft. We’ve armed you with everything you need—from the 5-minute daily habit to the full seasonal teardown, from essential tools to advanced restoration techniques.
The difference between a neglected grill and a meticulously maintained one is the difference between guessing and knowing. It’s the difference between fighting flare-ups and achieving the perfect sear. Between a grill that fails you in the middle of a holiday cookout and one that stands ready for any challenge, year after year.
The Ultimate Payoff
“The few minutes you spend maintaining your grill pay back in years of perfect cooks, saved money on replacements, and the confidence that your equipment will perform flawlessly every time you fire it up.”
text
This isn’t just about preserving metal and components. It’s about preserving moments—the perfect birthday steak, the unforgettable holiday turkey, the lazy Sunday burgers with family. Your well-maintained grill becomes a reliable partner in creating memories, not a source of frustration.
Your Sunday Experiment starts now. You don’t need to do everything at once. You don’t need to perform a full teardown this weekend.
🎯 Your Mission: Start Today
“Start today with a simple 5-minute clean after your next cook. Your future self—and your future steaks—will thank you.”
Bookmark this guide. Return to it with each changing season. Share it with fellow grill enthusiasts. And remember: every great pitmaster, every backyard hero, every chef who produces incredible food from live fire—they all share one simple secret.
They take care of their tools.
Now go fire up that clean grill and create something amazing.
Continue Your Maintenance Journey: Explore more of our expert guides:
🔧 Master Your Craft
text
🥩 Ingredients
🛠️ Equipment
📚 Resources