

Expert’s Note: This guide is a core technique in our BBQ Equipment Maintenance Series. A clean grate is the canvas for every masterpiece.
HOW TO CLEAN YOUR GRILL GRATES LIKE A PRO: FOR PERFECT SEAR MARKS AND NO STICK
“The sizzle when food hits the grill should be a sound of promise, not panic. That confident, immediate release isn’t luck—it’s the direct result of a perfectly clean and seasoned surface. Master this one skill, and you’ve solved 90% of grilling frustrations.”
How to Clean Your Grill Grates Like a Pro
Download our free Pro-Level Grill Cleaning Checklist for your grilling station.
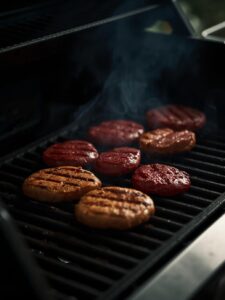
There are few grilling moments more disappointing than watching a beautifully marinated steak tear apart because it fused itself to a dirty grate. Or serving burgers that look more like lace doilies, with half their substance left behind. This isn’t a seasoning problem; it’s a cleaning problem.
Professional pitmasters and steakhouse chefs obsess over their grates. They don’t see cleaning as a tedious chore at the end of the cook; they see it as the critical first step of the next cook. A pristine grate ensures flawless sear marks, prevents sticking, and eliminates the off-flavors of last week’s dinner from tainting tonight’s meal.
This guide will take you beyond a simple wire brush scrub. We will dive into the specific techniques for every type of grate material, from stainless steel to cast iron and porcelain. You’ll learn the tools, the timing, and the tricks to achieve a professional-grade clean every single time.
🔬 THE SCIENCE OF THE STICK: WHY FOOD GRABS ON
To prevent sticking, you must first understand the enemy: molecular bonding.
⚙️ The Maillard Reaction & Protein Bonding:
- The Good Bond: When food hits a hot, clean surface, the Maillard reaction occurs—a complex chemical process that creates hundreds of new flavor compounds and that beautiful brown crust. Initially, the proteins in the food *do* form microscopic bonds with the metal of the grate.
- The Bad Bond: On a dirty grate, these proteins bond even more strongly to the old, carbonized food debris instead of the metal. This creates a super-strong, glue-like connection that tears the food apart when you try to flip it.
- The Release Point: As the food cooks, it naturally releases from a clean surface once the Maillard crust has fully formed and contracted. A dirty surface prevents this natural release.
🎯 The Three Pillars of a Non-Stick Surface:
-
- High Heat: A hot grate instantly sears the exterior, creating a barrier that prevents the food from sinking into the grooves and sticking.
Impeccable Cleanliness: No old food debris means nothing for the new food to glue itself to.
- Proper Lubrication: A thin layer of oil on the food or the grate acts as a final release agent.
🛠️ THE PRO’S TOOLKIT: MORE THAN JUST A WIRE BRUSH
Using the wrong tool can damage your grates. Here’s what you need.
✅ The Essential Arsenal:
- Long-Handled Grill Brush (Brass Bristles): The workhorse. Brass is softer than steel grates, so it cleans effectively without scratching. Replace it as soon as the bristles show wear.
- Stainless Steel Putty Knife or Scraper: Perfect for scraping off thick, baked-on gunk that a brush can’t handle. Ideal for stainless steel grates.
- Tongs and Grill Mitts: For handling hot grates and holding cleaning materials.
- Coarse Kosher Salt & Cooking Oil: A natural, abrasive paste for cleaning and polishing.
- Onion Half (The Secret Weapon): More on this later.
🚫 Tools to Avoid:
- Steel Wire Brushes on Porcelain Grates: They will scratch and chip the coating, leading to rust.
- Metal Scouring Pads: They can leave behind tiny metal filaments and are too abrasive for most surfaces.
- Harsh Chemical Oven Cleaners on a Hot Grill: The fumes are dangerous and can contaminate your food. (They have a place in deep cleaning, used cold and rinsed thoroughly).
⏱️ THE TWO-STEP PRO CLEANING RITUAL: DURING & AFTER
The secret is to clean in two phases: a quick clean when the grill is screaming hot, and a more thorough clean once it’s cooled.
🔥 Phase 1: The “Fire Clean” (While the Grill is Hot)
Timing: Right after you’ve taken the food off and the grill is still at cooking temperature (400°F+).
Action Plan: 1. Close the Lid: Let the grill rage for 5-10 minutes. This incinerates any loose food particles and turns stubborn debris into ash. 2. Scrape Vigorously: Wearing a grill mitt, take your long-handled brass brush and scrub the grates back and forth, applying firm pressure. Get into all the grooves. 3. The Onion Trick: For a next-level clean, spear half an onion on a fork. Rub the cut side firmly over the hot grates. The water and natural acids in the onion create steam, help dissolve grime, and leave a light, protective, non-stick coating. This is a classic steakhouse technique.
🧼 Phase 2: The “Takedown Wipe” (After the Grill is Cool)
Timing: Once the grill is cool enough to touch safely.
Action Plan: 1. Remove the Grates: Take them out of the grill for better access. 2. Wipe Down: Use a damp cloth or paper towel to wipe away any ash or residue left from the fire clean. 3. Lightly Oil (For Cast Iron & Steel): While the grates are still slightly warm from the fire clean, take a paper towel folded into a small pad, add a few drops of a high-smoke-point oil (canola, grapeseed), and wipe a microscopically thin layer over the entire surface. This protects against rust and preps them for the next cook.
Pro Tip: The “Fire Clean” is 90% of the battle. If you do nothing else, do this. It takes 60 seconds and ensures you always start with a clean slate. The residual heat will also evaporate any moisture, preventing rust.
🎭 MATERIAL MATTERS: TAILORED TECHNIQUES FOR EVERY GRATE
One size does not fit all. Here’s how to handle the most common types.
🥇 Stainless Steel Rod Grates
Characteristics: Durable, rust-resistant, can handle aggressive cleaning.
Pro Technique: The fire clean is your best friend. Follow up with a stainless steel putty knife for any stubborn spots. For a brilliant shine, use a paste of baking soda and water, scrub, and rinse.
🖤 Cast Iron Grates
Characteristics: Superior heat retention, but prone to rust if the seasoning is damaged.
Pro Technique: NEVER use soap. Rely on the fire clean with a brass brush. For stuck-on bits, use the salt-and-oil method: sprinkle kosher salt on the grate and scrub with a oiled paper towel or cloth. The salt acts as a gentle abrasive. The final, light oiling is non-negotiable.
⚪ Porcelain-Coated Grates
Characteristics: Easy to clean and rust-proof, but the coating is fragile and can chip.
Pro Technique: Handle with care. Use only a brass or nylon brush. Avoid metal scrapers and abrasive cleaners that can scratch the surface. If food is stuck, let the grill heat up to burn it off rather than chipping at it.
🎯 Grill Grate Cleaning Matrix
| Grate Type | Best Tool | Cleaning Secret | What to Avoid |
|---|---|---|---|
| Stainless Steel | Brass Brush, Putty Knife | Baking soda paste for shine | Letting grease build up |
| Cast Iron | Brass Brush, Salt/Oil Paste | Light oil after every clean | Soap, water soaking, wire wheels |
| Porcelain | Nylon or Brass Brush | The onion steam method | Metal scrapers, steel brushes |
🚨 RESCUE & RECOVERY: HANDLING NEGLECTED GRATES
If your grates are caked in black, cement-like gunk, don’t despair. You can save them.
🧪 The “Last Resort” Deep Clean:
For Cast Iron: 1. Take the grates to a self-service car wash and use the high-pressure wand (from a distance) to blast off heavy debris. 2. Soak in a solution of 50/50 water and white vinegar for several hours to loosen rust and carbon. 3. Scrub with a steel wool pad or a wire brush on a drill. 4. Immediately dry thoroughly and re-season using our Cast Iron Care and Seasoning Guide.
For Stainless Steel & Porcelain: 1. In a well-ventilated area, place the cold grates in a large trash bag. 2. Spray heavily with a commercial oven cleaner. 3. Seal the bag and let it sit overnight. 4. The next day, wearing gloves, remove the grates and rinse them thoroughly with a garden hose. All the gunk should wipe away easily.
🏁 CONCLUSION: THE HABIT OF A PITMASTER
Cleaning your grill grates isn’t just about maintenance; it’s about respect for the process and for the food you’re about to create. That five-minute ritual is what separates a hurried weeknight meal from a deliberate culinary experience.
When you make this two-phase cleaning process a non-negotiable habit, you will never again fear the flip. You’ll lay down perfect, photogenic sear marks with confidence, and your food will release with a satisfying, clean sizzle.
Your mission is this: On your very next grilling session, implement the “Fire Clean” immediately after you pull your food off. Experience how easy it is, and notice the difference it makes on your next cook. That single habit is the gateway to pro-level results.
📚 Related BBQ Topics
- Cast Iron Care and Seasoning – The definitive guide to maintaining your cast iron grates.
- Gas Grill Troubleshooting Guide – Keep the rest of your grill in perfect working order.
- The Ultimate Guide to Steak Cuts – Pair your perfectly clean grates with the perfect steak.
- BBQ Equipment Maintenance Series – Your hub for all gear care knowledge.
Never Fear the Flip Again
Transform your grilling from sticky to sublime. Master the pro cleaning method for perfect sear marks and effortless release every time.