

Expert’s Note: This foundational guide complements our BBQ Methods Encyclopedia. Offset smoking represents the most authentic—and challenging—path to true barbecue mastery. While pellet smokers offer convenience and kamados provide versatility, the offset smoker delivers the purest smoke flavor and the deepest connection to barbecue tradition.
A BEGINNER’S GUIDE TO OFF-SET SMOKERS: HOW TO MANAGE FIRE AND TEMPERATURE
“Learning to manage an offset smoker is like learning to conduct an orchestra of fire, air, and smoke. The firebox is your percussion section—providing the raw power and rhythm. The smokestack is your woodwinds—controlling the airflow and melody. The cooking chamber is your string section—where everything harmonizes into beautiful results. Master the conduction, and you create barbecue symphonies.”
A Beginner’s Guide to Off-Set Smokers: How to Manage Fire and Temperature (2025)
Download our free Offset Smoker Fire Management Cheat Sheet - your quick-reference guide to temperature control.
The offset smoker stands as the most traditional and revered tool in American barbecue, the choice of competition champions and barbecue legends. Yet for beginners, it can feel like trying to tame a wild beast. Unlike set-and-forget smokers, offsets demand constant attention, intuitive fire management, and a deep understanding of heat dynamics. This guide doesn’t just show you how to use an offset—it teaches you how to speak the language of fire and become the conductor of your own barbecue orchestra.
🔧 UNDERSTANDING YOUR OFFSET SMOKER: ANATOMY 101
Before you light the first match, understand every component and its purpose.
⚙️ The Three-Chamber System
How Air and Heat Move Through Your Smoker
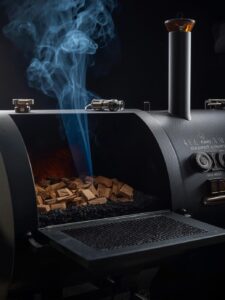
- Firebox (The Engine): The separate chamber where you build and maintain your fire. This is where fuel becomes heat and smoke. Size matters—larger fireboxes hold more fuel and require less frequent tending.
- Cooking Chamber (The Stage): Where the magic happens. Heat and smoke enter from the firebox, circulate around your food, and exit through the smokestack. The goal is even heat distribution throughout this space.
- Smokestack (The Conductor): Creates the draft that pulls heat and smoke through the entire system. Proper stack management is crucial for temperature control and clean smoke.
- Heat Baffle/Plate (The Traffic Cop): Many offsets include a metal plate that directs heat and smoke. Understanding how to adjust or position this is key to eliminating hot spots.
🎯 Offset Smoker Reality Check
❌ Common Beginner Misconceptions
- “Set it and forget it” operation
- Constant thick white smoke is good
- Bigger fire means hotter temperature
- All offsets cook evenly automatically
- Temperature will stay stable for hours
✅ Offset Reality
- Active management required
- Thin blue smoke is the goal
- Airflow controls temperature
- Hot spots are normal and manageable
- Constant small adjustments needed
🔥 FIRE MANAGEMENT: BUILDING THE PERFECT FIRE
The foundation of offset mastery lies in how you build and maintain your fire.
🪵 Fuel Selection and Preparation
Choosing and Preparing Your Wood
- Wood Types: Start with oak or hickory for their consistent burn characteristics. Fruit woods like apple and cherry are excellent for flavor but can be less predictable for beginners.
- Seasoning Matters: Use properly seasoned wood with 15-20% moisture content. Green wood creates bitter smoke, while bone-dry wood burns too quickly. Test by banging two pieces together—they should “clack” not “thud.”
- Size and Splitting: Split wood into consistent sizes—roughly the length of your forearm and 3-4 inches in diameter. Uniform pieces burn more predictably.
- The Charcoal Foundation: Most beginners should start with a charcoal base, adding wood chunks for smoke flavor. This provides more temperature stability than wood-only fires.
🎪 The Step-by-Step Fire Build
The Minion Method for Offsets
- Charcoal Foundation: Fill firebox 1/3 full with unlit charcoal, creating a slight slope toward the cooking chamber
- Hot Starter: Light 15-20 charcoal briquettes in a chimney starter until ashed over (20-30 minutes)
- Initial Placement: Pour hot coals onto the highest point of your unlit charcoal pile, near the cooking chamber opening
- Wood Addition: Place 2-3 small wood chunks on top of the hot coals—avoid large logs initially
- Initial Burn: Leave firebox door open until wood ignites and produces thin blue smoke (10-15 minutes)
- Temperature Management: Close firebox door, adjust vents to reach target temperature (225-250°F ideal for learning)
Fire Management Secret: Build your fire in the corner of the firebox closest to the cooking chamber. This creates a longer path for heat and smoke to travel, resulting in cleaner combustion and more stable temperatures. The fire should “reach” for the cooking chamber, not blast directly into it.
🌡️ TEMPERATURE CONTROL MASTERY: THE DANCE OF AIRFLOW
Temperature management in an offset is about balancing three airflow points.
🎛️ The Three Control Points
Mastering the Airflow Trinity
- Firebox Intake (Primary Control): This is your throttle—more air = hotter fire, less air = cooler fire. Make small adjustments (1/4 inch at a time) and wait 10-15 minutes to see the effect before making another adjustment.
- Firebox Exhaust (Secondary Control): On models with firebox chimneys, this controls how quickly heat exits the firebox. Generally keep this mostly open to ensure good draft through the entire system.
- Smokestack Damper (Fine Tuning): This controls the draft through the cooking chamber. Start with it fully open, then close it 25% if you need to slow heat loss or improve heat distribution.
📊 Temperature Management Matrix
🎯 Offset Smoker Temperature Scenarios
| Situation | Firebox Intake | Smokestack | Action |
|---|---|---|---|
| Temperature too low | Open slightly | Fully open | Add small wood piece, wait 15 min |
| Temperature too high | Close slightly | Fully open | Wait 15 min, don’t add fuel |
| Uneven heating | No change | Adjust 25% closed | Rotate meat, check baffle |
| White, bitter smoke | Open fully briefly | Fully open | Let fire breathe, ensure clean wood |
| No smoke flavor | No change | No change | Add small wood chunk to hot coals |
🔄 THE MAINTENANCE CYCLE: KEEPING THE FIRE HAPPY
Offset smoking requires a rhythm of regular maintenance tasks.
⏱️ The 45-Minute Cycle
Regular Maintenance Routine
- Every 30-45 Minutes: Check fire and temperature. Is the fire still vigorous? Are you maintaining target temperature?
- Fuel Addition: Add 1-2 small wood chunks or a small charcoal scoop when the fire begins to settle down. Don’t wait until temperature drops significantly.
- Ash Management: Check ash buildup every 2-3 hours. Excessive ash restricts airflow. Remove just enough to restore good airflow without disturbing the coal bed.
- Wood Positioning: When adding wood, place it against existing hot coals rather than tossing it randomly. This ensures consistent ignition.
🛠️ Essential Offset Smoker Tools
Fire Management Tools
- Welding Gloves: Heat-resistant protection for handling wood and adjusting fire
- Ash Tool/Shovel: For removing ash without disturbing coal bed
- Charcoal Chimney: For starting additional coals if needed
- Small Axe/Maul: For splitting wood to optimal size
Monitoring Tools
- Multi-probe Thermometer: Monitor cooking chamber temp and meat temp simultaneously
- Infrared Thermometer: Check surface temps and identify hot spots
- Notebook: Document your adjustments and results
- Headlamp: For overnight cooks and early morning checks
🚨 TROUBLESHOOTING COMMON OFFSET ISSUES
🎯 Offset Smoker Problem Solver
| Problem | Symptoms | Solution |
|---|---|---|
| Temperature Spikes | Rapid 50°F+ increases | Close intake slightly, don’t add fuel, spritz meat if needed |
| Temperature Drops | Gradual 50°F+ decreases | Add small wood pieces, open intake slightly, check ash |
| Bitter Flavor | Acrid taste, white smoke | Ensure clean wood, improve airflow, smaller wood pieces |
| Uneven Cooking | One side cooks faster | Rotate meat, use water pan, check baffle adjustment |
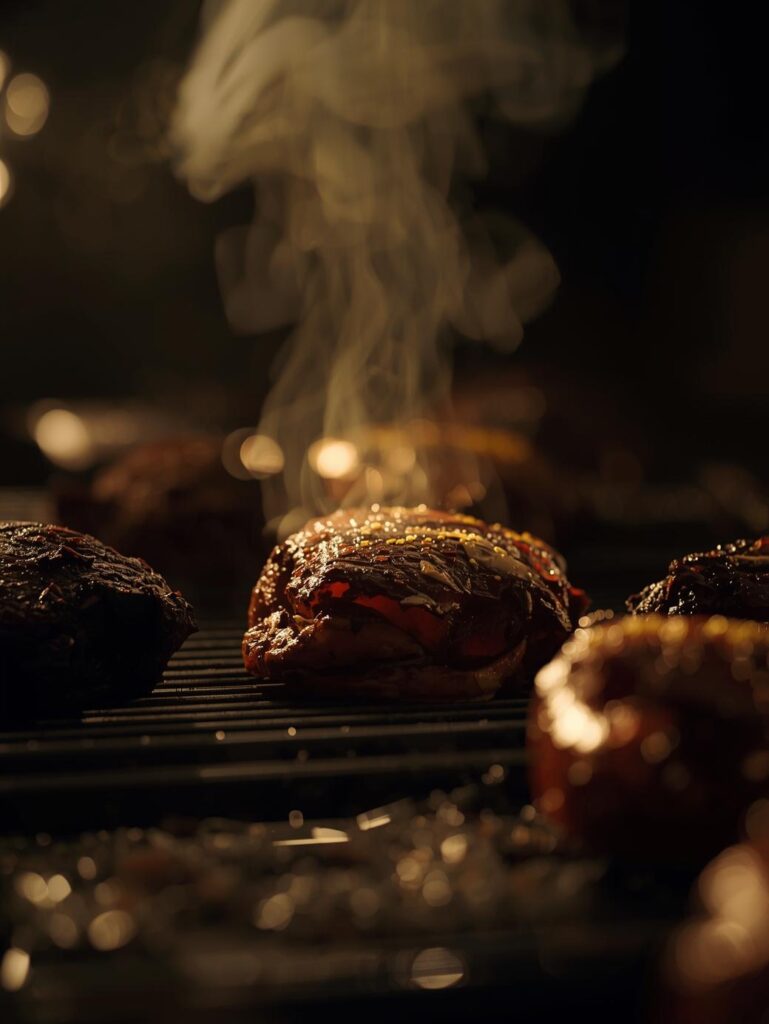
| Poor Smoke Ring | Little to no pink layer | Ensure clean smoke, proper humidity, don’t wrap too early |
| Fire Dies Frequently | Constant relighting needed | Check ash buildup, use larger coal bed, better wood selection |
🏆 THE BEGINNER’S OFFSET WORKFLOW: YOUR FIRST SUCCESSFUL COOK
Follow this step-by-step workflow for your first successful offset smoke.
First Offset Smoke Timeline (Pork Shoulder – 8 hours)
- 2 Hours Before: Set up smoker, prepare wood and charcoal, season meat
- 1 Hour Before: Light charcoal in chimney, prepare firebox with Minion method
- 30 Minutes Before: Establish fire and stabilize at 225°F, thin blue smoke present
- Cook Start (Hour 0): Place meat in cooking chamber, insert temperature probes
- Hours 1-6: Maintain 225-250°F, add wood every 45 minutes, rotate meat hourly
- Hours 6-8: Monitor internal temperature, wrap if desired at 165°F
- Finish: Remove at 203°F and probe tender, rest 2 hours minimum
🏁 EMBRACING THE OFFSET JOURNEY
Mastering the offset smoker is one of the most rewarding journeys in barbecue. Unlike automated smokers that deliver consistency through technology, the offset demands that you develop intuition, patience, and a deep understanding of fire behavior. Your first attempts may be frustrating—temperatures will swing, fires will die, and smoke will be bitter. But each mistake teaches you something about the conversation between fuel, air, and heat.
The true beauty of offset mastery isn’t just the incredible barbecue you’ll produce (though that’s certainly rewarding). It’s the transformation you undergo from someone who cooks on a smoker to someone who understands fire. The skills you develop—reading smoke color, anticipating temperature changes, managing fuel consumption—translate to every form of live-fire cooking.
Remember that every champion pitmaster started exactly where you are now. They struggled with temperature control, battled bitter smoke, and produced mediocre barbecue before achieving mastery. The difference between them and those who gave up was persistence and attention to detail.
Your mission: Start with forgiving cuts like pork shoulder or beef chuck. These are inexpensive and tolerant of temperature fluctuations. Document every cook—note what worked, what didn’t, and what you’ll try differently next time. Within 5-6 cooks, you’ll start developing the intuition that makes offset smoking feel less like work and more like artistry.
Welcome to the most authentic path in barbecue. The fire is waiting to teach you its secrets.
Continue Your Offset Smoking Education: Master every aspect of traditional smoking with our complete resource collection: