

How to Reverse Sear a Steak Perfectly: The Ultimate Guide
For years, the standard method for cooking a great steak has been a simple one: get a grill or skillet screaming hot, sear the steak on both sides, and then reduce the heat to finish cooking it through. But what if there was a better way? A way to eliminate the dreaded “gray band” of overcooked meat and guarantee a perfectly even, edge-to-edge cook with a crisp, delicious crust?
Welcome to the world of the reverse sear. The reverse sear is a revolutionary technique that flips the traditional process on its head. It involves a slow cook at a low temperature, followed by a quick, high-heat sear at the end. This guide on How to Reverse Sear a Steak Perfectly will explain the science behind this method and provide a detailed, step-by-step process to help you master it.
The Science Behind the Reverse Sear
To understand why the reverse sear works so well, you need to understand what happens to a steak when you cook it. When you put a cold steak on a hot surface, the exterior sears quickly, but the interior takes time to heat up. This results in a “doneness gradient,” where the center is rare, but the meat just below the surface is well-done.
The reverse sear solves this problem by using a two-step process:
- Low and Slow Cooking: The first step involves cooking the steak at a very low, consistent temperature (usually 225-275°F or 107-135°C). This gentle heat slowly raises the internal temperature of the meat, cooking it evenly from the outside in. This ensures that the entire steak, from edge to edge, reaches your desired doneness, preventing the tough, overcooked gray band.
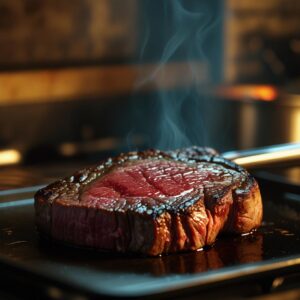
- The High-Heat Sear: Once the steak is just shy of its target temperature, you remove it from the low heat and crank the temperature up. A quick sear on a super-hot surface creates a Maillard reaction, a chemical process that browns the exterior and develops a complex, savory crust without cooking the interior any further.
The result is a steak that is tender, juicy, and cooked to a uniform doneness throughout, with a perfect crust on the outside. This is a key part of learning How to Reverse Sear a Steak Perfectly.
Internal Link Suggestion: To truly appreciate the science, learn more about why resting your meat is so important in our guide on The Secret to Juicy Steaks: Why Resting Your Meat Changes Everything.
Choosing the Right Steak for Reverse Searing
Not all steaks are created equal when it comes to the reverse sear. This technique is best suited for thick cuts, typically 1.5 inches or more. Thin steaks will cook too quickly during the initial phase, and you won’t get the benefits of the slow cook.
Best cuts for reverse searing:
- Ribeye: The marbling in a ribeye melts beautifully during the slow cook, resulting in a tender, flavorful steak.
- New York Strip: This cut is a great candidate due to its uniform thickness and beefy flavor.
- Filet Mignon: A thick filet mignon will turn out incredibly tender and juicy with this method.
- T-Bone or Porterhouse: These bone-in cuts benefit immensely from the reverse sear, as the bone helps insulate the meat and cook it more evenly.
- Picanha: A thick, flavorful cut that becomes incredibly tender with this method.
Internal Link Suggestion: For more on selecting the perfect cut, read our guide on What is the Best Steak Cut? The Ultimate Meat Master Guide.
Step-by-Step Guide: How to Reverse Sear a Steak Perfectly
Mastering this technique is a simple process once you understand the steps. You can perform this on a charcoal grill, a gas grill, or even in your oven. We’ll focus on a two-zone setup for a grill, which is ideal for this method.
Step 1: Prepare the Steak
- Pat it dry: Use a paper towel to pat the steak completely dry on all sides. A dry surface is crucial for a good sear.
- Season generously: Season your steak with a generous amount of coarse salt and black pepper. You can also use your favorite steak rub. Apply the seasoning to all sides.
- Rest (optional but recommended): Place the seasoned steak on a wire rack on a baking sheet and let it rest in the refrigerator for a few hours or even overnight. This process, known as dry brining, draws moisture out and helps create an even better crust during the final sear.
Step 2: Cook Low and Slow
- Set up your grill: Set up your grill for two-zone cooking. For a charcoal grill, pile the hot coals to one side. For a gas grill, turn on the burners on one side and leave the others off.
- Place the steak on the cool side: Put the steak on the indirect, cooler side of the grill. Insert a meat thermometer probe into the thickest part of the steak.
- Close the lid and cook: Close the lid and cook the steak slowly until it is about 10-15°F below your desired final doneness. For a medium-rare steak, you’re aiming for an internal temperature of around 115-120°F (46-49°C). This can take anywhere from 20-45 minutes depending on the thickness of the steak.
- Remove the steak: Once the steak reaches the target temperature, remove it from the grill. Do not discard the thermometer.
External Link Suggestion: For a more in-depth look at two-zone grilling, a great resource is the Weber Grills website, which provides visual guides on setting up your grill.
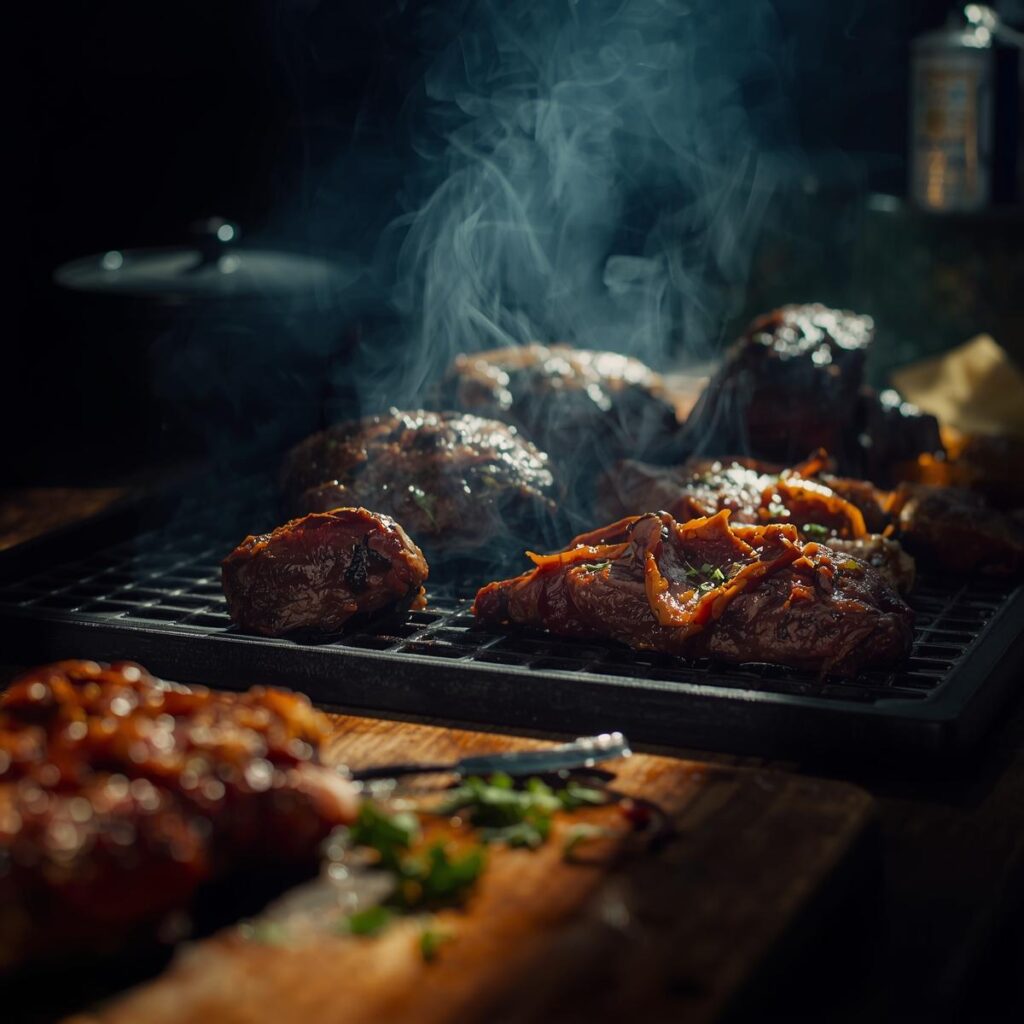
Step 3: Crank the Heat and Sear
- Heat the grill to high: If you’re using a charcoal grill, move the grates to the hot side. For a gas grill, turn all burners to high and let the grill preheat for at least 10 minutes. You want the grates to be screaming hot.
- Sear the steak: Place the steak directly on the hot grates. Sear for about 60-90 seconds per side. Don’t move the steak around. The goal is to get a perfect, dark crust.
- Check for doneness: Once the sear is complete, check the internal temperature one last time. It should be right at your target doneness (e.g., 130-135°F or 54-57°C for medium-rare).
Step 4: Serve and Enjoy
Because you cooked the steak low and slow, the muscle fibers have had time to relax. This means there is no need for a long resting period. You can serve the steak almost immediately after searing.
Internal Link Suggestion: Pair your perfectly seared steak with some of the recipes in our guide on The Best Side Dishes and Sauces to Pair with BBQ and Steaks.
Variations and Tips
- Oven Reverse Sear: If you don’t have a grill, you can use your oven. Simply cook the steak on a wire rack at 250°F (121°C) until it reaches the target temperature. Then, sear it in a smoking-hot cast iron skillet on the stovetop with a little oil or butter.
- The Power of the Cast Iron Skillet: A cast iron skillet is an incredible tool for searing. Its ability to retain and distribute heat evenly ensures a superior crust.
- Use a Fat for the Sear: A little bit of oil with a high smoke point (like avocado oil) or a pat of butter in the skillet will help you get an even deeper, more flavorful crust.
- Don’t Rush the Sear: The final sear is quick, but it’s crucial. Make sure your grill or skillet is as hot as possible. A quick, aggressive sear is what makes this technique so effective.
Troubleshooting Common Reverse Sear Issues
Even with the best instructions on How to Reverse Sear a Steak Perfectly, things can go wrong. Here are some common problems and their solutions:
- My steak has a gray band: This happens if your initial “low and slow” temperature was too high. Make sure your grill or oven is set no higher than 275°F (135°C). The initial phase should be a gentle cook, not a roast.
- The crust isn’t a deep brown: This is usually a sign that your searing surface wasn’t hot enough, or your steak wasn’t dry enough. Pat the steak dry and preheat your grill or skillet for at least 10-15 minutes on high heat.
- My steak is overcooked: This often happens if you let the initial temperature go too high. The “carryover cooking” that happens during the sear will raise the temperature. Remove the steak 10-15°F below the final target and trust the process.
External Link Suggestion: For more professional tips on searing, you can read from a source like Serious Eats, which has a very detailed explanation of the science and process.
Final Thoughts
Once you’ve mastered How to Reverse Sear a Steak Perfectly, you may never go back to the traditional method. This technique gives you unparalleled control over your steak’s doneness and guarantees a consistently delicious result. It’s a method that is simple to learn but yields professional-grade results every time. Whether you’re cooking a prime ribeye or a simple sirloin, the reverse sear will help you achieve a steak that is tender, juicy, and beautiful to behold. So grab a thick cut, fire up your grill, and get ready to cook the best steak of your life.
FAQs: How to Reverse Sear a Steak Perfectly
-
- Can I reverse sear a thin steak? The reverse sear is not recommended for thin steaks (under 1.5 inches). The low-and-slow portion of the cook will be too fast, and you won’t get the benefits of even cooking.
- Do I need a meat thermometer for this technique? A meat thermometer is absolutely essential. The entire process relies on cooking to a specific internal temperature, and guessing will likely lead to an overcooked steak.
- Why do I need to pat the steak dry before searing? Moisture on the surface of the steak will turn to steam when it hits the hot pan or grill, preventing the Maillard reaction (the process that creates a delicious crust).
- Why do I have to rest the steak after the reverse sear? The benefit of the reverse sear is that the steak is already rested during the slow-cook phase. You can serve it immediately after the final sear, as the juices have already redistributed throughout the meat.
- Can I use this method for other meats? Yes, the reverse sear method works wonderfully for other thick cuts of meat, such as pork chops or duck breasts.
Further Reading:
-
Best BBQ Grills for Beginners – Our selection of the perfect starter grills
-
10 Common BBQ Mistakes (And How to Fix Them) – Avoid these beginner pitfalls
-
Essential BBQ Tools You Need – The must-have equipment for every griller
You Might Also Like:
-
Budget BBQ: The Best Affordable Cuts of Meat – Great meats that won’t break the bank
-
Quick BBQ: How to Grill Amazing Meals in Under 30 Minutes – Fast, delicious recipes for busy beginners
-
BBQ Techniques Explained – Master the fundamental cooking methods
External Cooking Guides & Resources
- AmazingRibs.com: A leading resource for BBQ and grilling, offering science-based techniques, myth-busting articles, and a massive database of recipes.
- The Spruce Eats: A comprehensive guide to America’s regional BBQ styles, detailing the history and unique characteristics of each.
- Atlas Obscura: Global Grilling Traditions: An exploration of unique and lesser-known grilling traditions from around the world.
- Weber’s Grilling Guide: Official guides from a well-known grill manufacturer, offering tips on grilling, smoking, and using different types of fuel.


Pingback: The Single-Sided Sear: What Happens When You Never Flip Your Steak?
Pingback: Smoking vs Grilling: The Ultimate Guide to Perfect BBQ [2025]
Pingback: How to Make Crispy Pork Belly at Home - The Meat Master USA [2025]
Pingback: Common BBQ Mistakes and How to Avoid Them | The Meat Master USA [2025]
Pingback: BBQ Grilling vs Smoking: Key Differences and When to Use Each Method
Pingback: Two-Zone Grilling Techniques Explained - The Meat Master USA
Pingback: What Is the Best Steak Cut? The Ultimate Meat Master Guide [2025]
Pingback: Filet Mignon Recipe | The Meat Master USA - 2025
Pingback: The Ultimate Guide to Steak Cuts: Choosing, Cooking, and Pairing [2025]
Pingback: The Secrets of Perfect Ribeye: A Masterclass in Grilling
Pingback: The Ultimate Steak Doneness Guide: From Rare to Well-Done [2025]
Pingback: Top-Rated Meat Thermometers for Perfect Results [2025] The Meat Master USA
Pingback: Why Resting Steak Makes It Juicy: The Science Behind Perfect Meat [2025]