
Expert’s Note: This reverse searing guide expands upon our BBQ Methods Encyclopedia. Reverse searing isn’t just another cooking method—it’s the ultimate cheat code for perfect steak doneness. It turns the most challenging aspect of steak cooking (temperature control) into the easiest part.
Reverse Searing: The Ultimate Steak Method for Perfect Doneness Every Time
“Reverse searing is like having a time machine for steak perfection. It lets you peek into the future, see exactly where your steak is headed, then slam it with fire at the perfect moment. Traditional searing is guessing; reverse searing is knowing. It’s the difference between hoping for medium-rare and commanding it.”

Reverse Searing: The Ultimate Steak Method for Perfect Doneness Every Time
Download our Reverse Searing Timeline - Temperatures and timing for every steak thickness
Welcome to steak cooking’s best-kept secret—the method that eliminates guesswork, banishes gray bands, and delivers restaurant-quality results with home kitchen consistency. Reverse searing flips conventional wisdom on its head by cooking steak low and slow first, then finishing with a blistering sear. The result? Perfect edge-to-edge doneness, a crust that crackles, and confidence that comes from absolute control.
🎯 WHY REVERSE SEARING BEATS TRADITIONAL METHODS
Understanding the science reveals why this method is superior for thick-cut steaks.
⚙️ The Three Revolutionary Advantages
The Physics of Perfect Steak
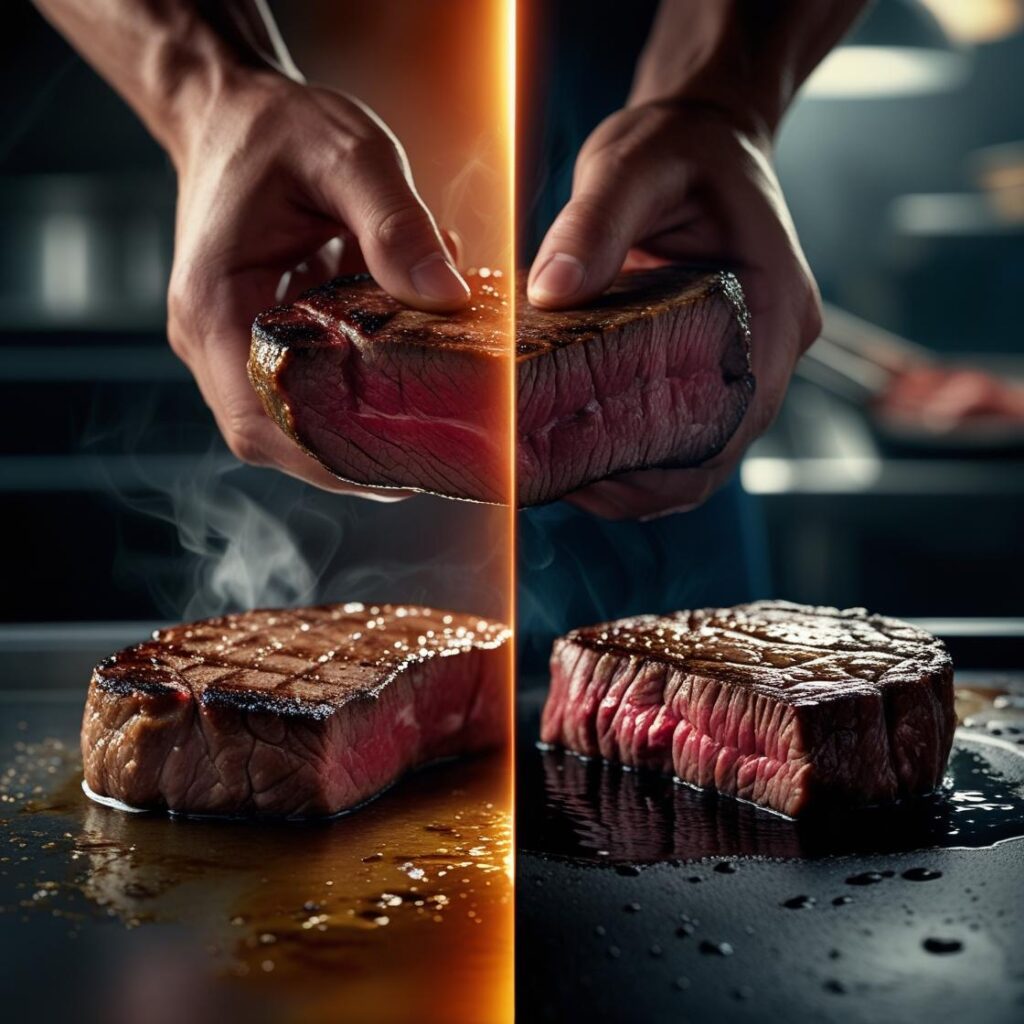
- Eliminates Gray Bands: Traditional searing creates overcooked edges trying to reach the center. Reverse searing cooks so evenly that the entire steak is the same doneness from edge to edge.
- Dries the Surface: Hours in low heat evaporates surface moisture, creating the perfect conditions for Maillard reaction—that beautiful, flavorful crust forms instantly instead of steaming.
- Total Temperature Control: You bring the steak to exactly 10-15°F below your target temperature, then the quick sear adds the final degrees. No guesswork, no carryover cooking anxiety.
- Relaxed Timing: The pre-cooked steak can wait comfortably while you prepare sides or fix drinks. The sear takes 60-90 seconds per side—impossible to mess up.
🎯 Method Comparison Matrix
❌ Traditional Searing
- Gray bands of overcooked meat
- Wet surface prevents good crust
- Guesswork on doneness
- Rush to serve before overcooking
- Inconsistent results
✅ Reverse Searing
- Edge-to-edge perfect doneness
- Dry surface for incredible crust
- Precise temperature control
- Relaxed timing, no rushing
- Consistent every time
🔧 THE REVERSE SEAR PROCESS: STEP-BY-STEP MASTERY
Follow this foolproof system for steaks that will ruin restaurants for you forever.
📝 The Reverse Searing Protocol
The Exact Sequence for Perfection
- Steak Selection: Choose thick cuts (1.5 inches or thicker). Ribeye, strip steak, and filet mignon work exceptionally well. Thinner steaks don’t benefit as much.
- Season Generously: Apply kosher salt and freshly ground black pepper at least 45 minutes before cooking. Salt draws out moisture, then gets reabsorbed for seasoned-through meat.
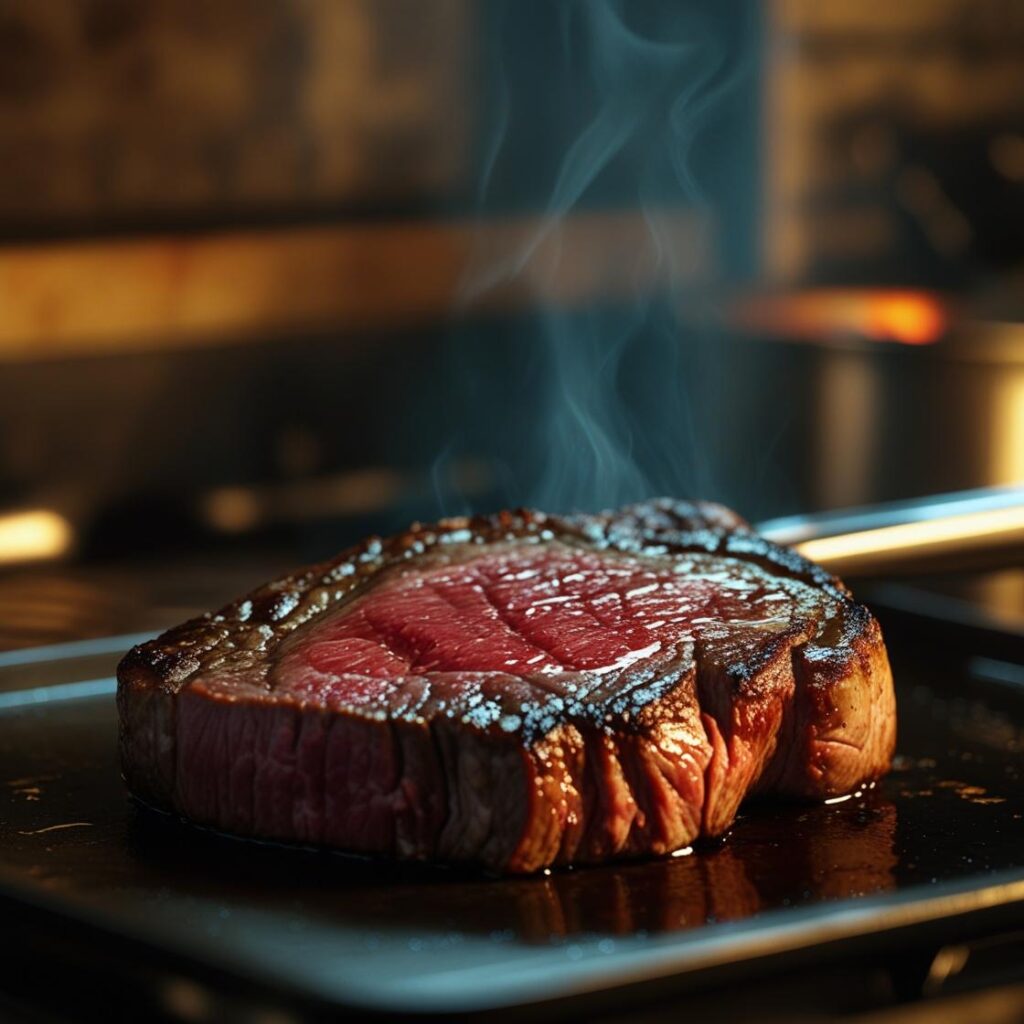
- Low-Temp Cook: Place steak on rack in oven/smoker at 225-250°F. Use a thermometer probe to monitor internal temperature.
- Temperature Target: Remove steak when it reaches 10-15°F below your final desired temperature (see chart below).
- Rest Briefly: Let steak rest 10 minutes while you prepare the searing surface.
- Sear Like a Dragon: 60-90 seconds per side on screaming hot surface until beautiful crust forms.
- Final Rest & Serve: Rest 5 minutes, then serve immediately. No additional carryover cooking to worry about.
🌡️ TEMPERATURE & TIMING MASTERY
The exact temperatures that guarantee perfect results every time.
📊 Reverse Searing Temperature Matrix
🎯 Perfect Temperature Guide
| Doneness Level | Remove From Oven At | Final Temp After Sear | Visual Cues |
|---|---|---|---|
| Rare | 105-110°F | 120-125°F | Cool red center, very soft |
| Medium Rare | 115-120°F | 130-135°F | Warm red center, soft |
| Medium | 125-130°F | 140-145°F | Warm pink center, firm |
| Medium Well | 135-140°F | 150-155°F | Slight pink, quite firm |
⏱️ Timing Guide by Thickness
🎯 Oven Time Estimates at 225°F
| Steak Thickness | Time to 115°F (Medium Rare) | Time to 125°F (Medium) | Best Cut Examples |
|---|---|---|---|
| 1 inch | 20-25 minutes | 25-30 minutes | Standard grocery store cuts |
| 1.5 inches | 35-45 minutes | 45-55 minutes | Butcher shop specials |
| 2 inches | 55-70 minutes | 70-85 minutes | Tomahawk, thick ribeye |
| 2.5+ inches | 75-90+ minutes | 90-110+ minutes | Prime rib, mega-steaks |
🔥 SEARING METHODS: CHOOSING YOUR WEAPON
The final sear is where magic happens—choose your method wisely.
🍳 Cast Iron Skillet
The Gold Standard for Home Cooks
- Heat Level: Ripping hot – wait until oil just starts to smoke
- Fat Choice: Avocado oil (high smoke point) or clarified butter
- Technique: Press gently for maximum contact, don’t move
- Advantage: Consistent, even heat across entire surface
- Pro Tip: Add butter and aromatics (garlic, thyme) for last 30 seconds and baste
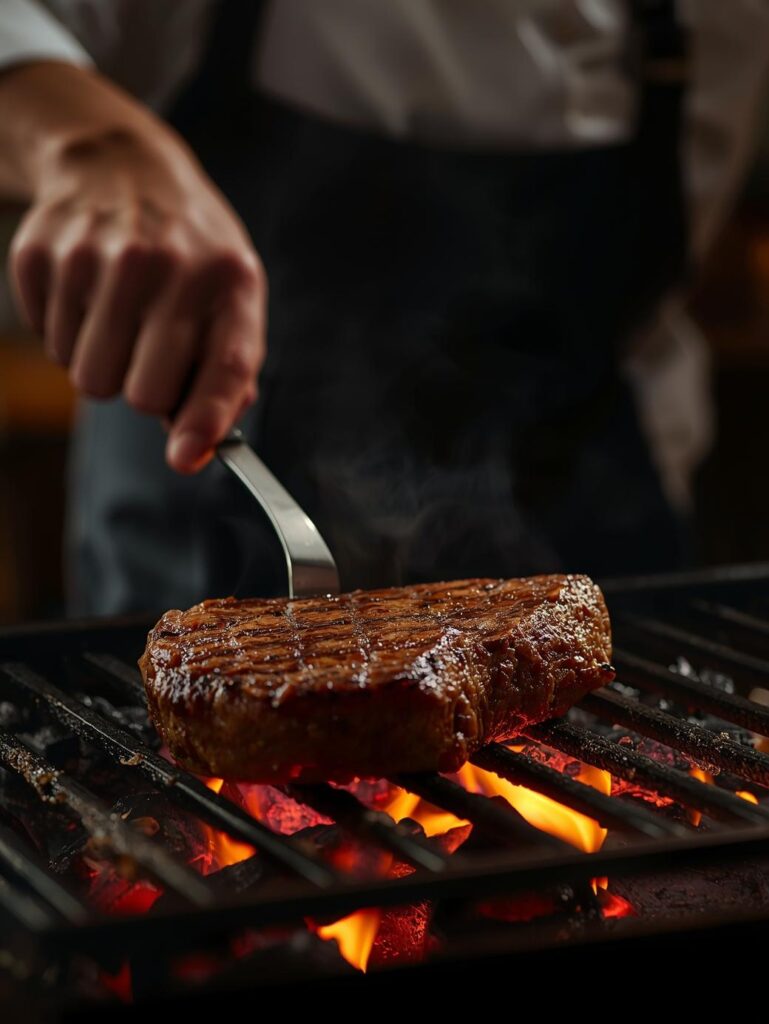
🔥 Charcoal Grill
The Ultimate Flavor Machine
- Setup: Full chimney of hot coals, direct heat zone
- Technique: Place directly over coals, lid off
- Advantage: Smoky flavor, extreme high heat
- Watch For: Flare-ups from dripping fat
- Pro Tip: Create two heat zones – super hot for sear, cooler for moving if flare-ups
⚡ Gas Grill
Fast and Convenient
- Setup: All burners on high, preheat 15 minutes
- Technique: Direct over flames, lid closed when not flipping
- Advantage: Consistent, controllable heat
- Challenge: Often doesn’t get as hot as charcoal
- Pro Tip: Use grill grates or cast iron pan on grill for better sear
🎯 Searzall Torch
The Scientific Approach
- Equipment: Bernzomatic torch + Searzall attachment
- Technique: Slow, even passes 1-2 inches from surface
- Advantage: No hot kitchen, incredibly precise
- Challenge: Learning curve, equipment cost
- Pro Tip: Use in well-ventilated area, keep moving to avoid “torch taste”
🥩 BEST CUTS FOR REVERSE SEARING
Some steaks benefit more than others from this method.
📋 Cut Selection Guide
🎯 Reverse Searing Suitability Scale
| Steak Cut | Suitability | Ideal Thickness | Special Notes |
|---|---|---|---|
| Ribeye | 10/10 – Perfect | 1.5-2.5 inches | Renders fat beautifully, incredible crust |
| New York Strip | 9/10 – Excellent | 1.5-2 inches | Consistent texture, great marbling |
| Filet Mignon | 8/10 – Great | 2-3 inches | Butter-like texture edge to edge |
| Porterhouse/T-Bone | 7/10 – Good | 1.5-2 inches | Two textures in one, both cook perfectly |
| Sirloin | 6/10 – Okay | 1.5 inches | Benefits from tenderizing |
| Skirt/Flank | 3/10 – Not Recommended | Too thin | Better with high-heat sear only |
🚨 REVERSE SEARING TROUBLESHOOTING
🎯 Common Problems & Solutions
| Problem | Symptoms | Cause | Solution |
|---|---|---|---|
| No Crust Formation | Steak steaming, pale surface | Surface not dry enough, pan not hot enough | Pat drier before searing, wait for oil to smoke |
| Overcooked During Sear | Gray bands reappear | Sear too long, starting temp too high | Hotter surface, shorter sear time |
| Undercooked Center | Cool, red center | Removed from oven too early | Use thermometer, remove 10°F below target |
| Burnt Crust | Blackened, bitter exterior | Sear way too hot, sugar in rub burned | Slightly lower heat, watch carefully |
| Uneven Cooking | One side more done | Oven hotspots, uneven thickness | Rotate in oven, choose even cuts |
🏁 MASTERING THE ULTIMATE STEAK METHOD
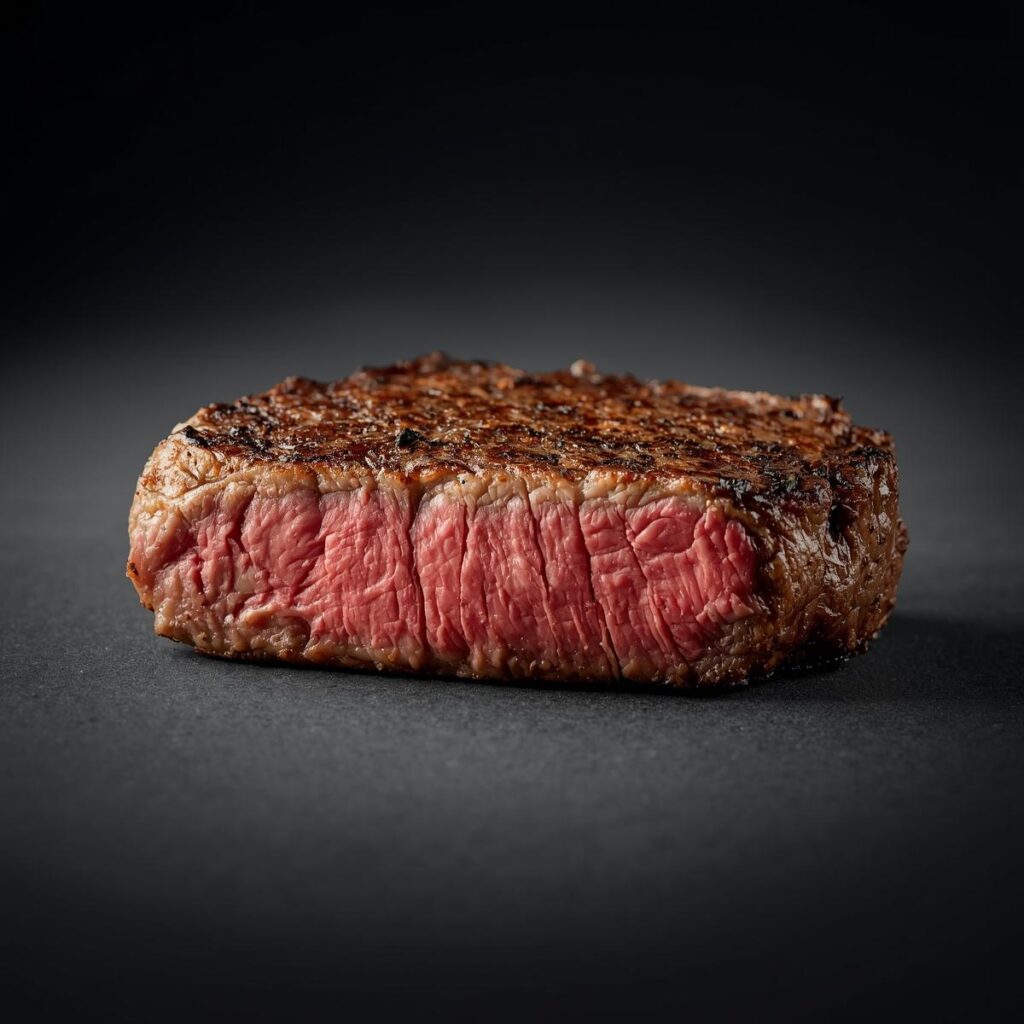
Reverse searing represents the evolution of steak cooking—from guesswork to precision, from hope to certainty. Once you experience the magic of cutting into a steak that’s perfectly medium-rare from edge to edge, with a crust that crackles with flavor, you’ll never go back to the anxiety of traditional methods.
This method democratizes restaurant-quality steak. It doesn’t require chef’s intuition—it requires a good thermometer and patience. The low-temp cooking does the hard work while you relax, and the final sear is so quick it’s impossible to mess up.
Your mission: Start with a 1.5-inch thick ribeye. Follow the temperature guide exactly. Use a cast iron skillet for your first attempt. Document the process with photos at each stage. The side-by-side comparison with your previous steak attempts will be so dramatic, you’ll become an immediate convert.
The reverse sear isn’t just another cooking method—it’s the final method you’ll ever need for perfect steak. Welcome to the future of steak perfection.
🔥 MASTER REVERSE SEARING →
Get our complete reverse searing guide with recipes and advanced techniques
Continue Your Steak Mastery Journey: Elevate every aspect of your steak game: