Firekeeper’s Note: Mastering an offset smoker is the final boss of BBQ. It’s a raw, hands-on dialogue with fire itself. Forget set-and-forget convenience; this is about becoming one with the flame, learning to read its moods, and conducting its heat like a symphony. This guide is for those who have graduated from basic temperature control and are ready to speak the ancient language of wood and embers.
Advanced Fire Management for Offset Smokers: Conducting the Flame
“An offset smoker isn’t an appliance; it’s an instrument. The firebox is your strings, the stack damper your brass, and the cooking chamber your percussion. The pitmaster is the conductor, listening for the subtle cues—the specific sound of the crackle, the color of the smoke, the feel of the heat on your hand—that separate a good fire from a legendary one. This is where BBQ becomes art.”

Advanced Fire Management for Offset Smokers: Conducting the Flame
Download Your Free Offset Fire Management Field Guide
You’ve mastered the basics of holding a temperature. Now, you’re ready to dive into the nuanced, almost spiritual practice of true offset smoker mastery. This isn’t about fighting the fire; it’s about partnering with it, understanding its personality, and leveraging advanced techniques to achieve the cleanest smoke and most stable heat possible for that perfect bark and profound smoke flavor.
🎯 THE ADVANCED MINDSET: BECOMING THE FIREKEEPER
You are no longer a thermostat operator. You are a fire whisperer.
⚙️ The Three Laws of Advanced Fire Management
The Philosophy of the Flame
- Law 1: You Manage Embers, Not Flames: Your primary heat source is a bed of hot coals, not licking flames. The goal is to add wood that ignites quickly and cleanly from this coal bed, not to burn logs directly.
- Law 2: Stability is a Rolling Average, Not a Flat Line: On a stick burner, a perfectly flat temperature line is a myth. Pros manage a “sweet spot” range (e.g., 250°F ± 15°F). The key is minimizing the size and frequency of the swings.
- Law 3: The Smoker is One Connected Airway: The firebox intake, cooking chamber, and stack damper are not separate controls; they are parts of one respiratory system. Adjusting one affects the entire draft.
🎯 The Novice vs. The Firekeeper
🔥 The Novice
- Fights temperature swings
- Adds large, cold logs to a small fire
- Chokes the fire with closed intakes
- Sees thick white smoke
- Reacts to temperature drops
- Mindset: “Why is it so hard to keep steady?”
🎛️ The Firekeeper
- Anticipates and guides temperature trends
- Uses smaller, pre-heated splits
- Maintains a clean, oxygen-rich fire
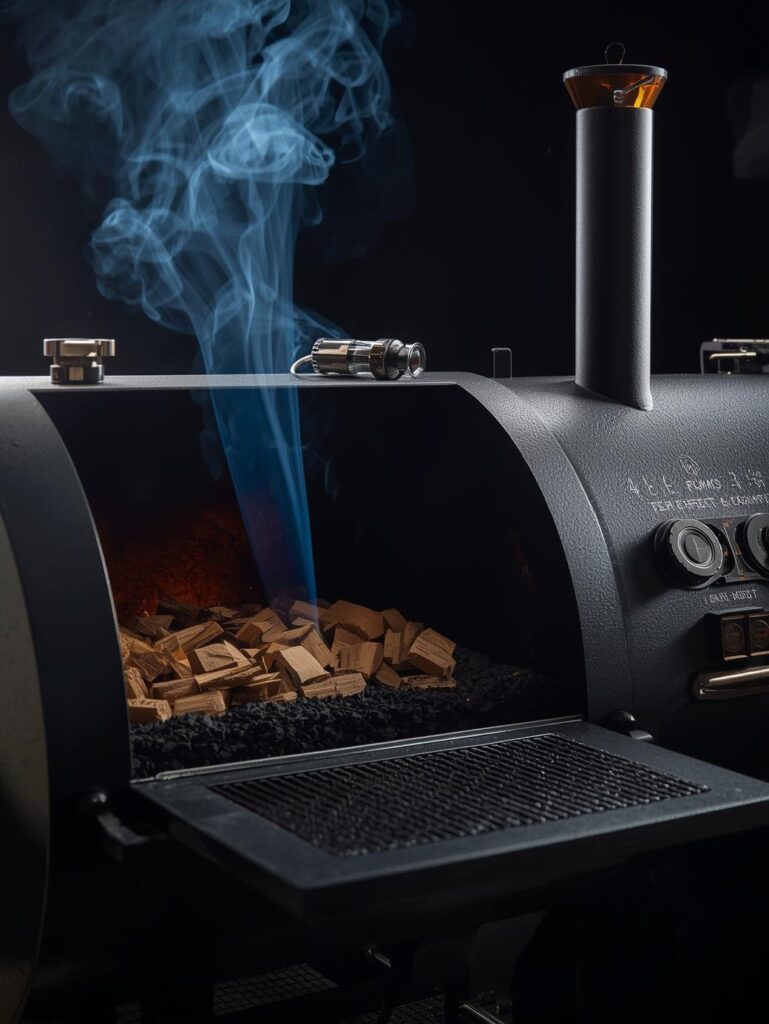
- Sees thin, blue, almost invisible smoke
- Adds fuel *before* the temp drops
- Mindset: “The fire is hungry; I’ll feed it a small split.”
🔥 BUILDING THE PERFECT FIRE: THE FOUNDATION
A masterpiece cook starts with a flawless foundation.
🎯 The “Top-Down” Coal Bed Method
For a Clean, Long-Lasting Start
- Layer the Firebox: Place 3-4 medium-sized splits of your chosen wood on the bottom. Crumple newspaper or use fire starters in the center. Place a full chimney of fully lit charcoal on top of the wood and paper.
- Let it Cascade: As the charcoal burns, it will ignite the wood below. This creates a large, solid coal bed without the acrid smoke of starting a cold log directly.
- Establish Your Baseline: Once the initial wood has broken down into a substantial bed of hot coals (about 1-2 inches deep), you have your foundation. This process takes 45-60 minutes.
- Pro Tip: This method prevents the “dirty” start-up smoke from soaking your meat and provides a stable platform for adding your first cooking splits.
📊 The Advanced Fire Management Matrix
🎯 Reading the Fire’s Language
| Fire Indicator | What You’re Seeing | What It Means & The Action |
|---|---|---|
| Smoke Color: Thick & White | Billowy, opaque smoke. | Creosote & Bitterness. Incomplete combustion. Fire is too cool or starved for oxygen. Action: Open firebox intake to increase airflow. Add a small, hot split. |
| Smoke Color: Thin & Blue | Wispy, barely-tvisible smoke with a blue tint. | Clean Combustion. The fire is hot and efficient. This is your target. Action: Maintain this state. You are in the zone. |
| Fire Sound: Roaring/Hissing | A loud, aggressive sound. | Too Much Air. Temperature will spike. Action: Close the firebox intake slightly. Let the coal bed settle. |
| Fire Sound: Quiet Crackle | A gentle, steady crackling. | Perfect Burn. The split is burning evenly and cleanly. Action: Take notes—this is what success sounds like. |
| Coal Bed: Small & Ashy | The coal bed is shrinking and turning white. | Fuel Starvation. A temperature crash is imminent. Action: Add your next split *now*. Don’t wait for the temp to drop. |
🎛️ MASTERING THE DRAFT: THE HOLY TRINITY OF CONTROL
Understanding the relationship between the three controls is your key to stability.
🔥 Firebox Intake Damper
Your Primary Throttle
- Function: Controls the volume of oxygen feeding the fire.
- How to Use: This is your most frequent adjustment. Start with it 100% open when building your fire and adding splits. Close it incrementally to lower and stabilize temperature.
- Pro Tip: Never close it completely. A smothered fire produces dirty smoke. Keep it at least 25% open to maintain clean combustion.
💨 Stack Damper (Chimney)
Your Fine-Tuning Knob
- Function: Controls the *draw* or suction that pulls heat and smoke through the cooking chamber.
- How to Use: For most cooks, keep it 100% open. If you’re struggling with high temps even with the firebox intake closed, closing the stack damper by 25% can help by slowing the airflow through the entire system.
- Pro Tip: A wide-open stack ensures the smoke and heat are pulled efficiently across your meat, preventing stale, bitter smoke from lingering.
🪵 The Wood Split Itself
Your Fuel Selector
- Function: The size, type, and moisture content of your split directly impacts burn rate and temperature.
- How to Use: Use splits that are uniform in size (about the size of a 2-liter soda bottle). Smaller splits for more frequent, smaller adjustments; larger splits for longer burns (riskier).
- Pro Tip: Season your wood properly (6-12 months). Wood that is too green will steam and produce white smoke; wood that is too dry will burn too hot and fast.
⏱️ THE RHYTHM OF THE FIRE: THE FEEDING CYCLE
Consistency comes from establishing a predictable routine.
🗣️ The Pro’s Feeding Protocol
How to Add Wood Without Chaos
- Pre-Heat Your Splits: Place the next 2-3 splits you’ll use on top of the firebox. This drives off surface moisture and allows them to ignite almost instantly, minimizing the temperature drop and white smoke.
- Read the Coal Bed: Before adding wood, look at your coal bed. You want a solid, glowing base about the size of a dinner plate. If it’s small and ashy, you’ve waited too long.
- The “Open, Add, Close” Method:
- OPEN: Open the firebox door and the intake damper fully.
- ADD: Quickly place the pre-heated split onto the hottest part of the coal bed. Position it to allow air to flow around it.
- CLOSE: Close the door. Leave the intake wide open for 1-2 minutes to give the new split a blast of oxygen to catch cleanly.
- Manage the Spike: Once the split is burning cleanly (you’ll hear a steady crackle), begin closing the intake damper to your “cruising” position to level out the temperature.
📋 THE OFFSET MASTERY DRILL: A 4-HOUR FIRE HOLD
Your Practice Regimen for Muscle Memory
Drill 1: The Empty Smoker
No meat. Just fire. Practice holding 250°F for 4 hours straight. Focus solely on the rhythm of adding splits and damper control.
Drill 2: The Split Size Test
Use only small splits (wrist-sized) for 2 hours, then only large splits (forearm-sized). Learn how each affects burn time and temp recovery.
Drill 3: The Recovery Test
Let the temp drop to 200°F. Practice bringing it back to 250°F as quickly as possible without overshooting using a pre-heated split and damper control.
Drill 4: The “No-Peek” Cook
Cook a cheap pork butt. Do not open the cook chamber lid for the first 4 hours. Learn to trust your fire management and probes.
🚨 ADVANCED TROUBLESHOOTING: FIREFIGHTING FOR PROS
🎯 Solving Complex Offset Problems
| Crisis | Root Cause | The Firekeeper’s Fix |
|---|---|---|
| Runaway Temperature | Over-sized split, too much air, or both. | Close the firebox intake completely for 60 seconds, then open to 25%. If severe, carefully remove the burning split with long tongs and dunk in water. |
| Fire Won’t Stay Lit / Drops Rapidly | Poor coal bed management or wet wood. | Add a full chimney of lit charcoal to rebuild the coal bed fast. Then resume with small, dry, pre-heated splits. |
| Bitter, Acrid Flavor | Consistent dirty, white smoke from a starved fire. | It’s too late for this cook. For next time: Keep firebox intake more open. Use smaller, drier splits. Maintain a robust coal bed. |
| Hot Spot on Cooking Chamber | Normal, but can be managed. Firebox side is always hotter. | Rotate your meat 180 degrees every 1-2 hours. Place larger cuts (brisket point) toward the firebox, delicate cuts (brisket flat) toward the stack. |
🏁 YOU ARE NOW A FIREKEEPER
You have graduated to the highest level of live-fire cooking. You now understand that an offset smoker is a living, breathing entity, and you have learned its language. You can read the smoke, listen to the fire, and feel the draft. This deep, intuitive connection transforms BBQ from a cooking method into a craft.
Remember the three laws: manage embers, embrace the rolling average, and respect the connected airway. Now, go tend your fire with confidence and respect.
Dive deeper into the fundamentals of building and maintaining the perfect smoking fire
Your Offset Smoker Library: Continue your journey to fire mastery.